“Zen and the Art of Moccamaster Maintenance”
Introduction
Last week I noticed that my Moccamaster KGB Select was leaking water during the brewing process. The water was dripping from the bottom of the machine, seemingly coming from the heating element. I started researching possible causes and went on trying to fix it, however, I was not able to find sufficient sources of information for a full disassembly online. The following concludes the full repair process, including the disassembly and deep-cleaning of the machine. A breakdown of what caused the leak is provided at the end.
Exclaimer
I am neither an expert nor is this a professional guide, it simply describes the process I went through to fix my machine, it might not work for you.
Please contact me for any suggestions or corrections. I can provide my full error audit trail if needed.
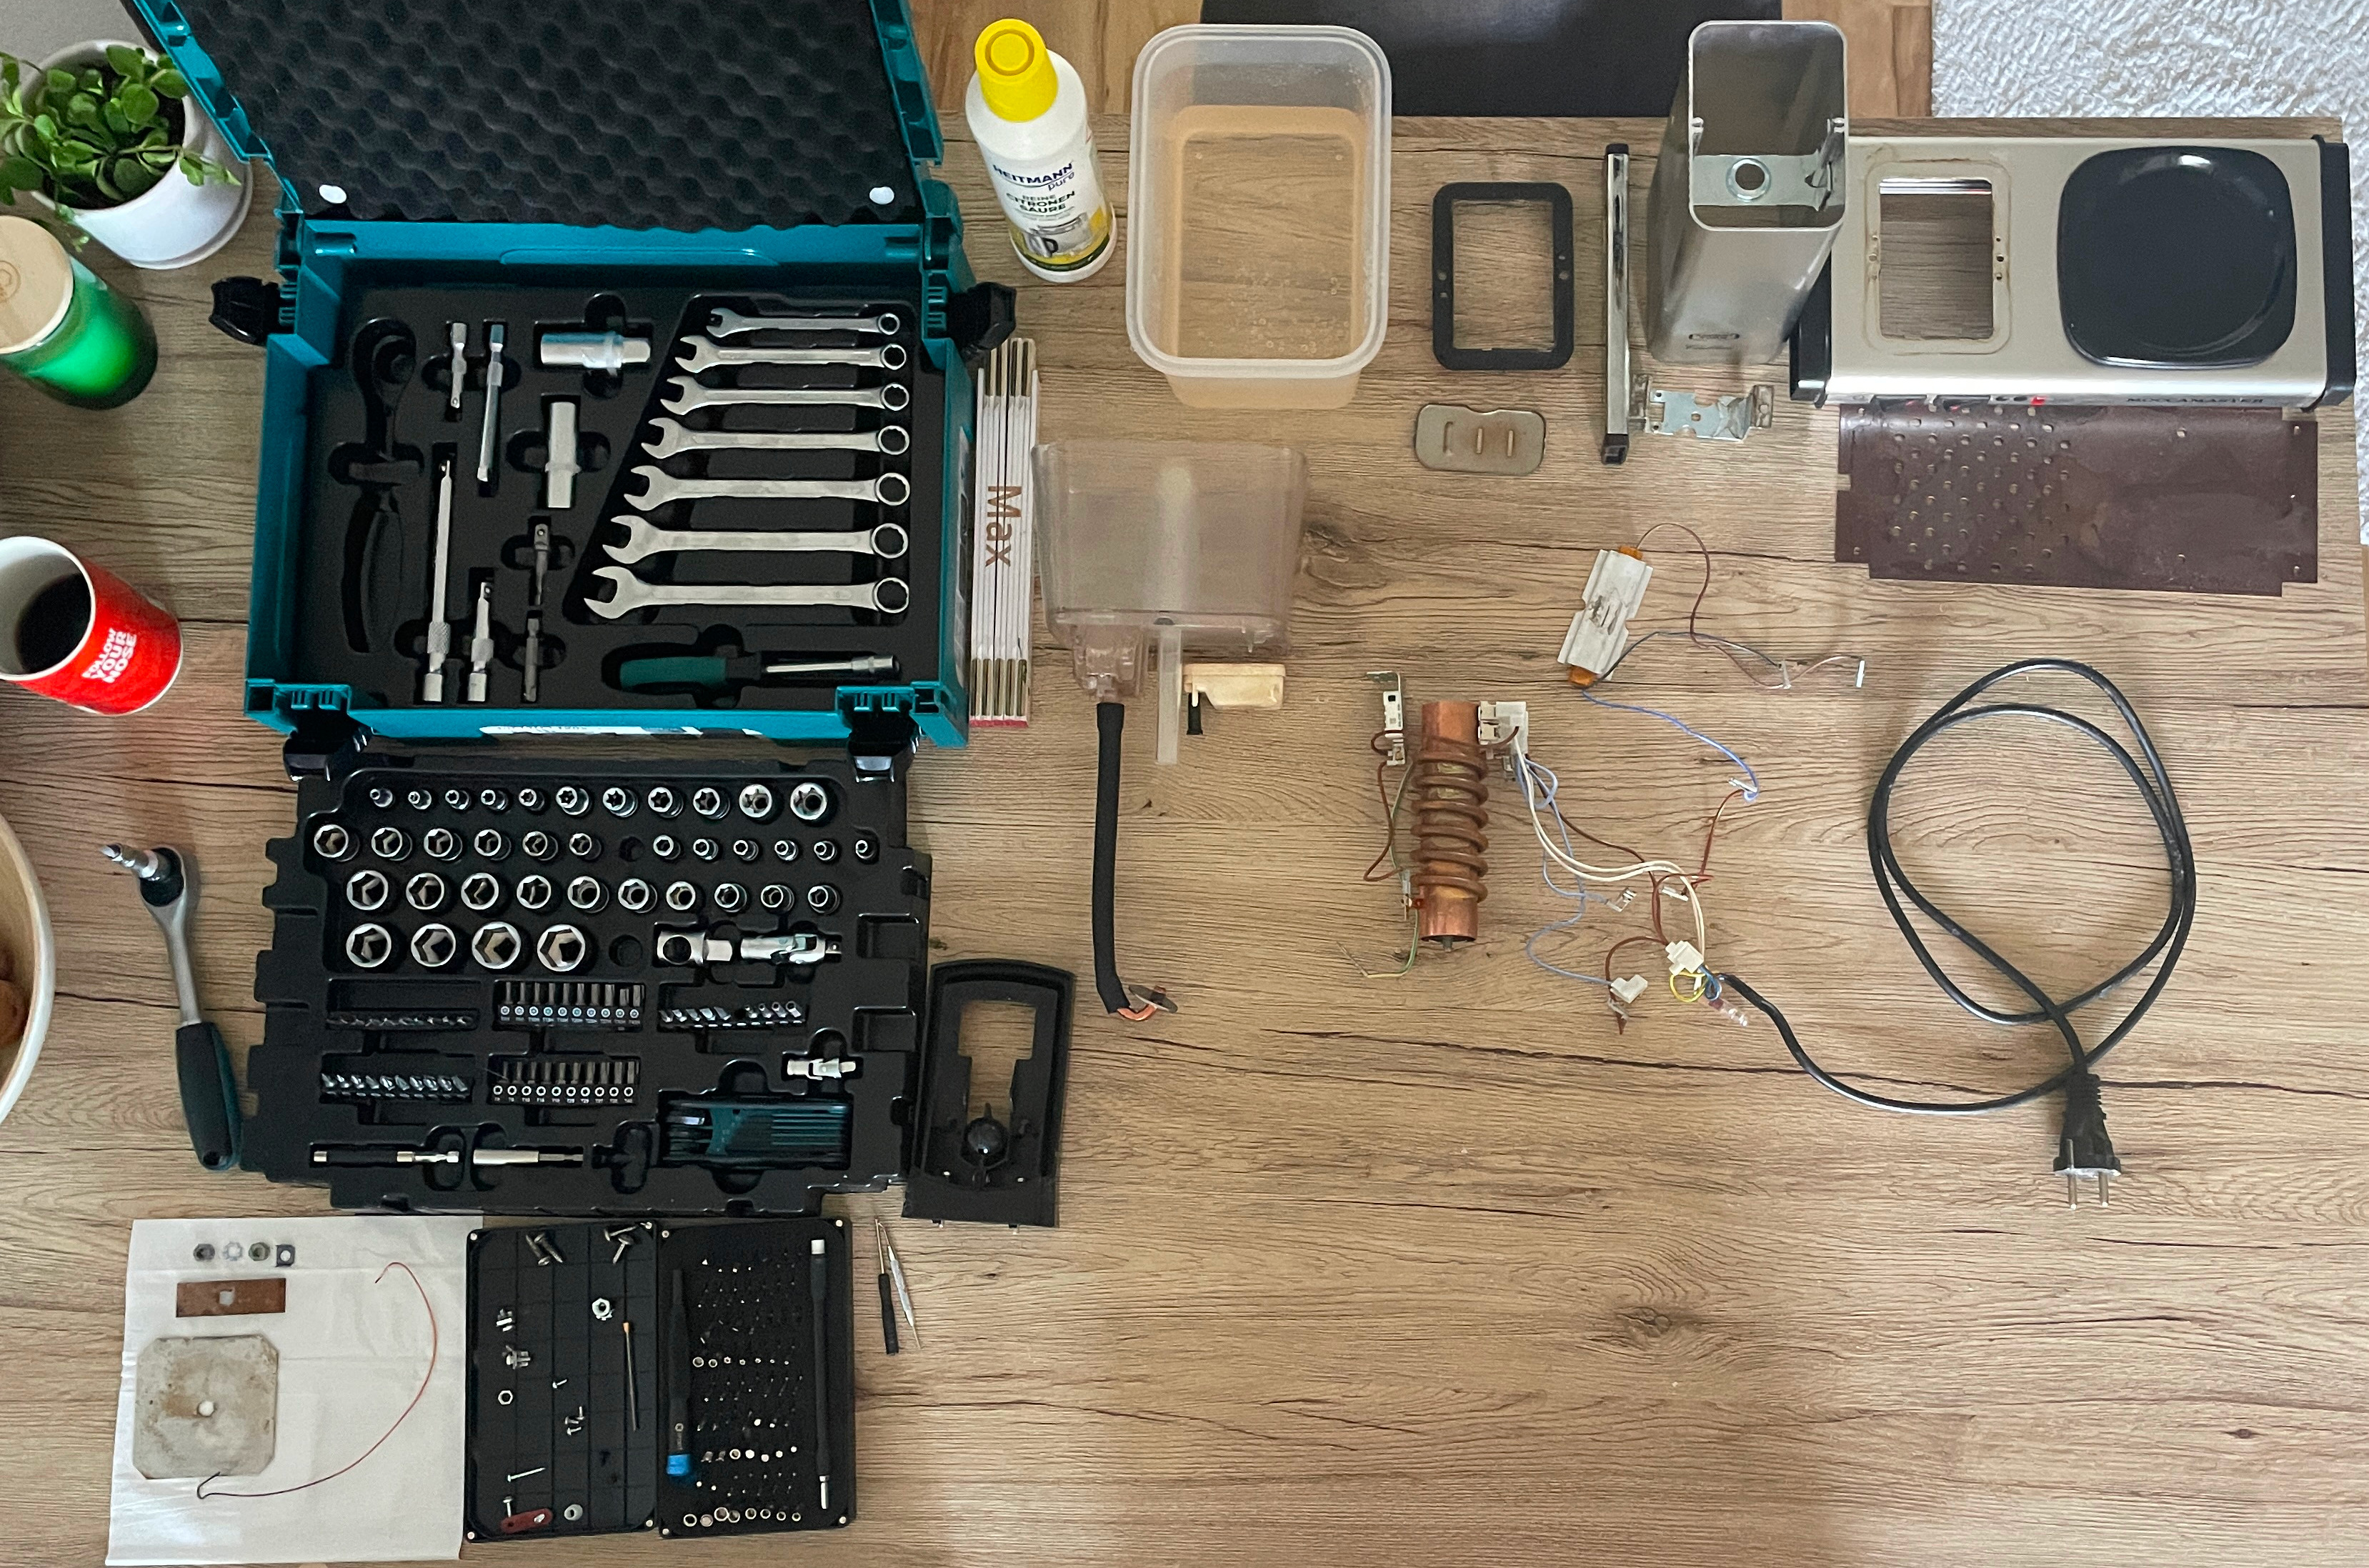
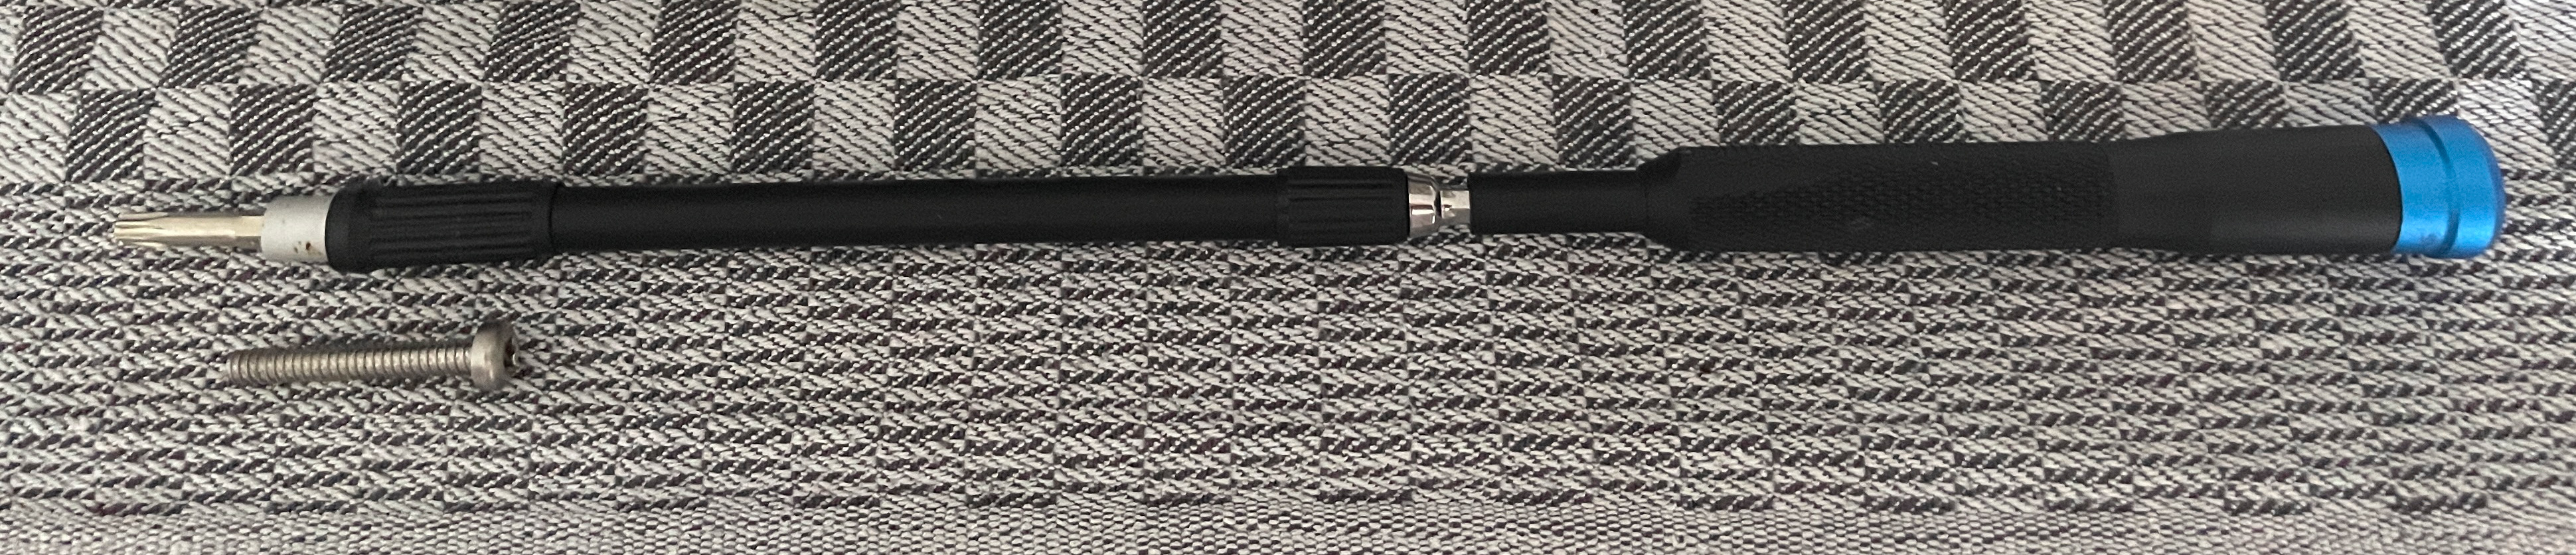
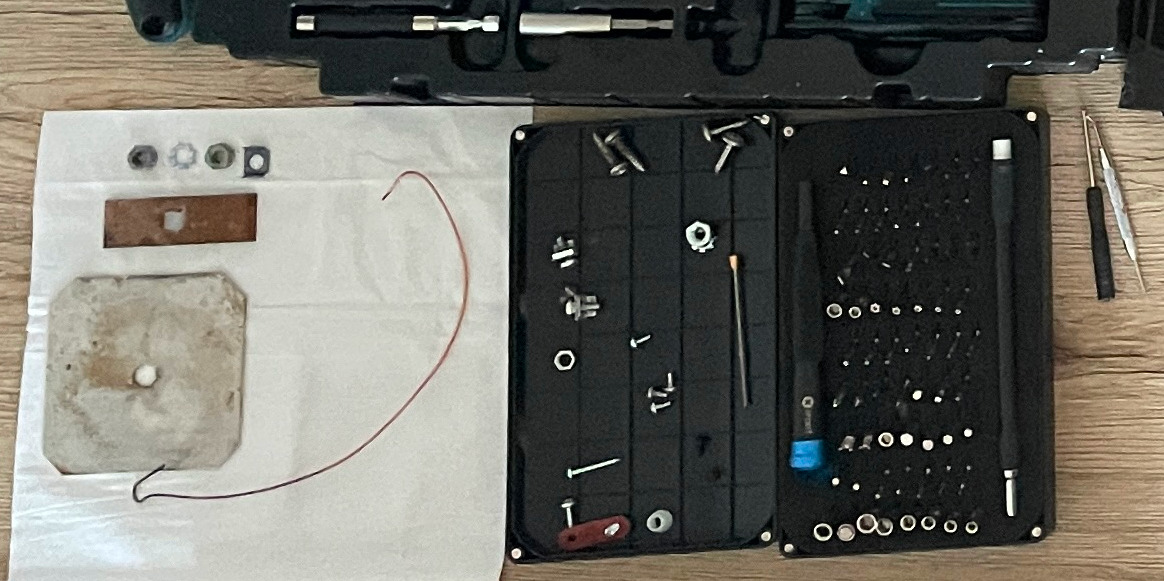
Required Tools
When looking through pictures online, I noticed that the assembly inside can differ between different generations of the KGB Select. In my case, I am dealing with a ~12 year old machine, so the tools you require might differ from the ones I used.
I required the following tools for the repair:
| Tool | |
|---|---|
| Torx TX20 | |
| Phillips Head (PH1) | |
| Tweezers(O-ring removal and small parts) | |
| Box Spanner (8mm) | |
| Box Spanner (10mm) |
Additionally, some of the screws inside are hard to reach. For this, it was really useful to have a flexible magnetic bit holder extender.
Required Cleaning Materials
| Material | |
|---|---|
| Descaling solution | |
| Water | |
| Towel | |
| Toothbrush | |
| The (bent) toothbrush came in very useful in combination with a cleaning paste, but be careful not to use too abrasive paste. |
Before You Begin
- Unplug the machine and let it cool completely
- Work on a clean, well-lit surface
- Take photos of each step for reassembly
- Keep screws organized by step
- The inside contains a glass tube. Be careful not to break it!
It is a good idea to gain a rough understanding of how the machine works. I found the illustration on the Amazon product page to be very helpful for this, since it shows an X-ray view of the machine.
Disassembly Steps
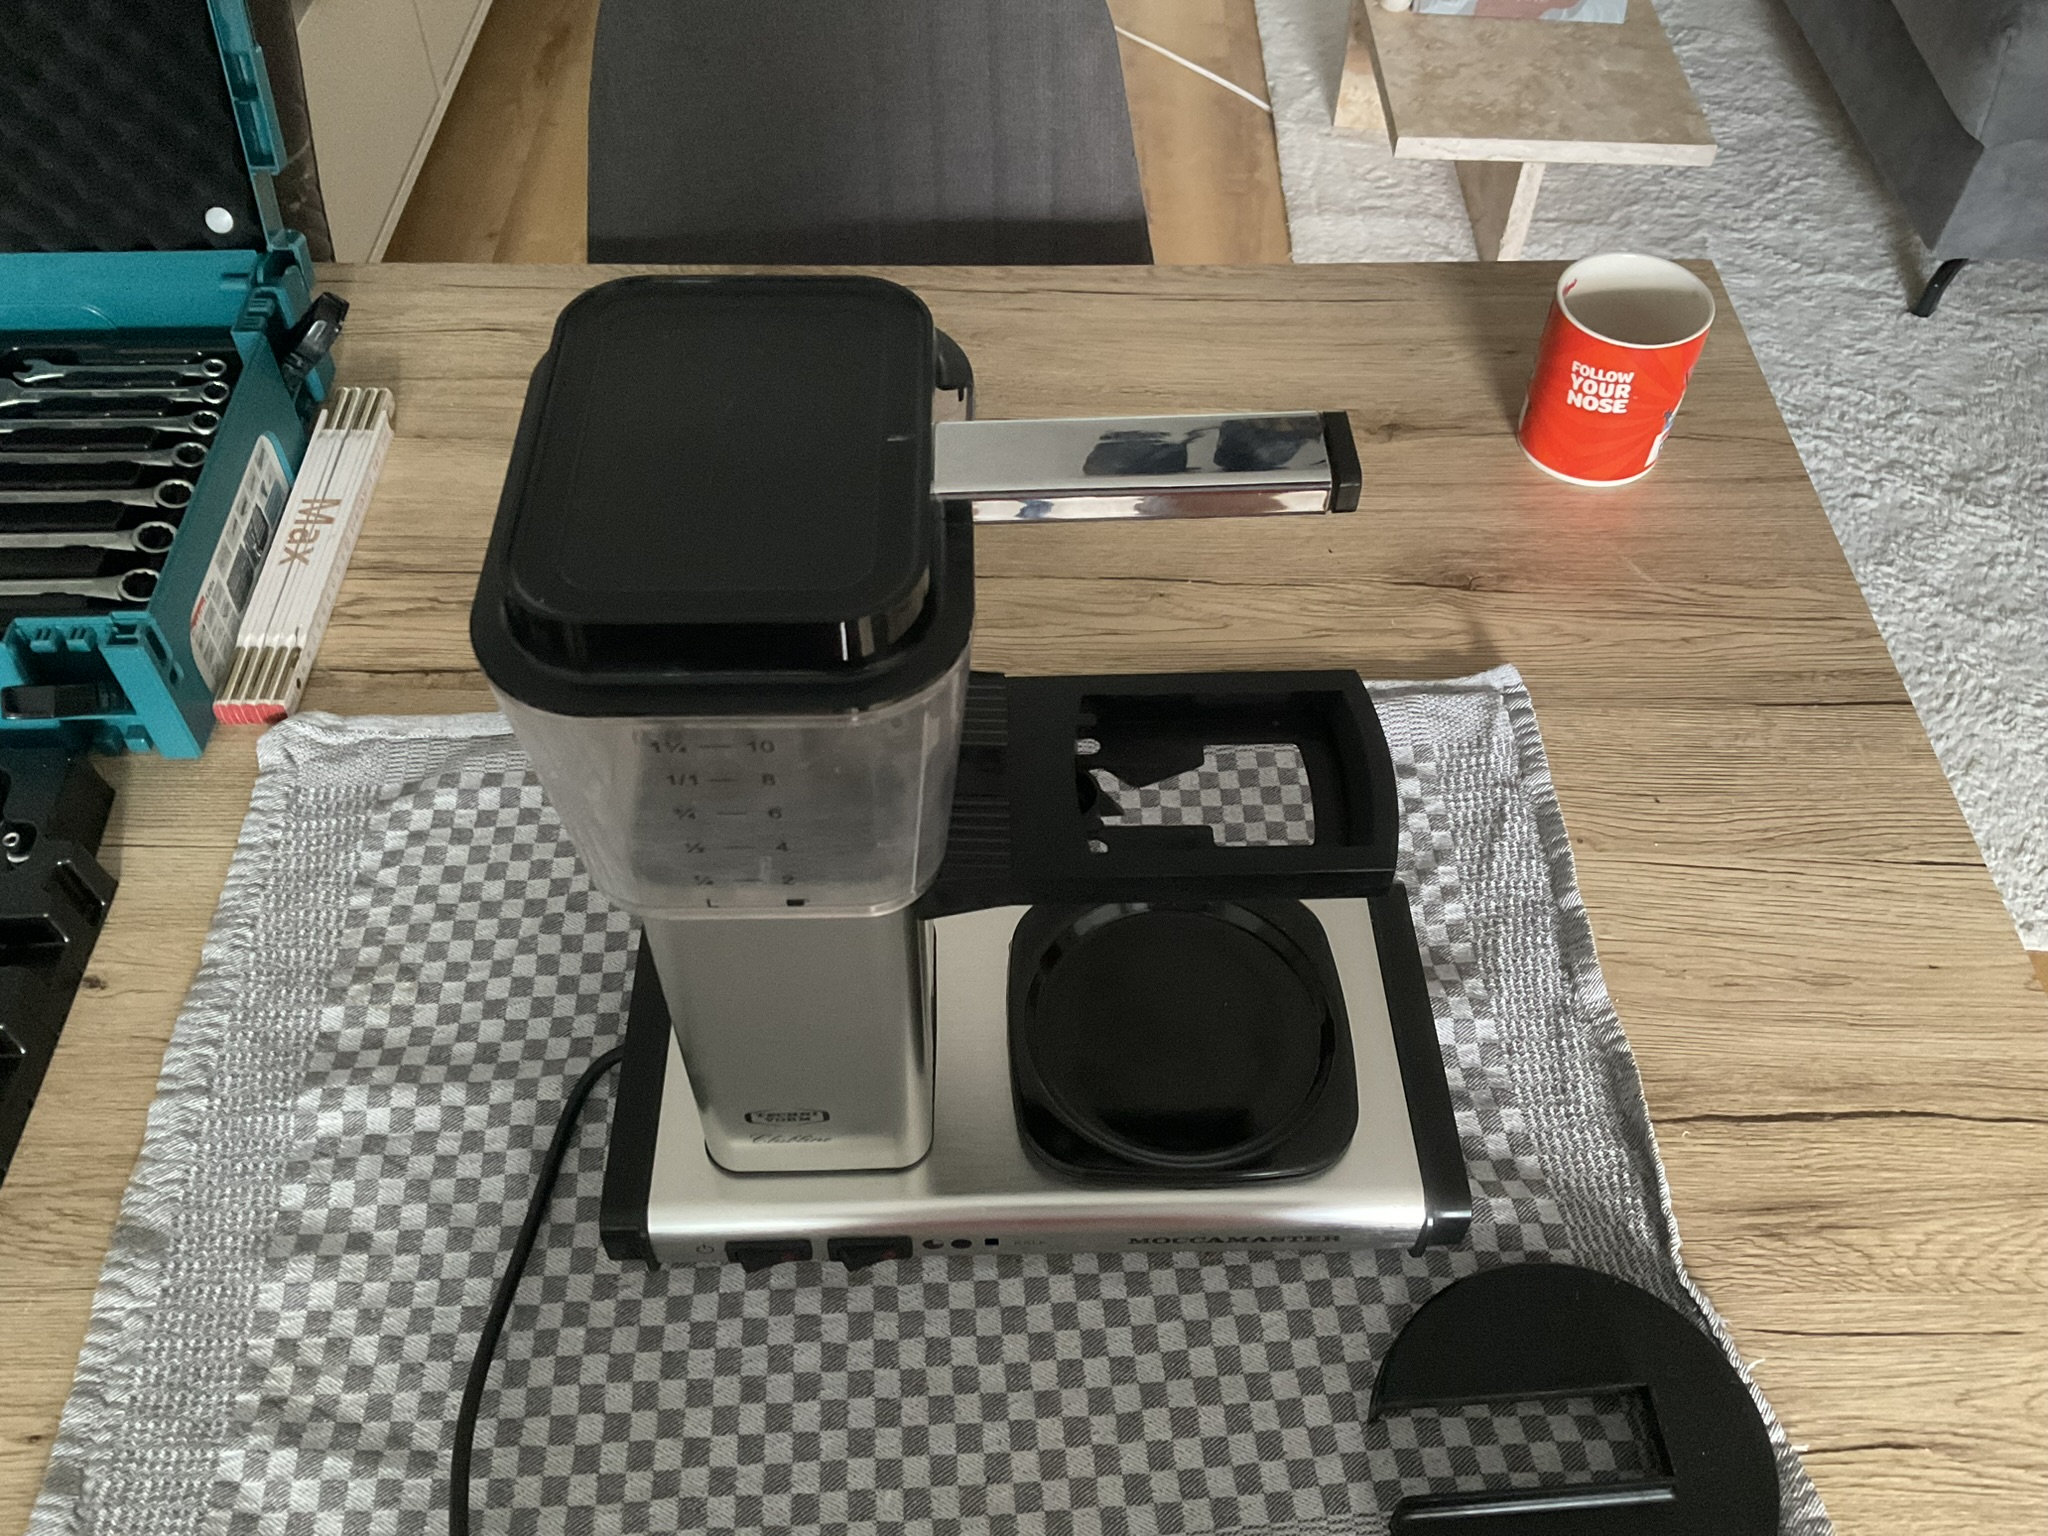
1. Removing the Housing
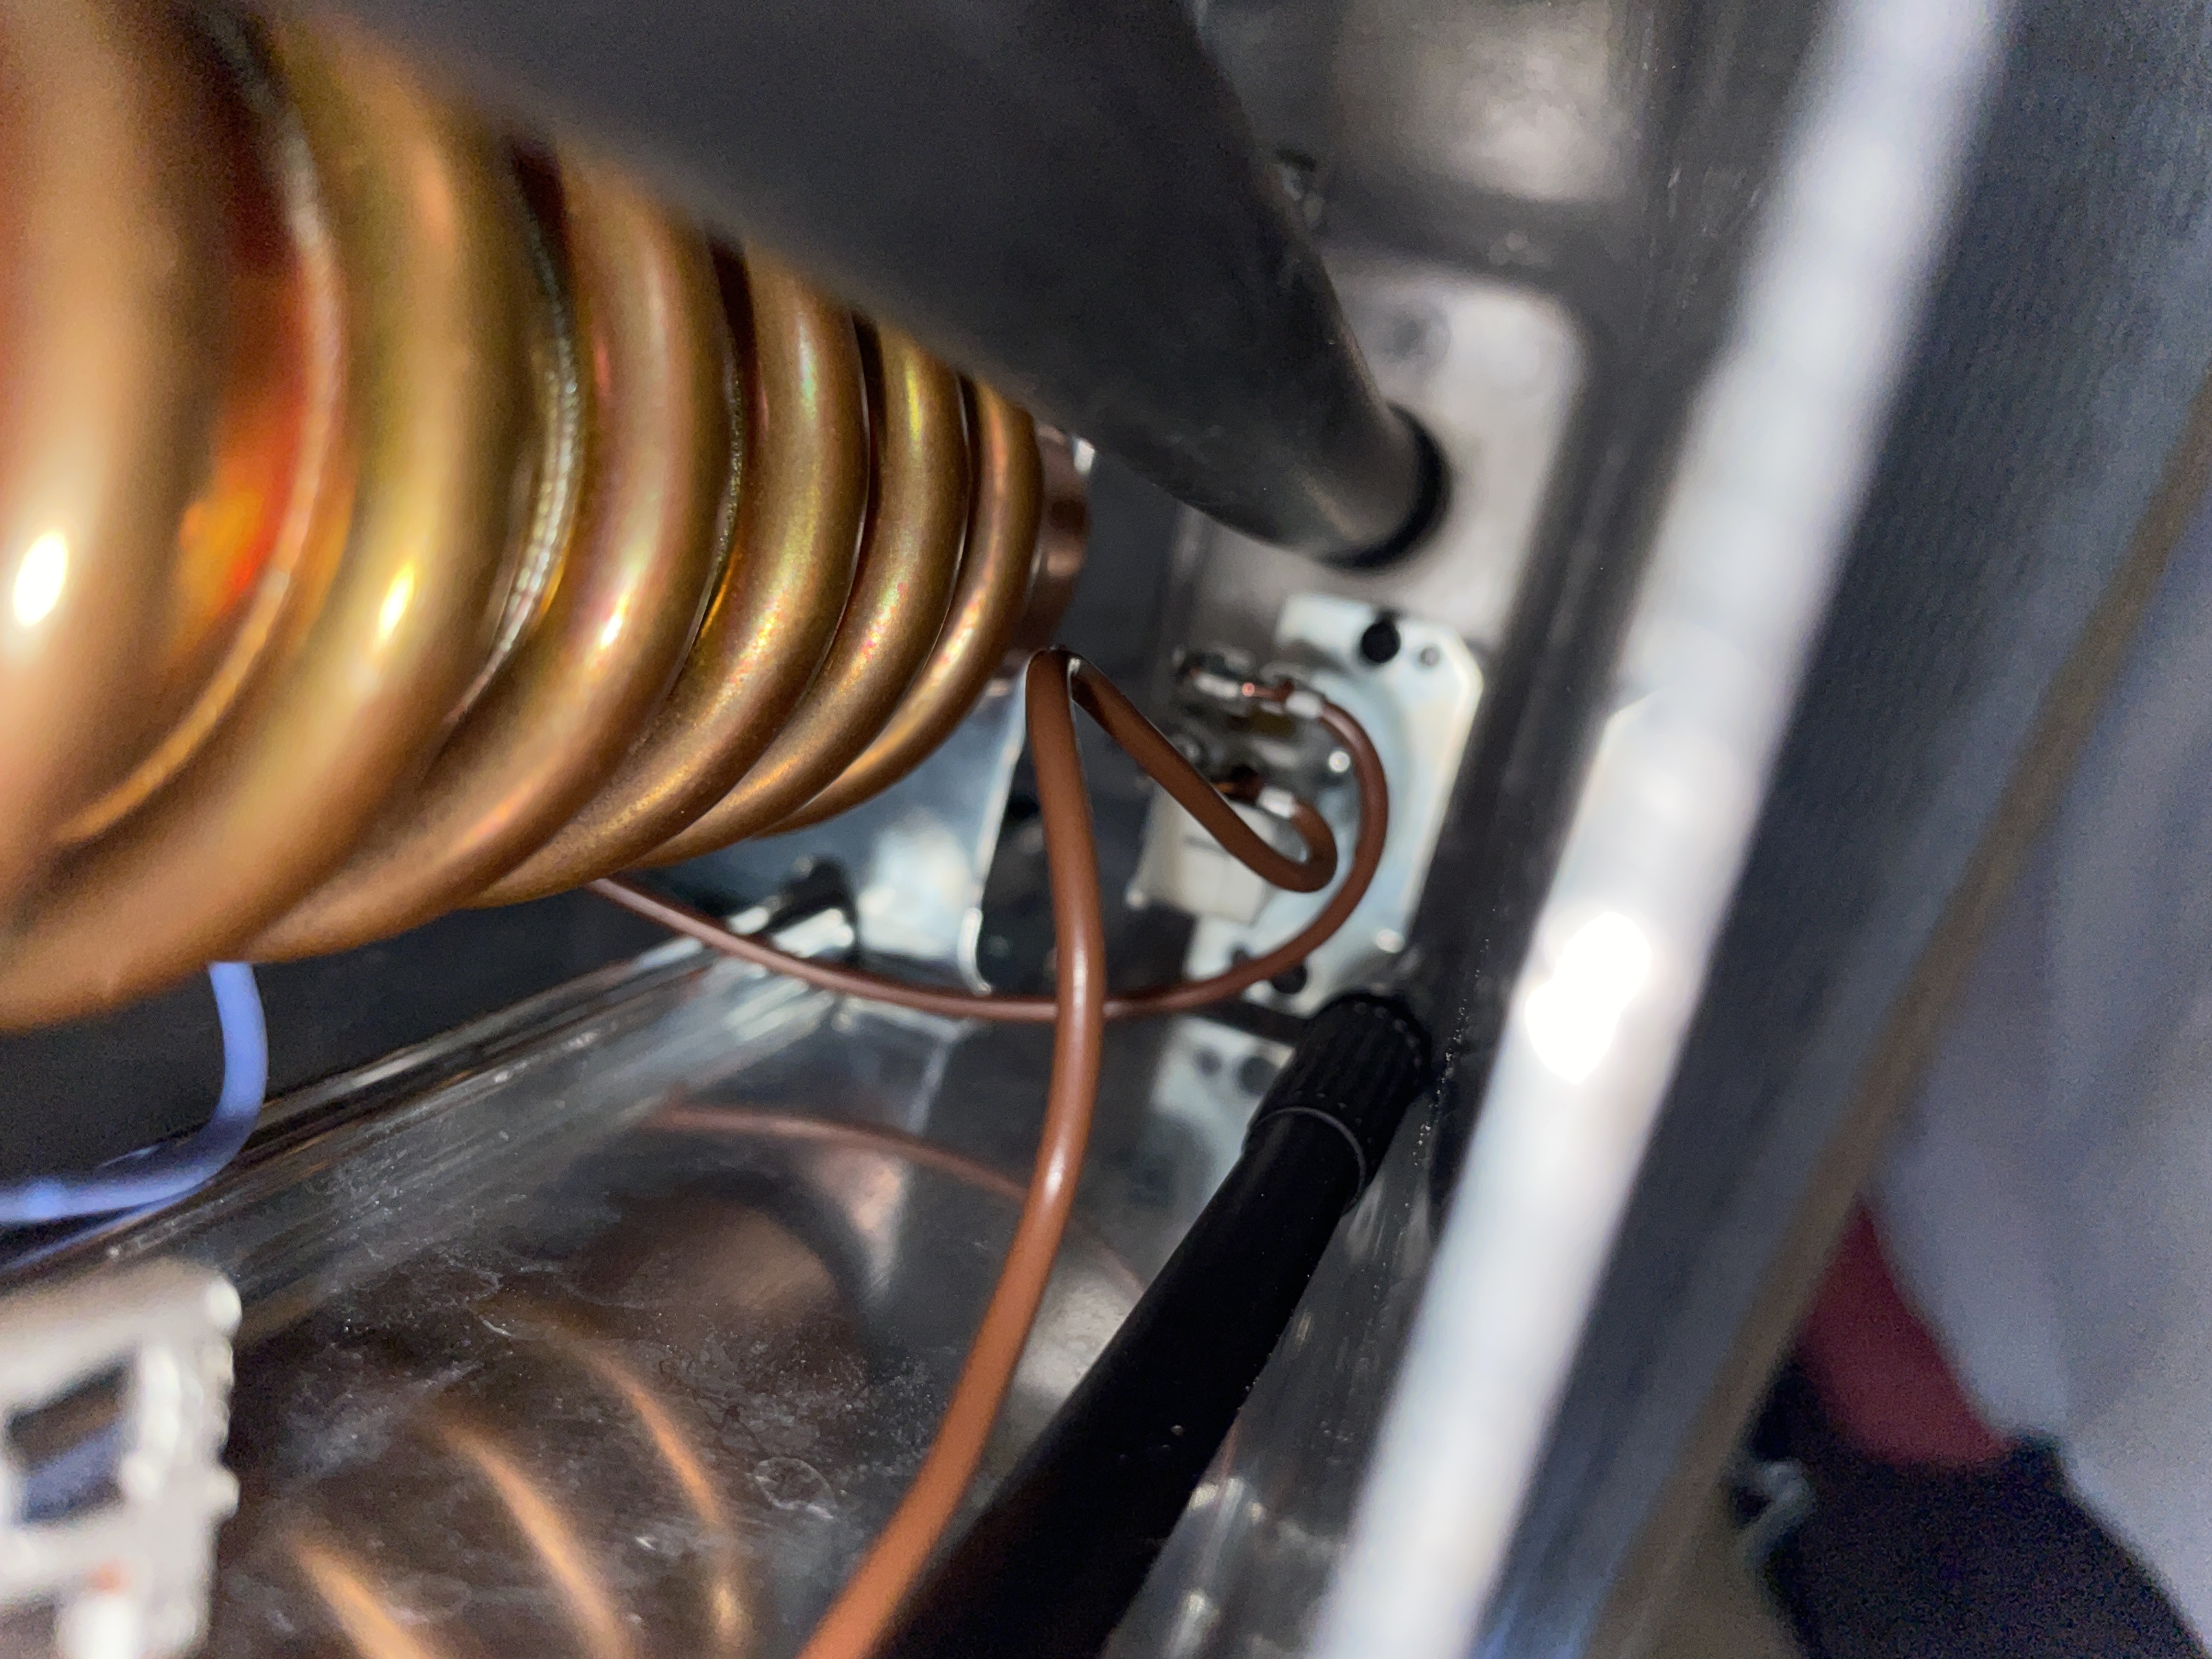
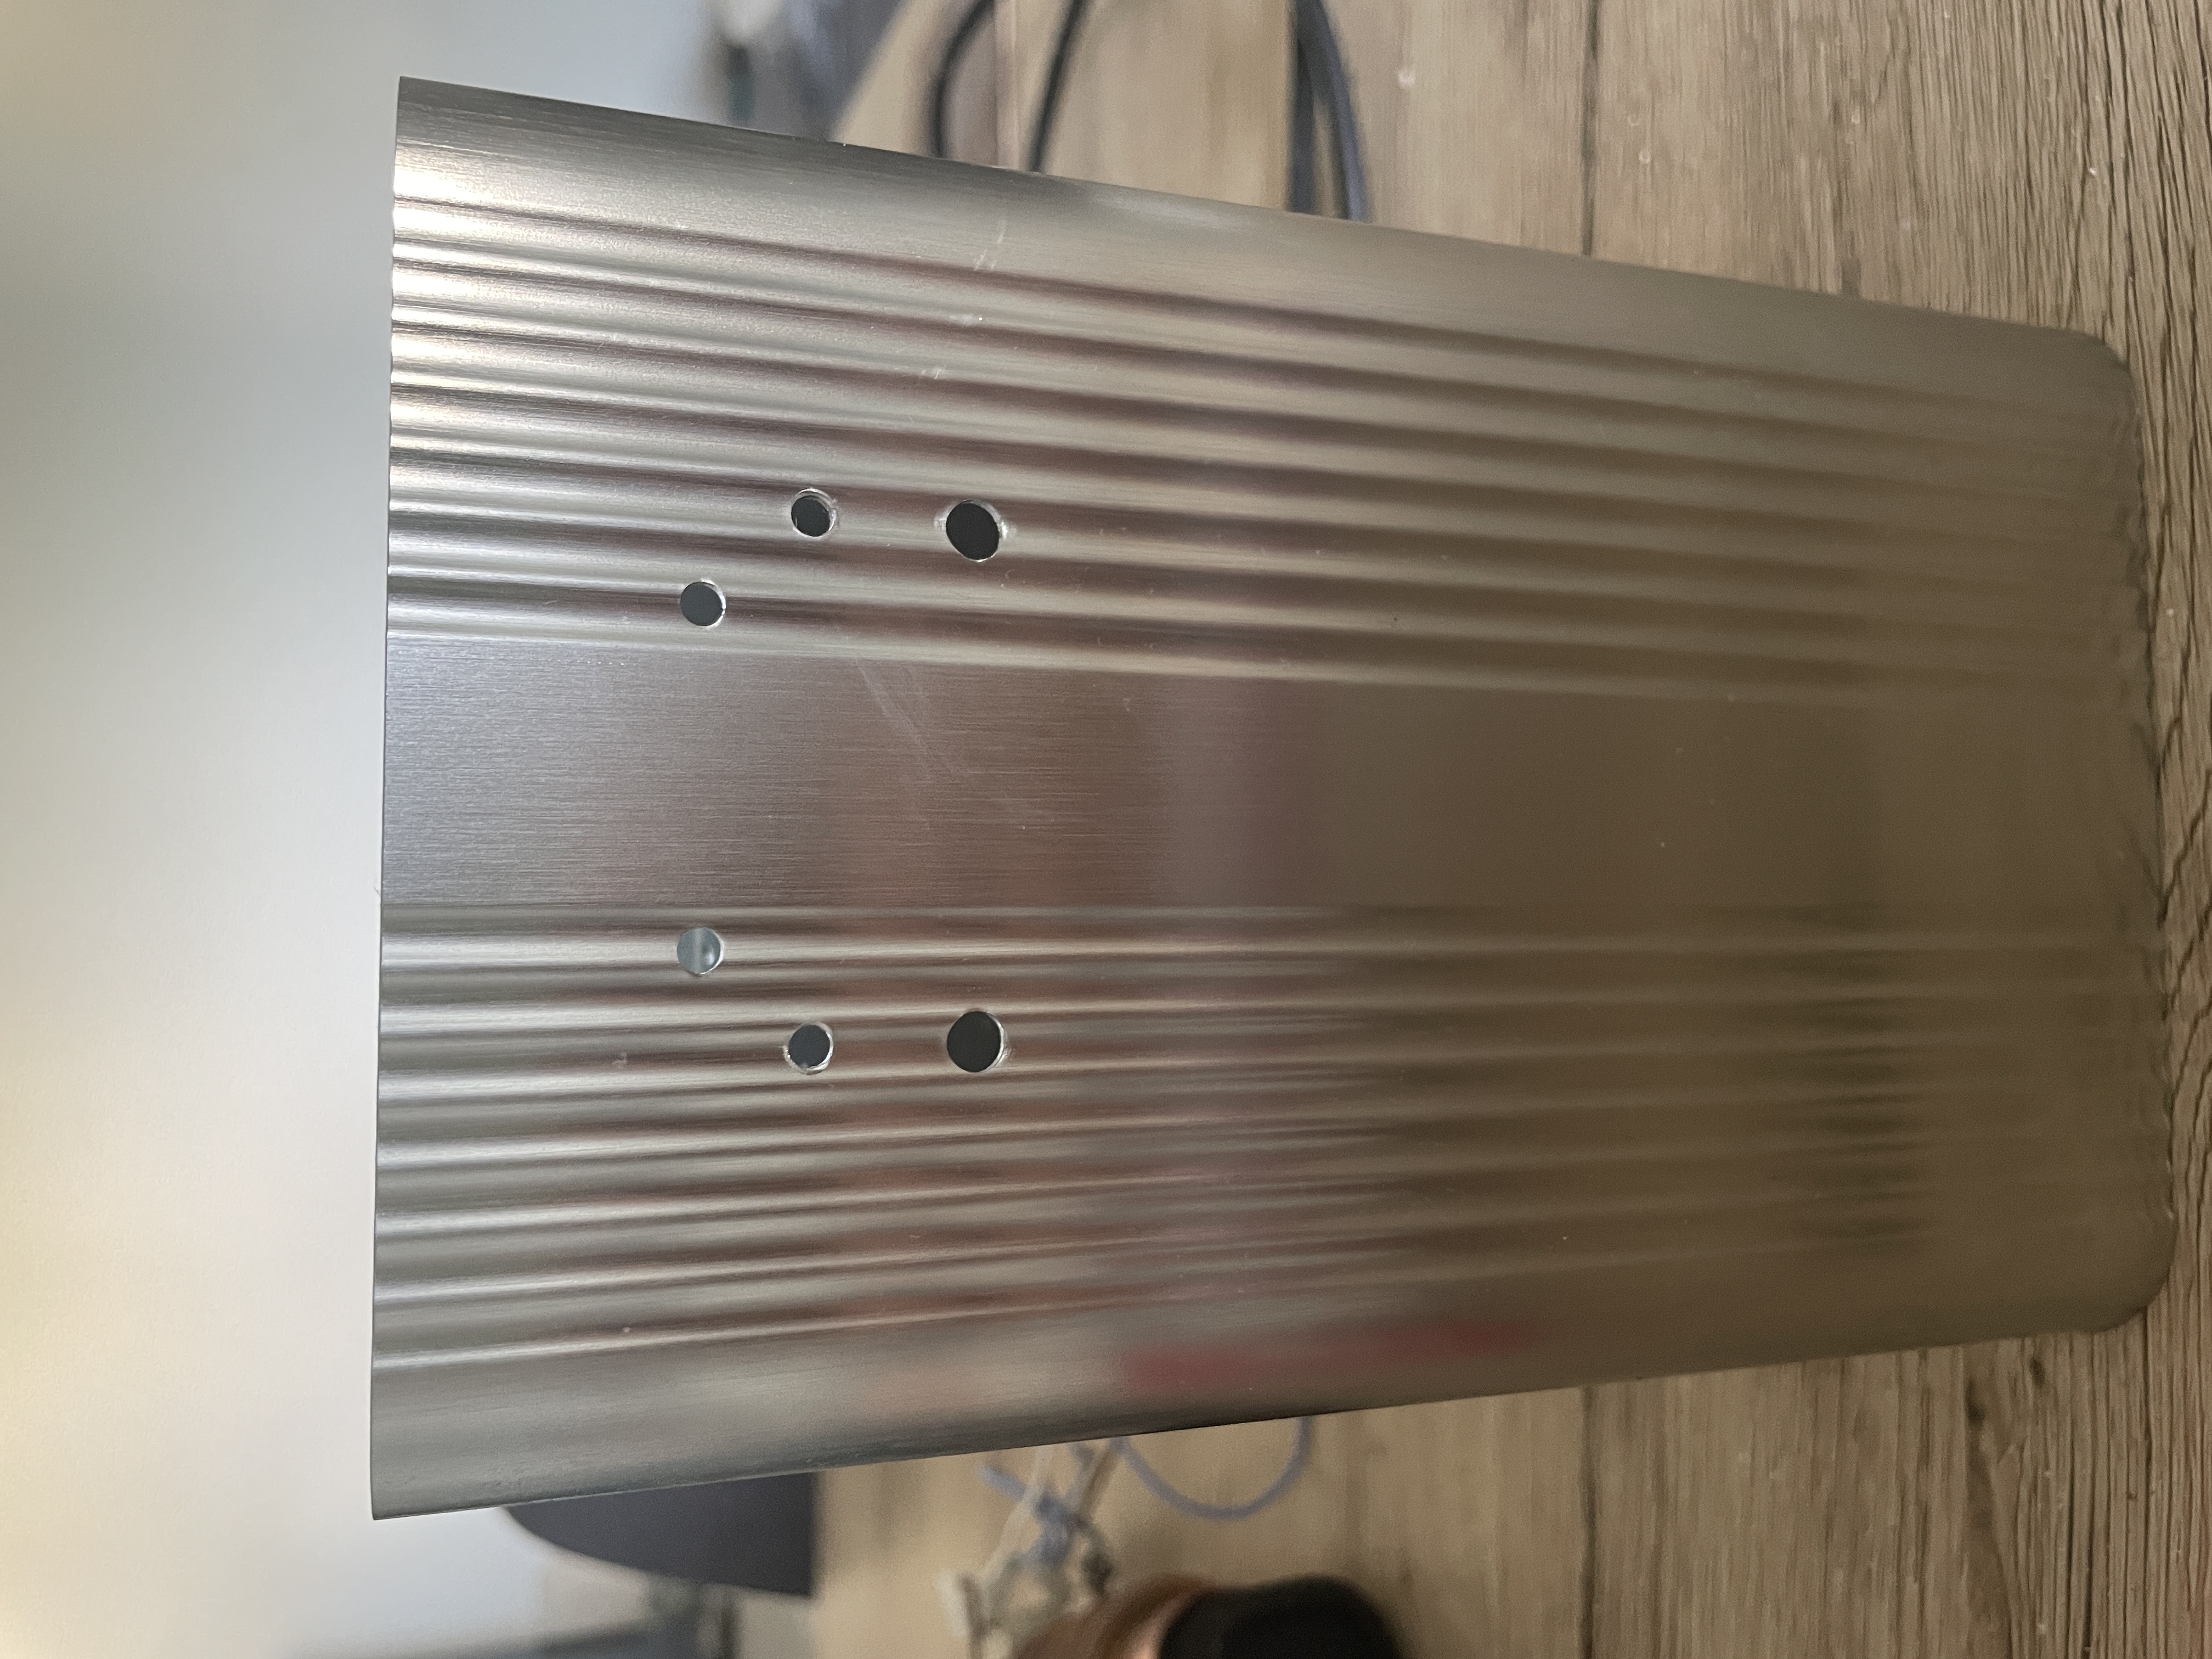
After letting the machine cool down, turn the machine on it’s side and place it on a towel. Some water will have collected inside of the machine, so be prepared to clean it up. I removed the housing by unscrewing the 4 screws on the bottom of the machine.
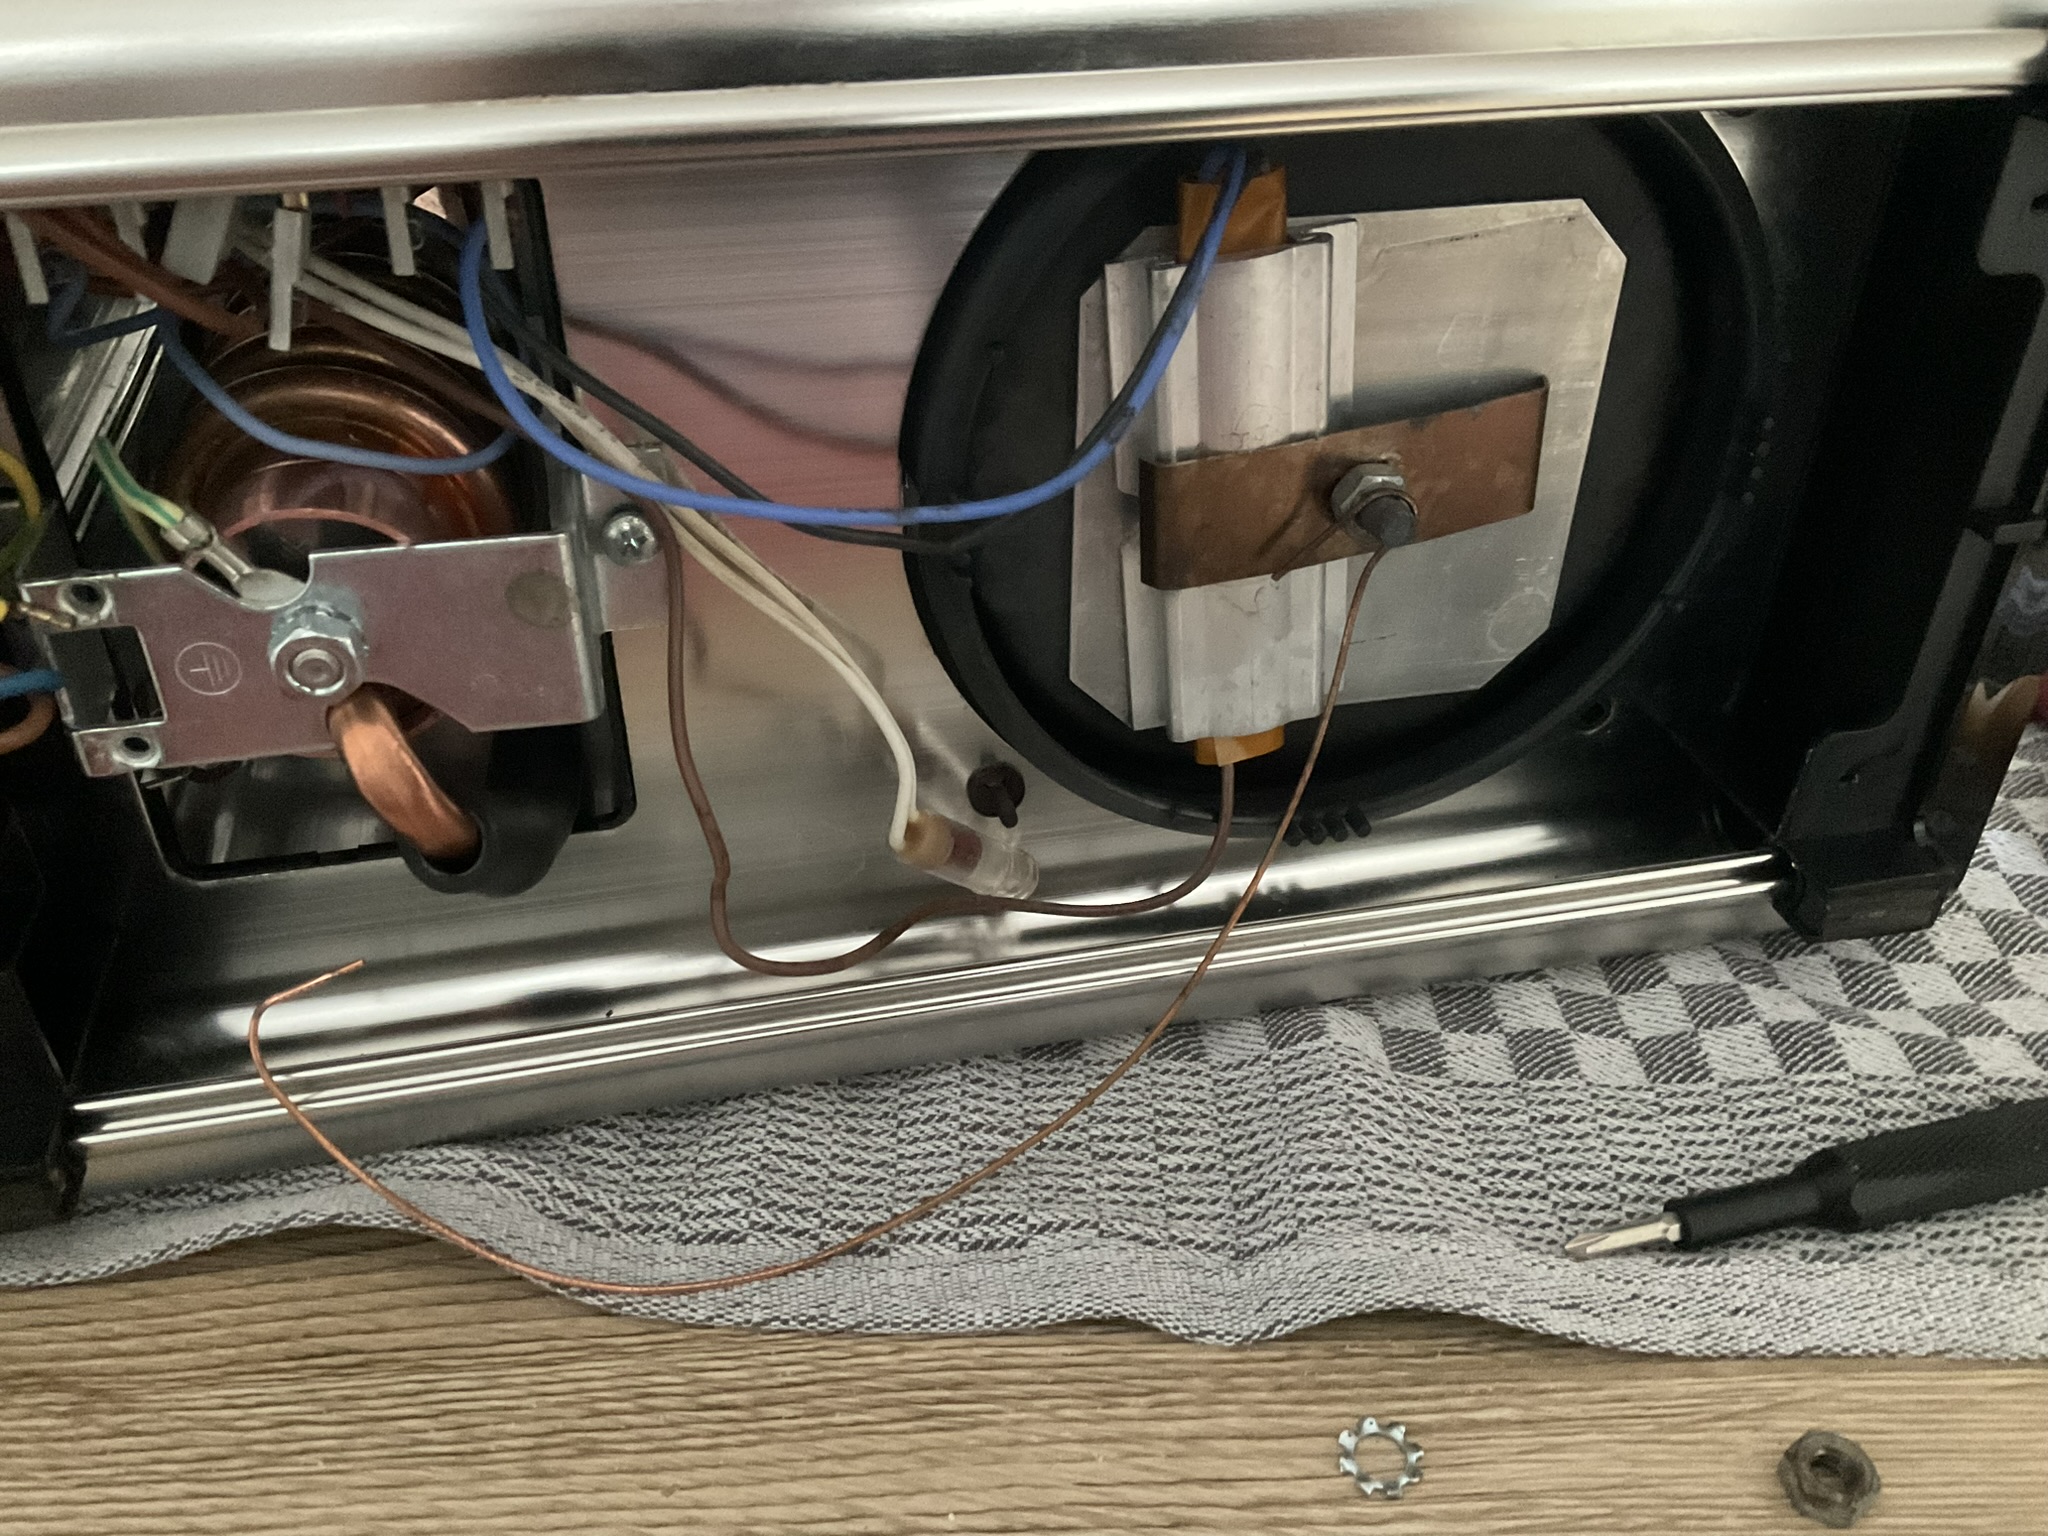
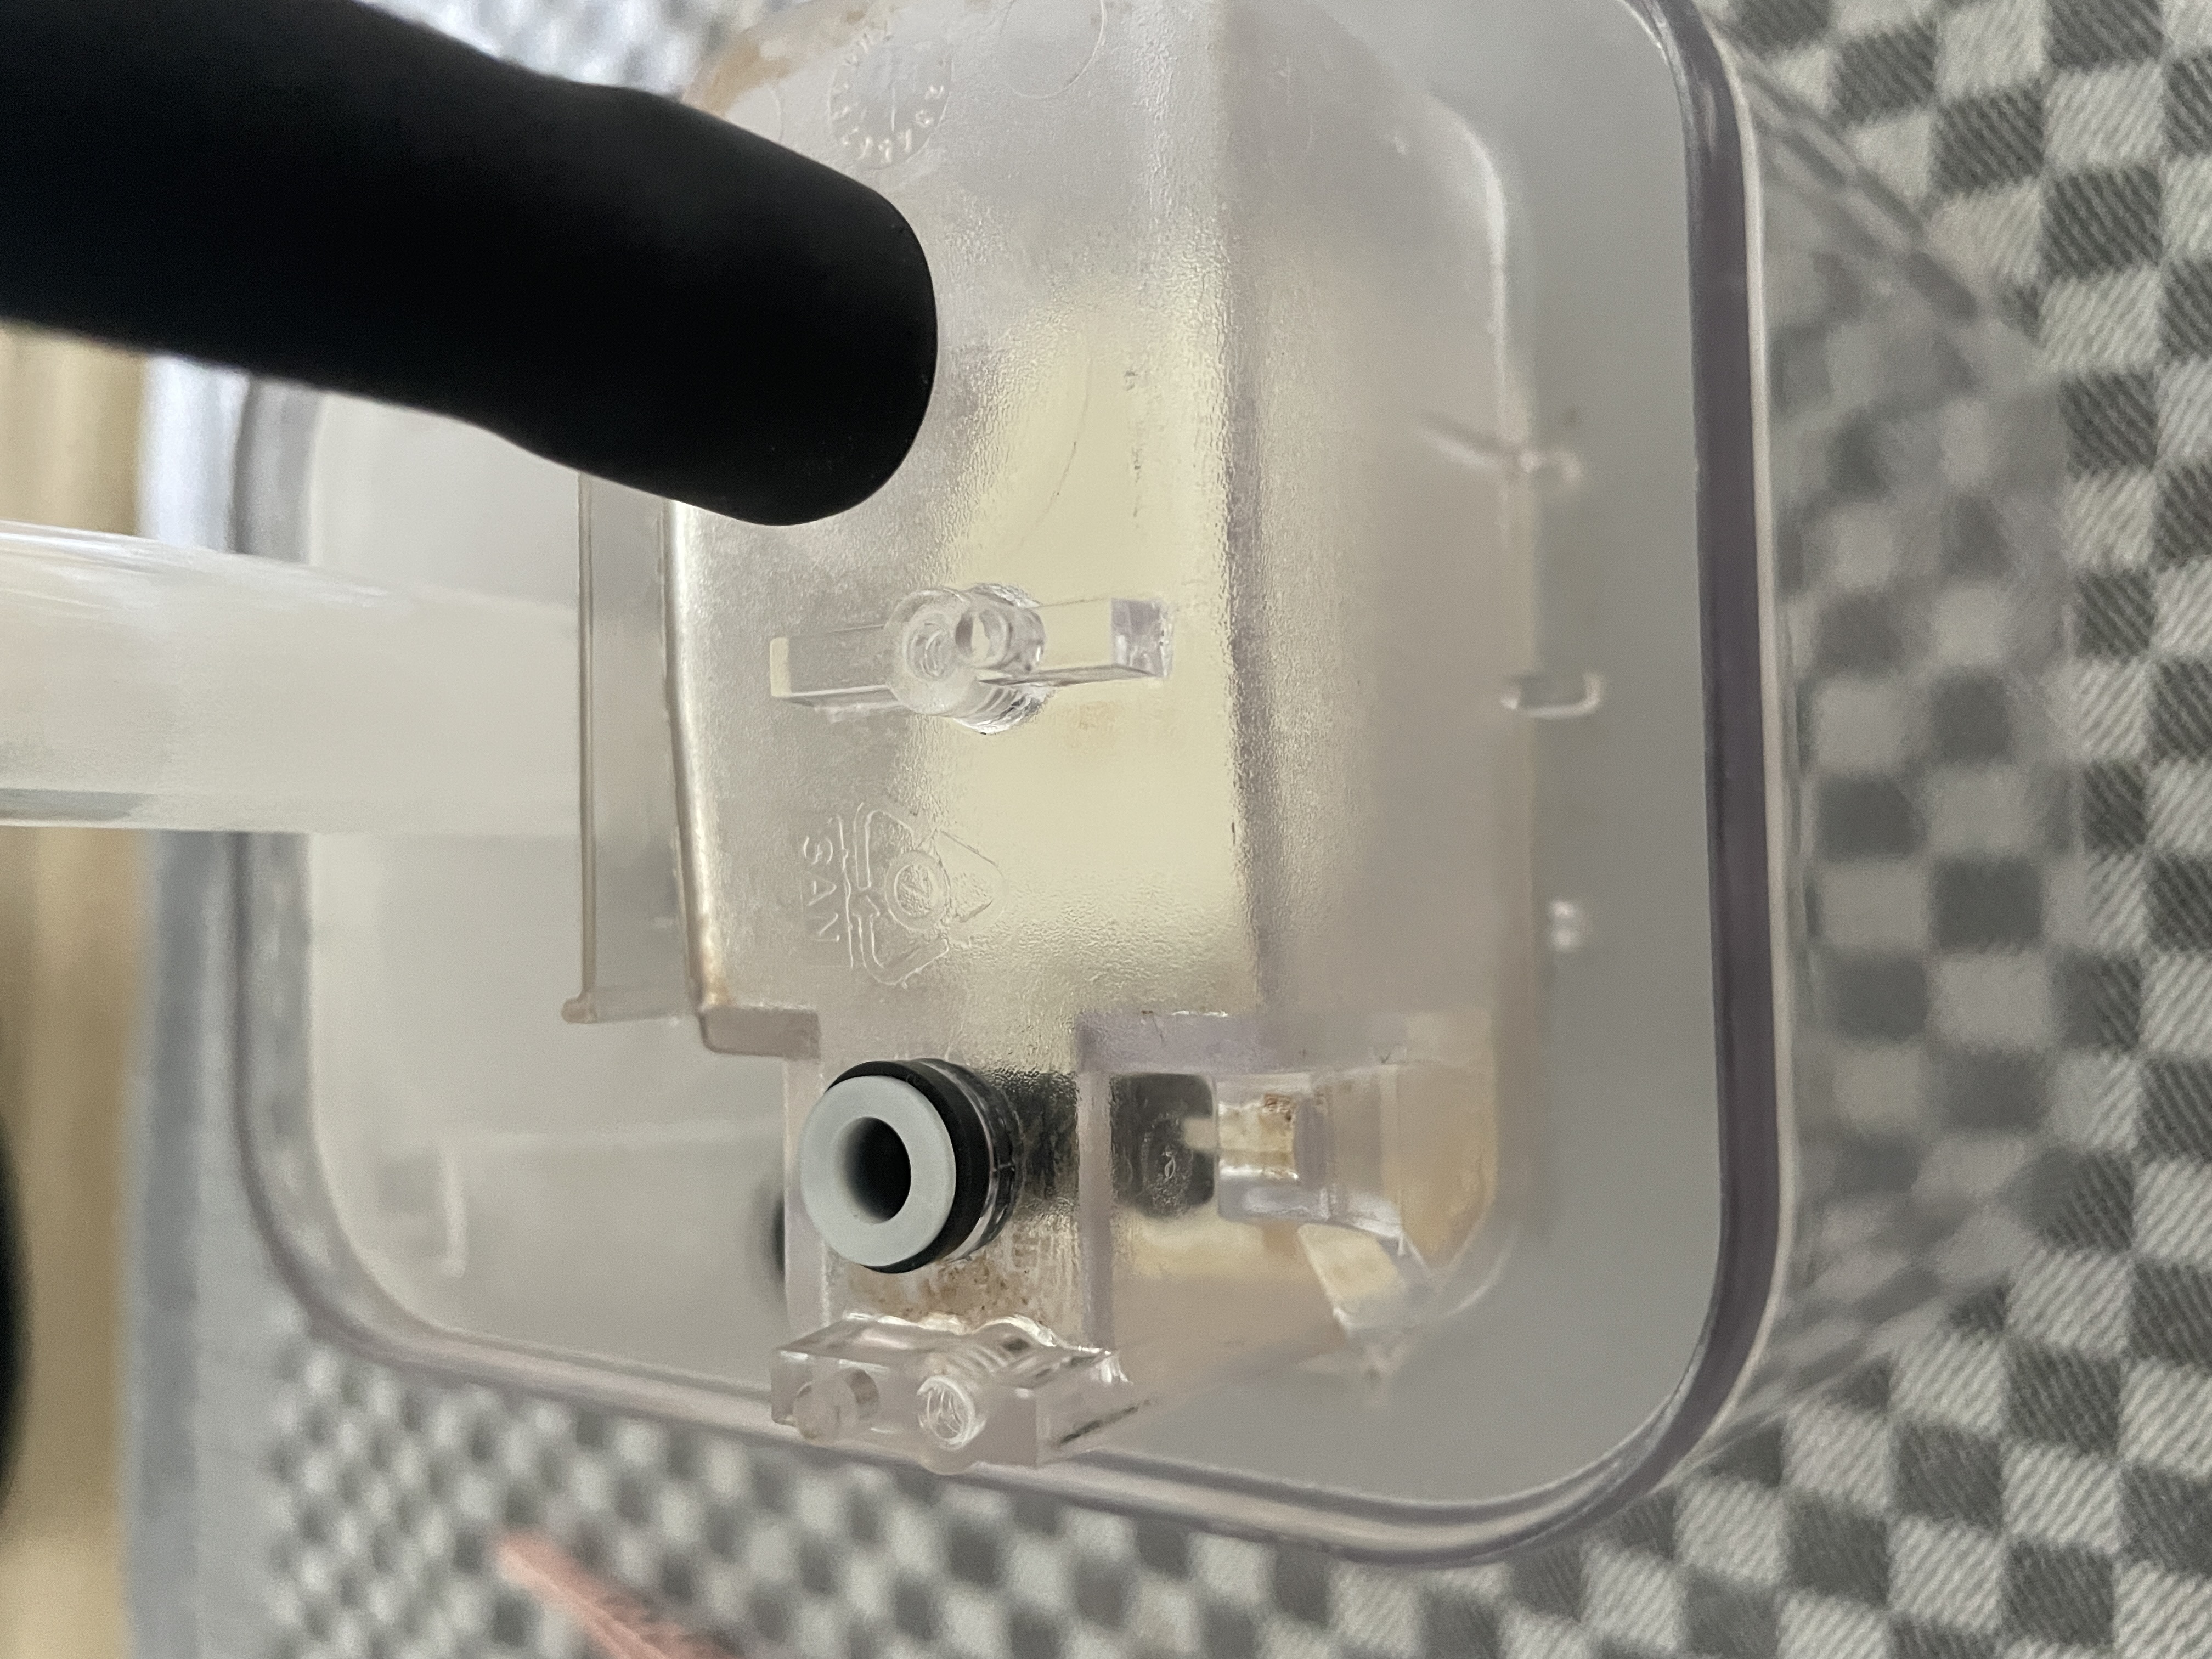
The inside of the machine looks like this:
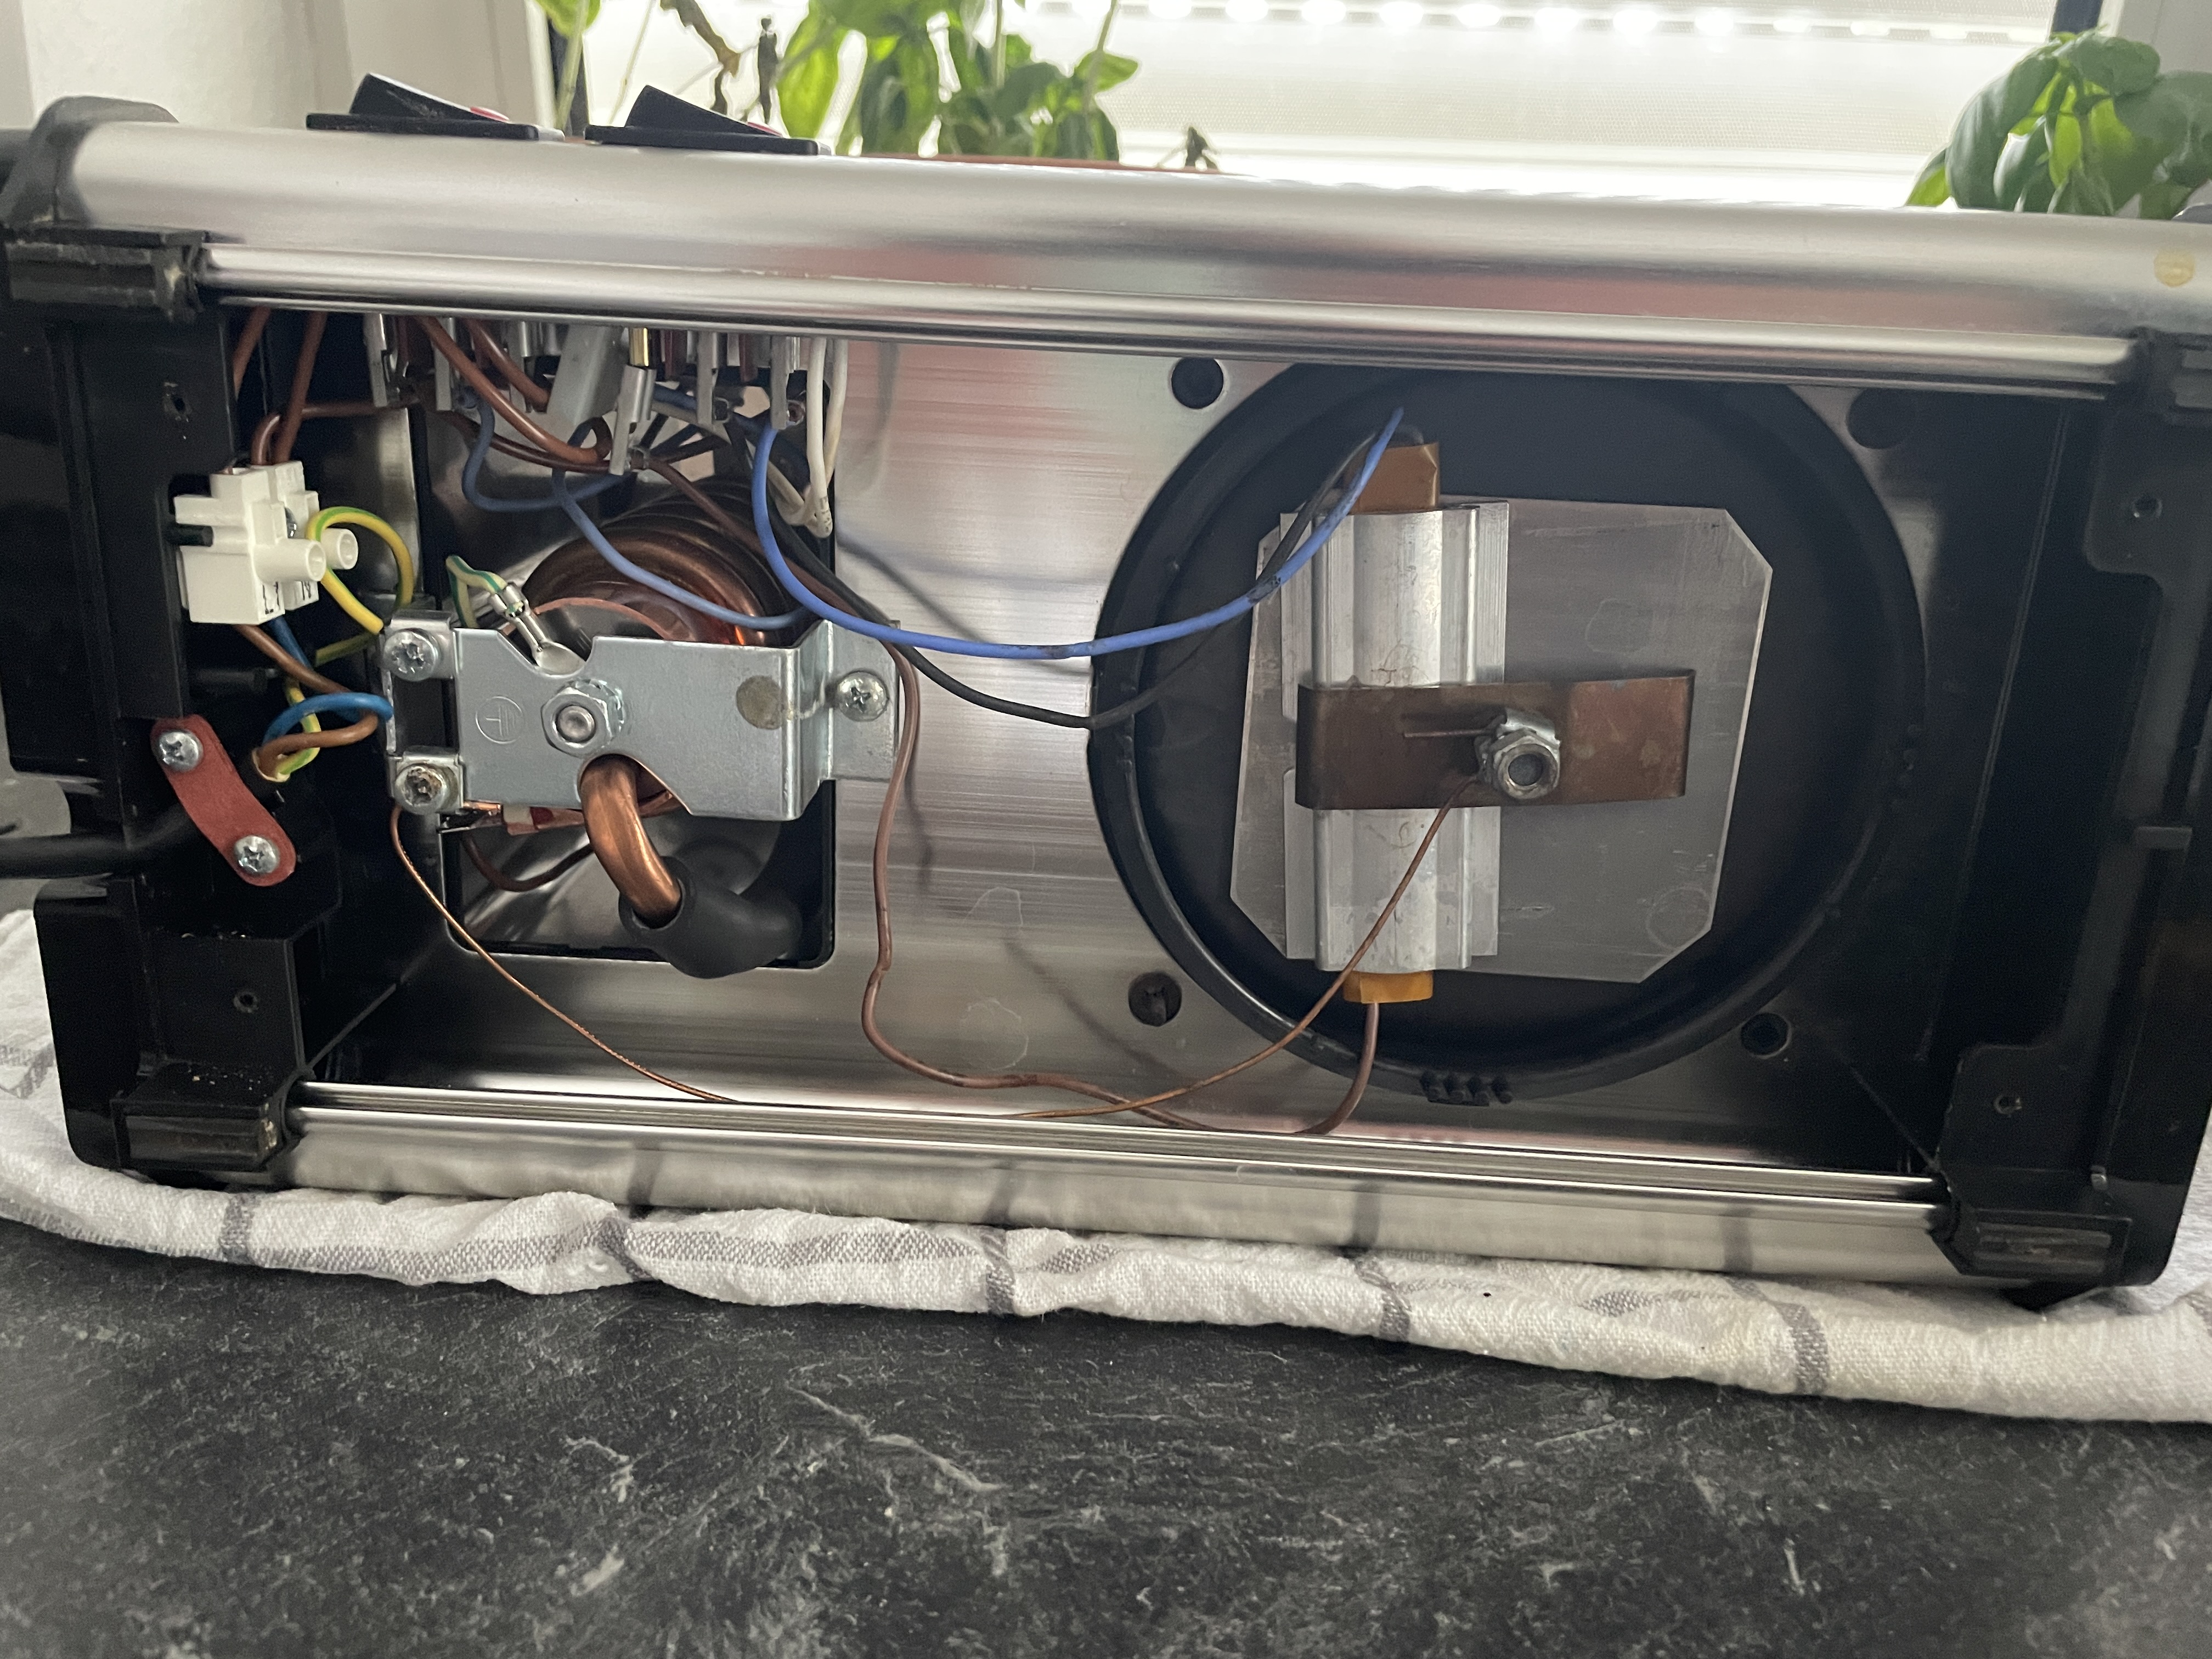 As well as the tooling, it’s possible that the elements inside have also changed over the years. Be sure to take picutres throughout so you can reassemble the machine correctly.
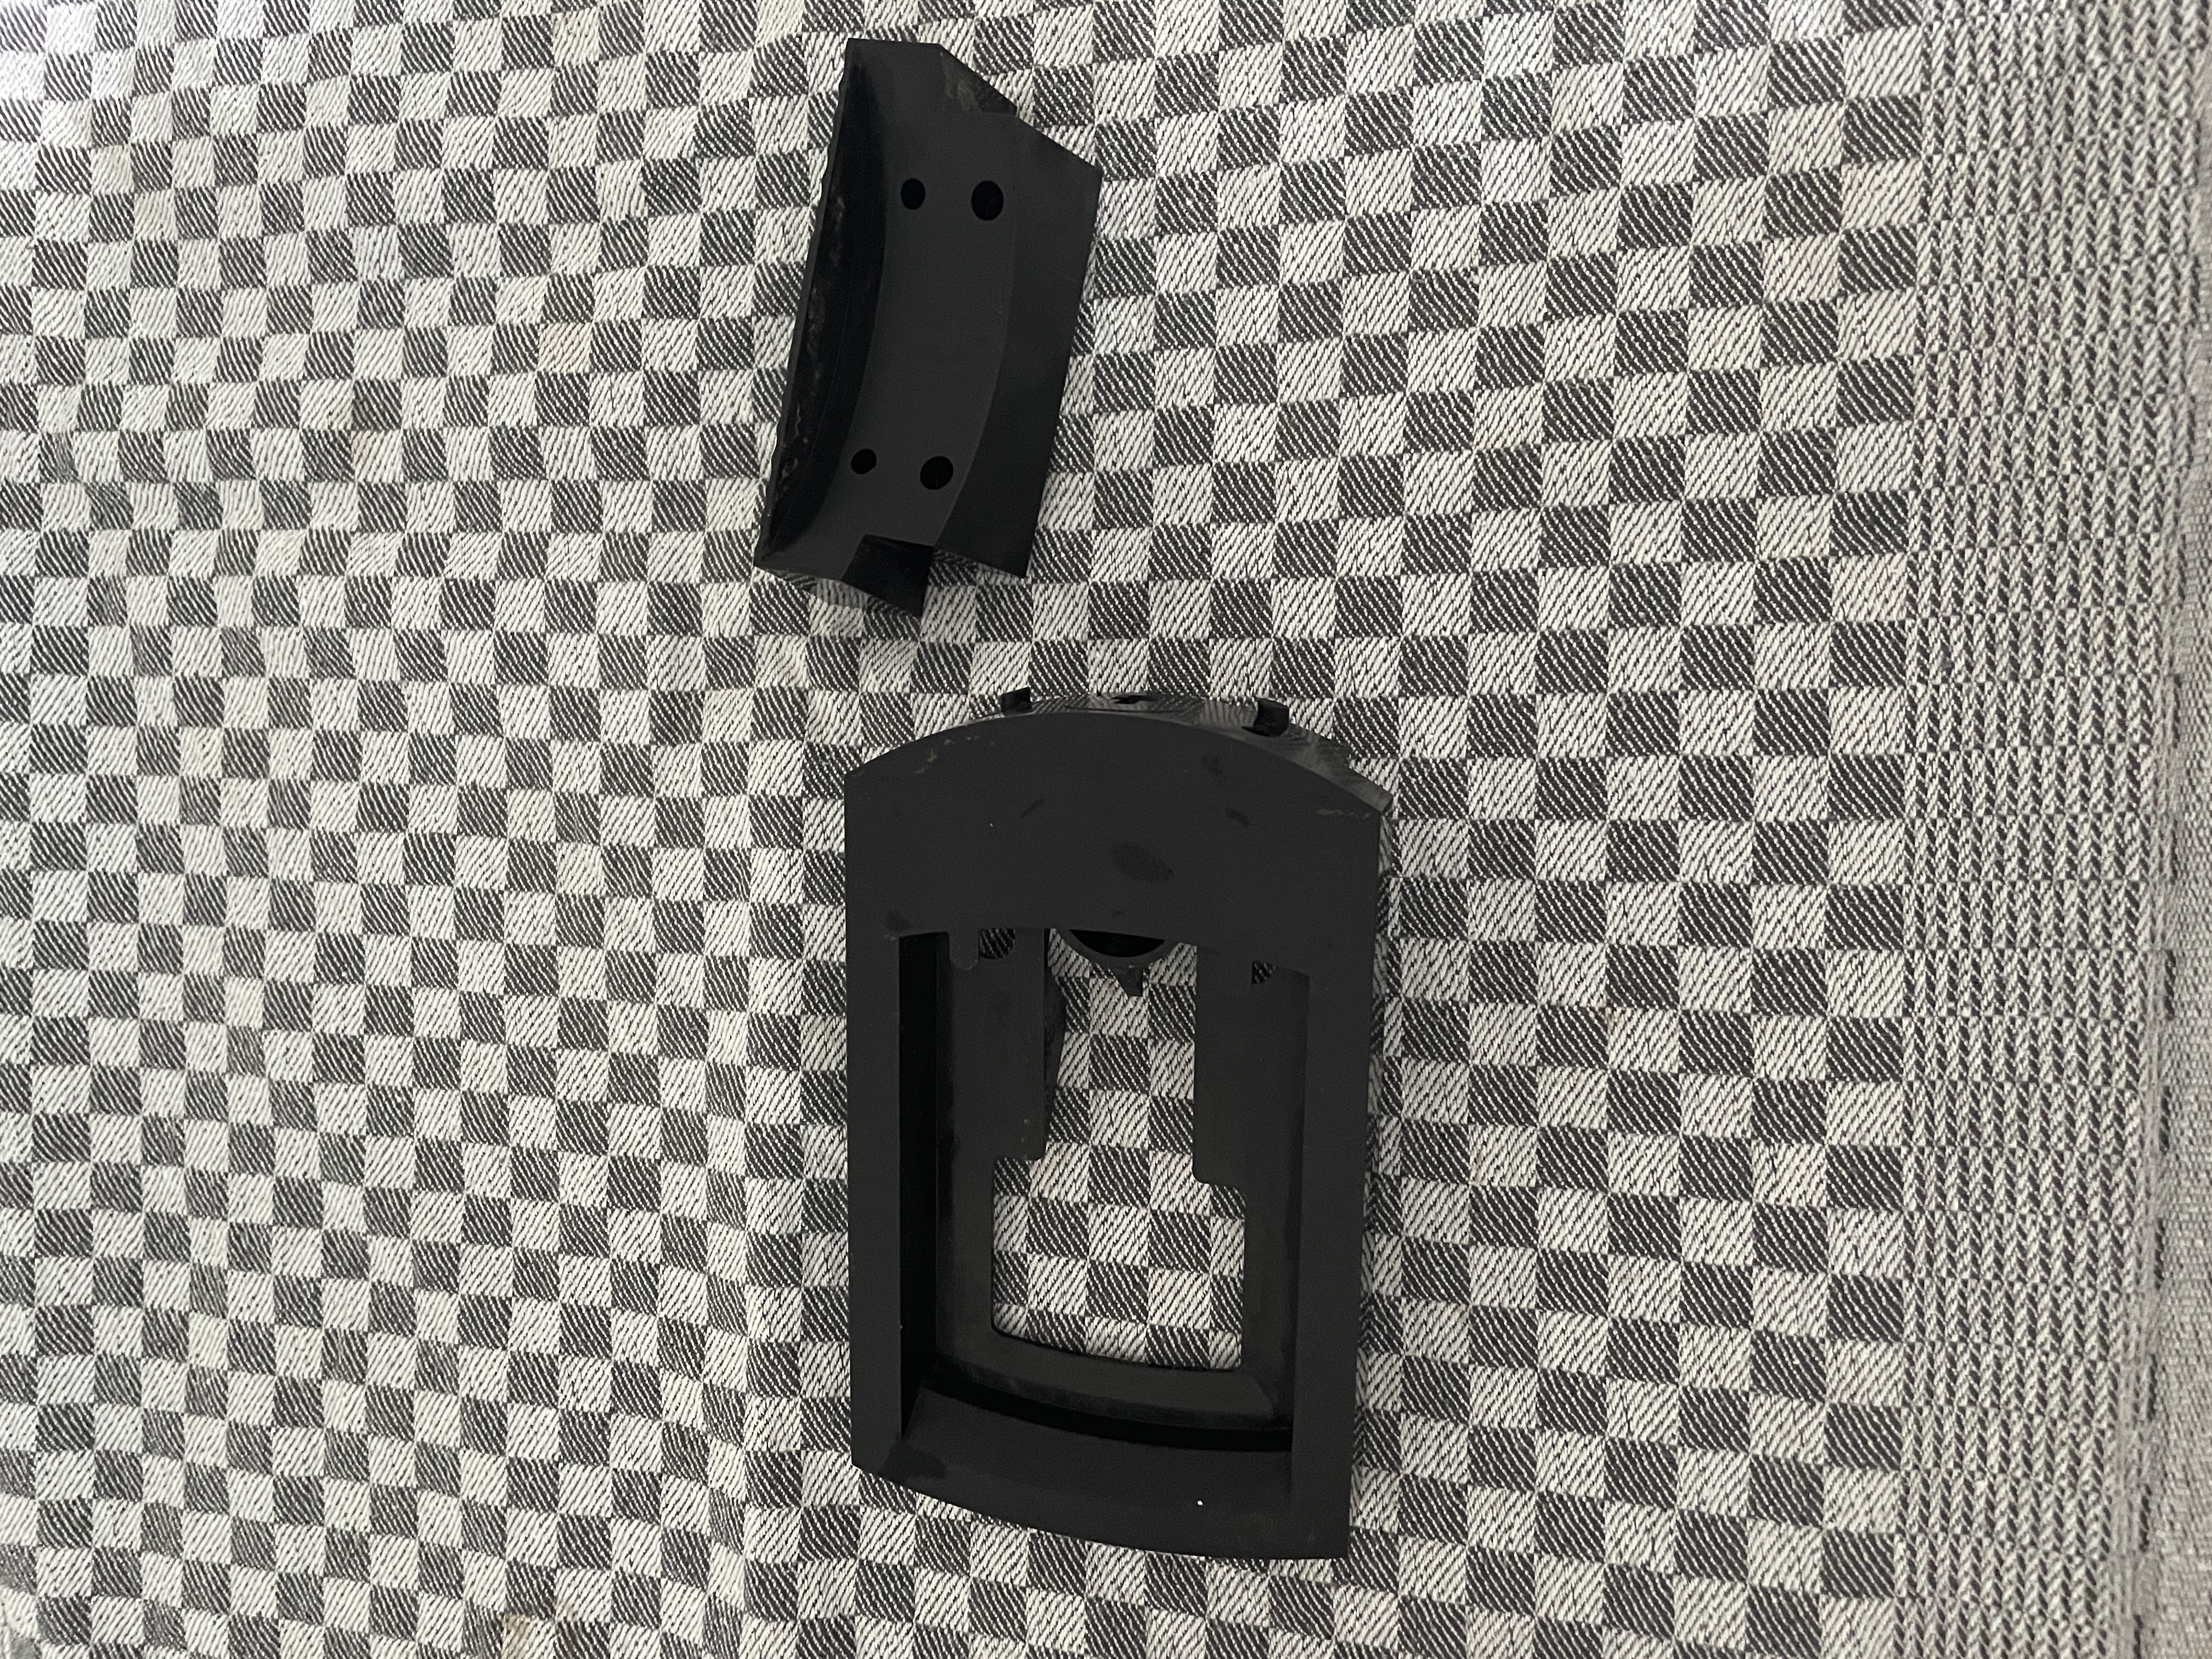
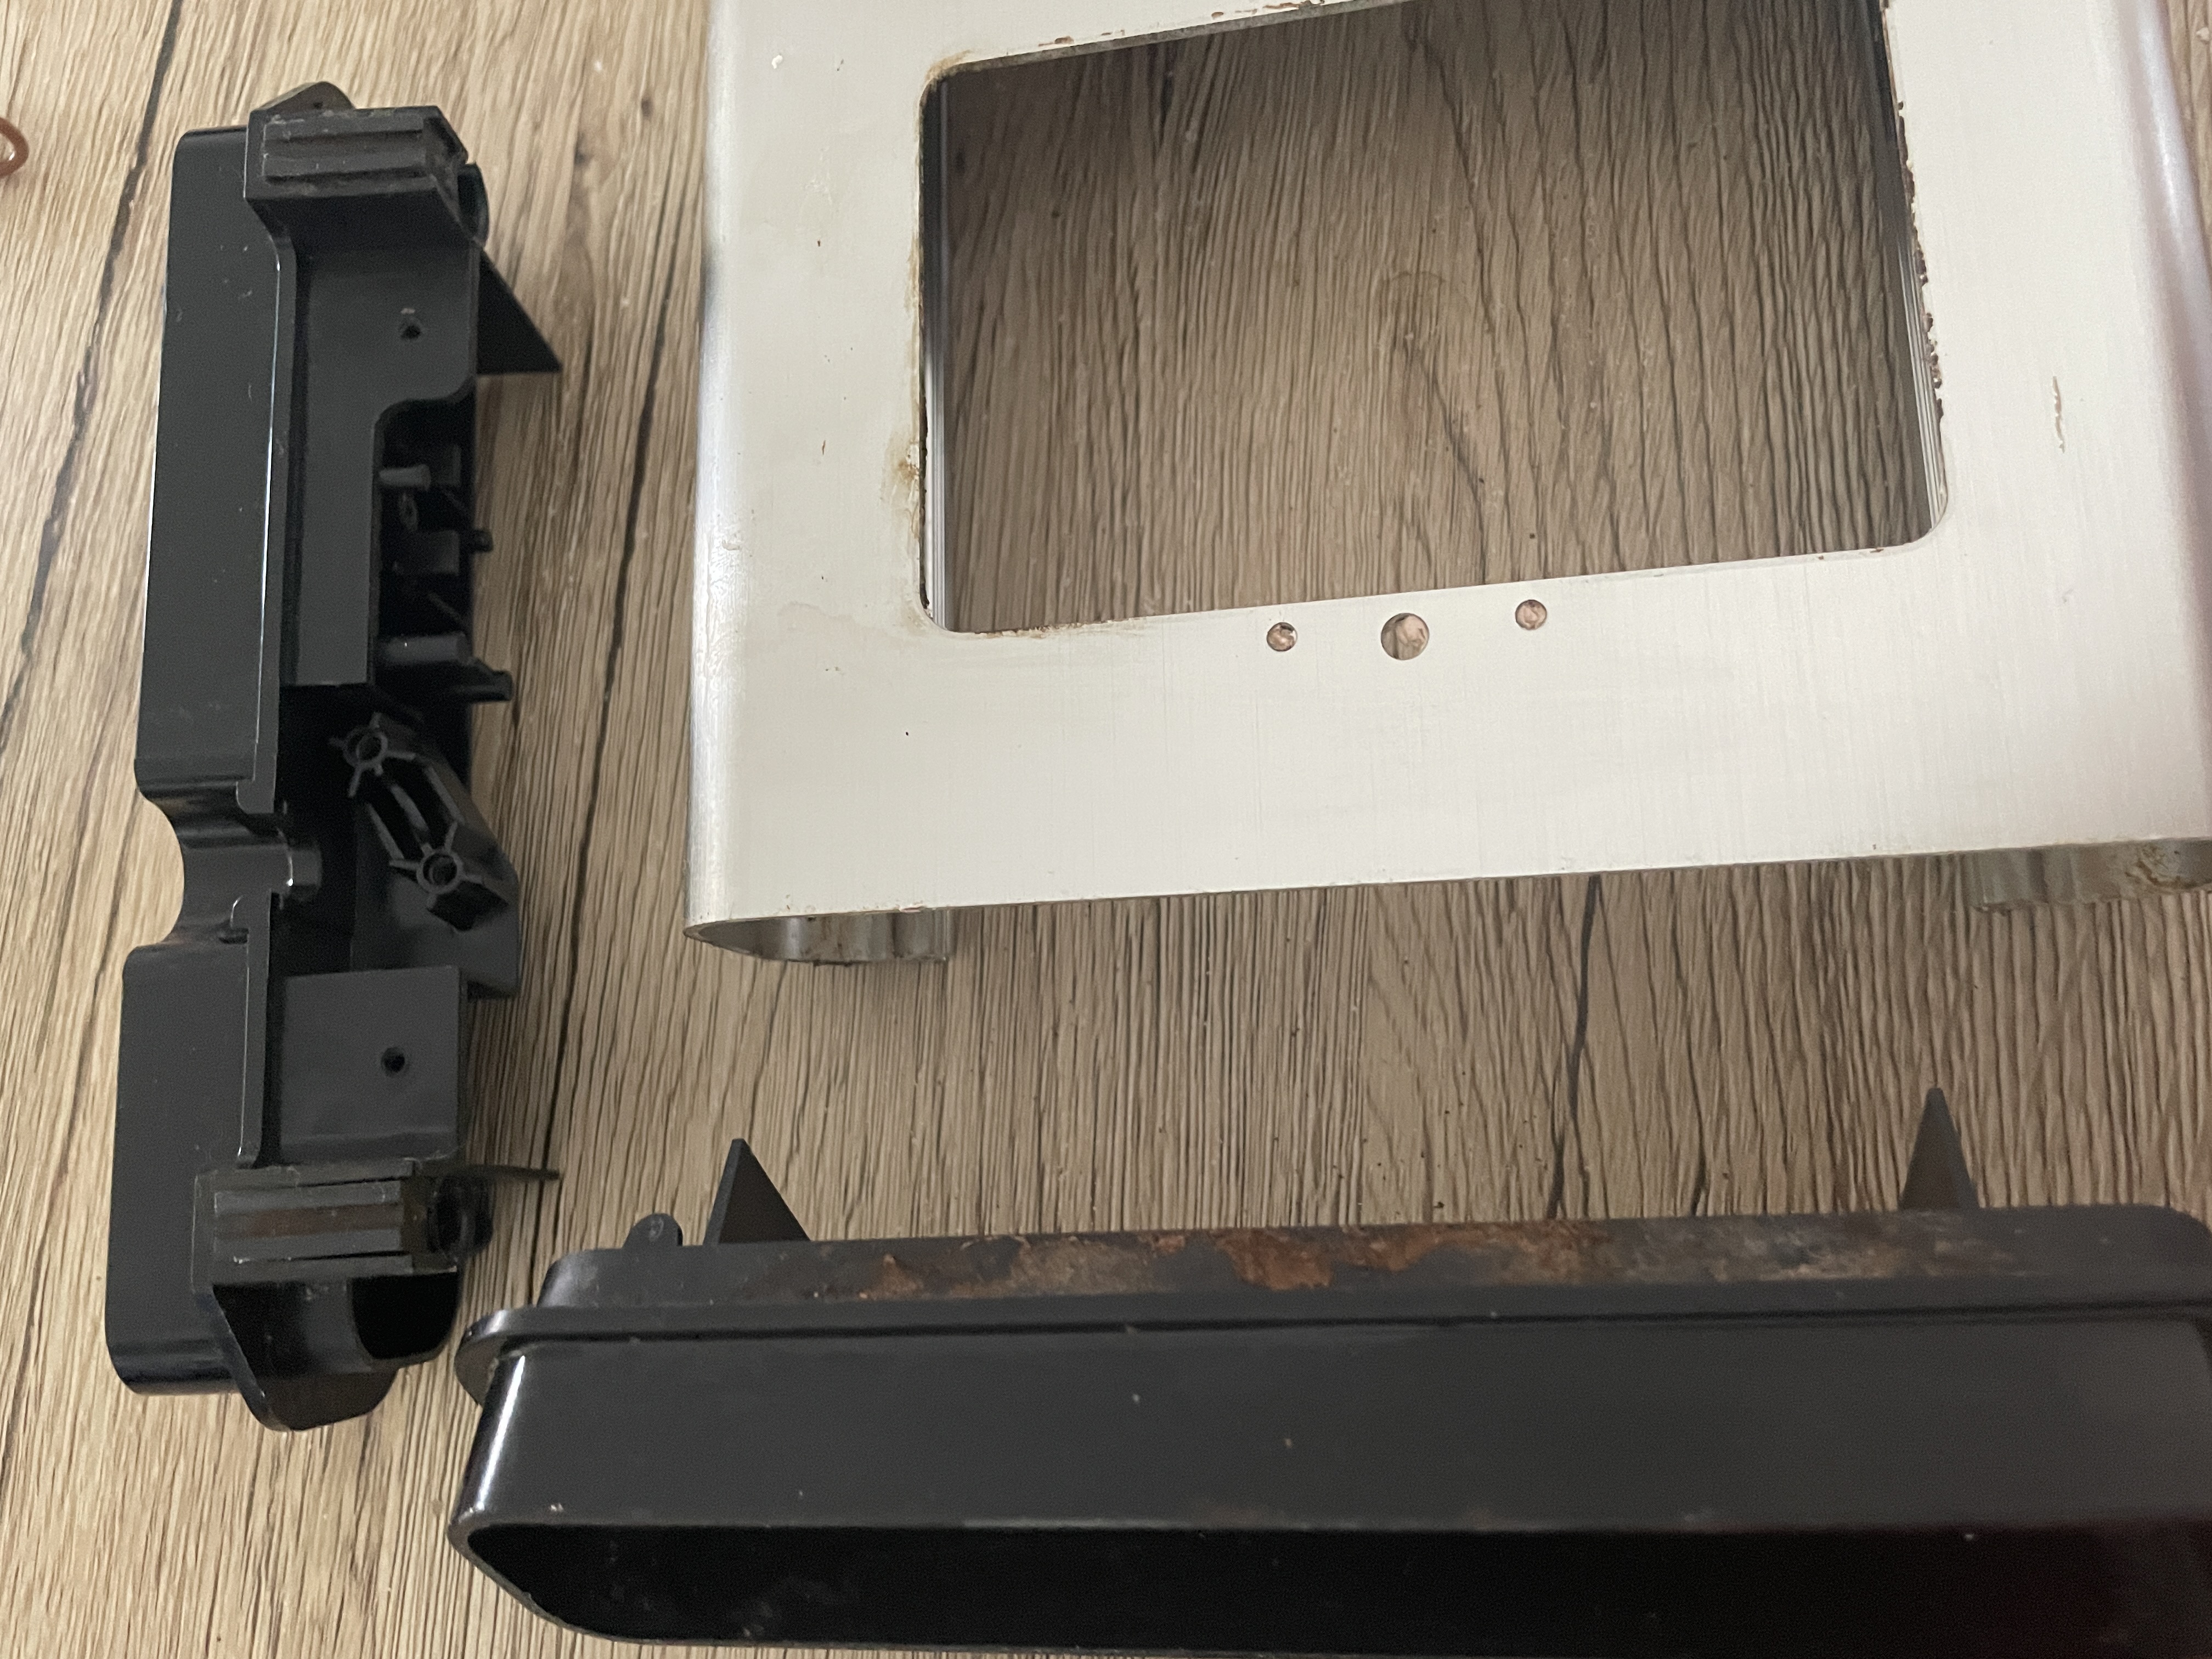
2. Removing The Filter Funnel Holder
The filter funnel holder can be removed by unscrewing the 2 screws on the side of the holder. They are difficult to reach, so I used a magnetic bit holder extender to reach them. This one is by iFixit.
After removing both of the screws, the holder itself can be taken apart into two parts simply by pulling them apart slightly. It can get greasy under there, so it is suggested to clean it up before reassembling.
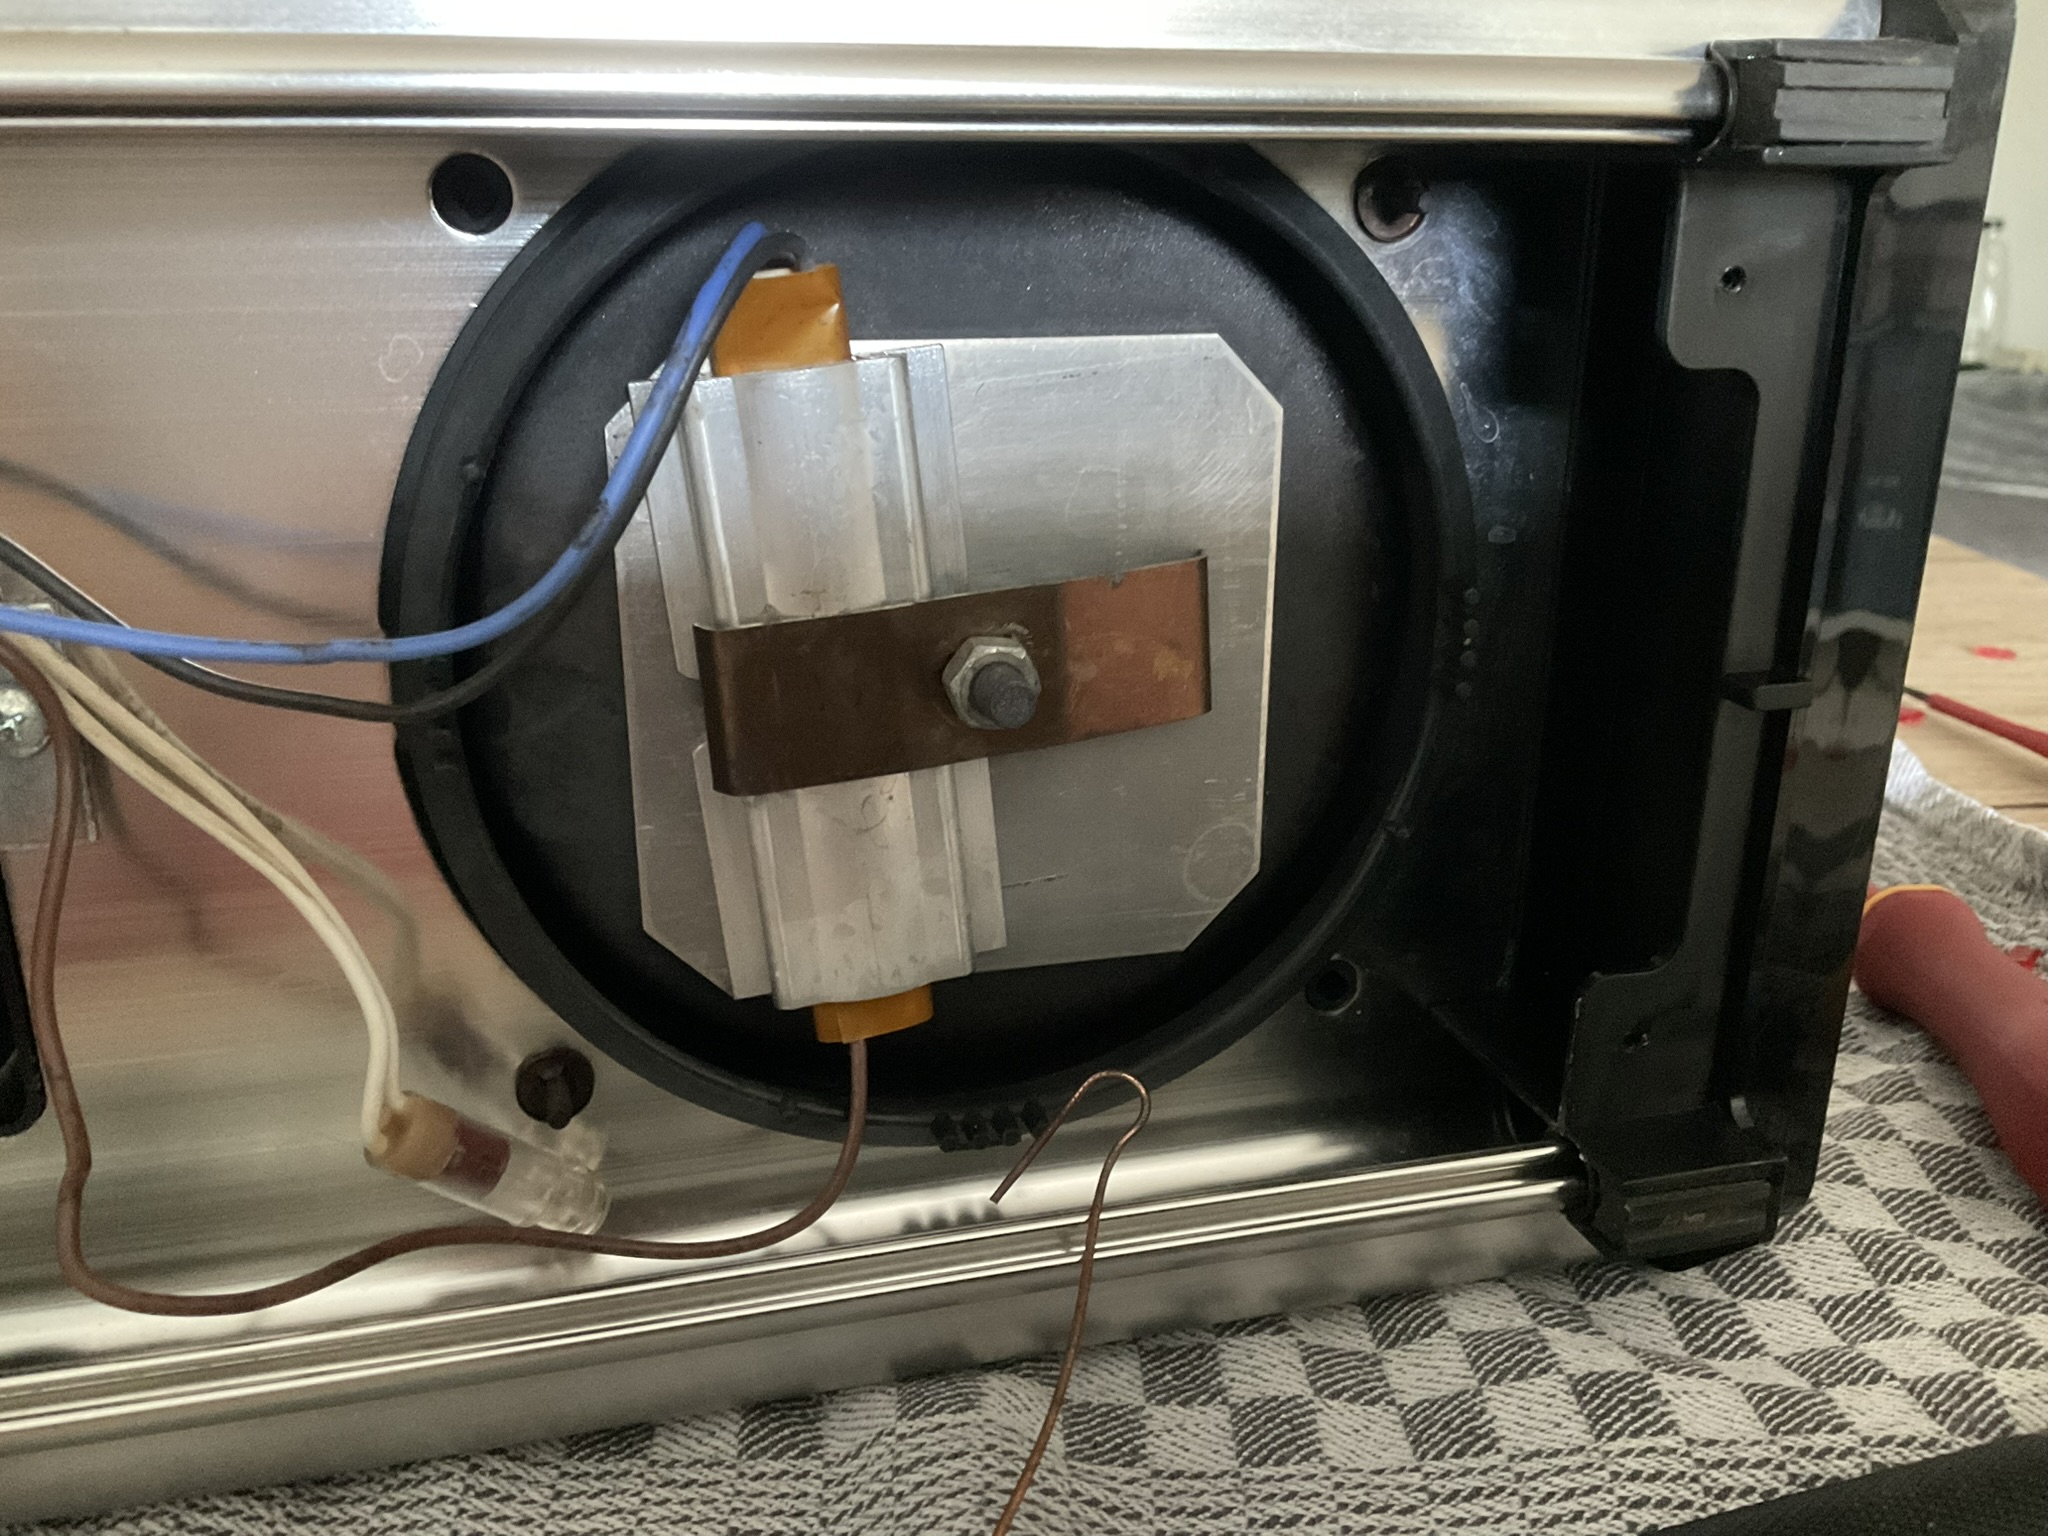
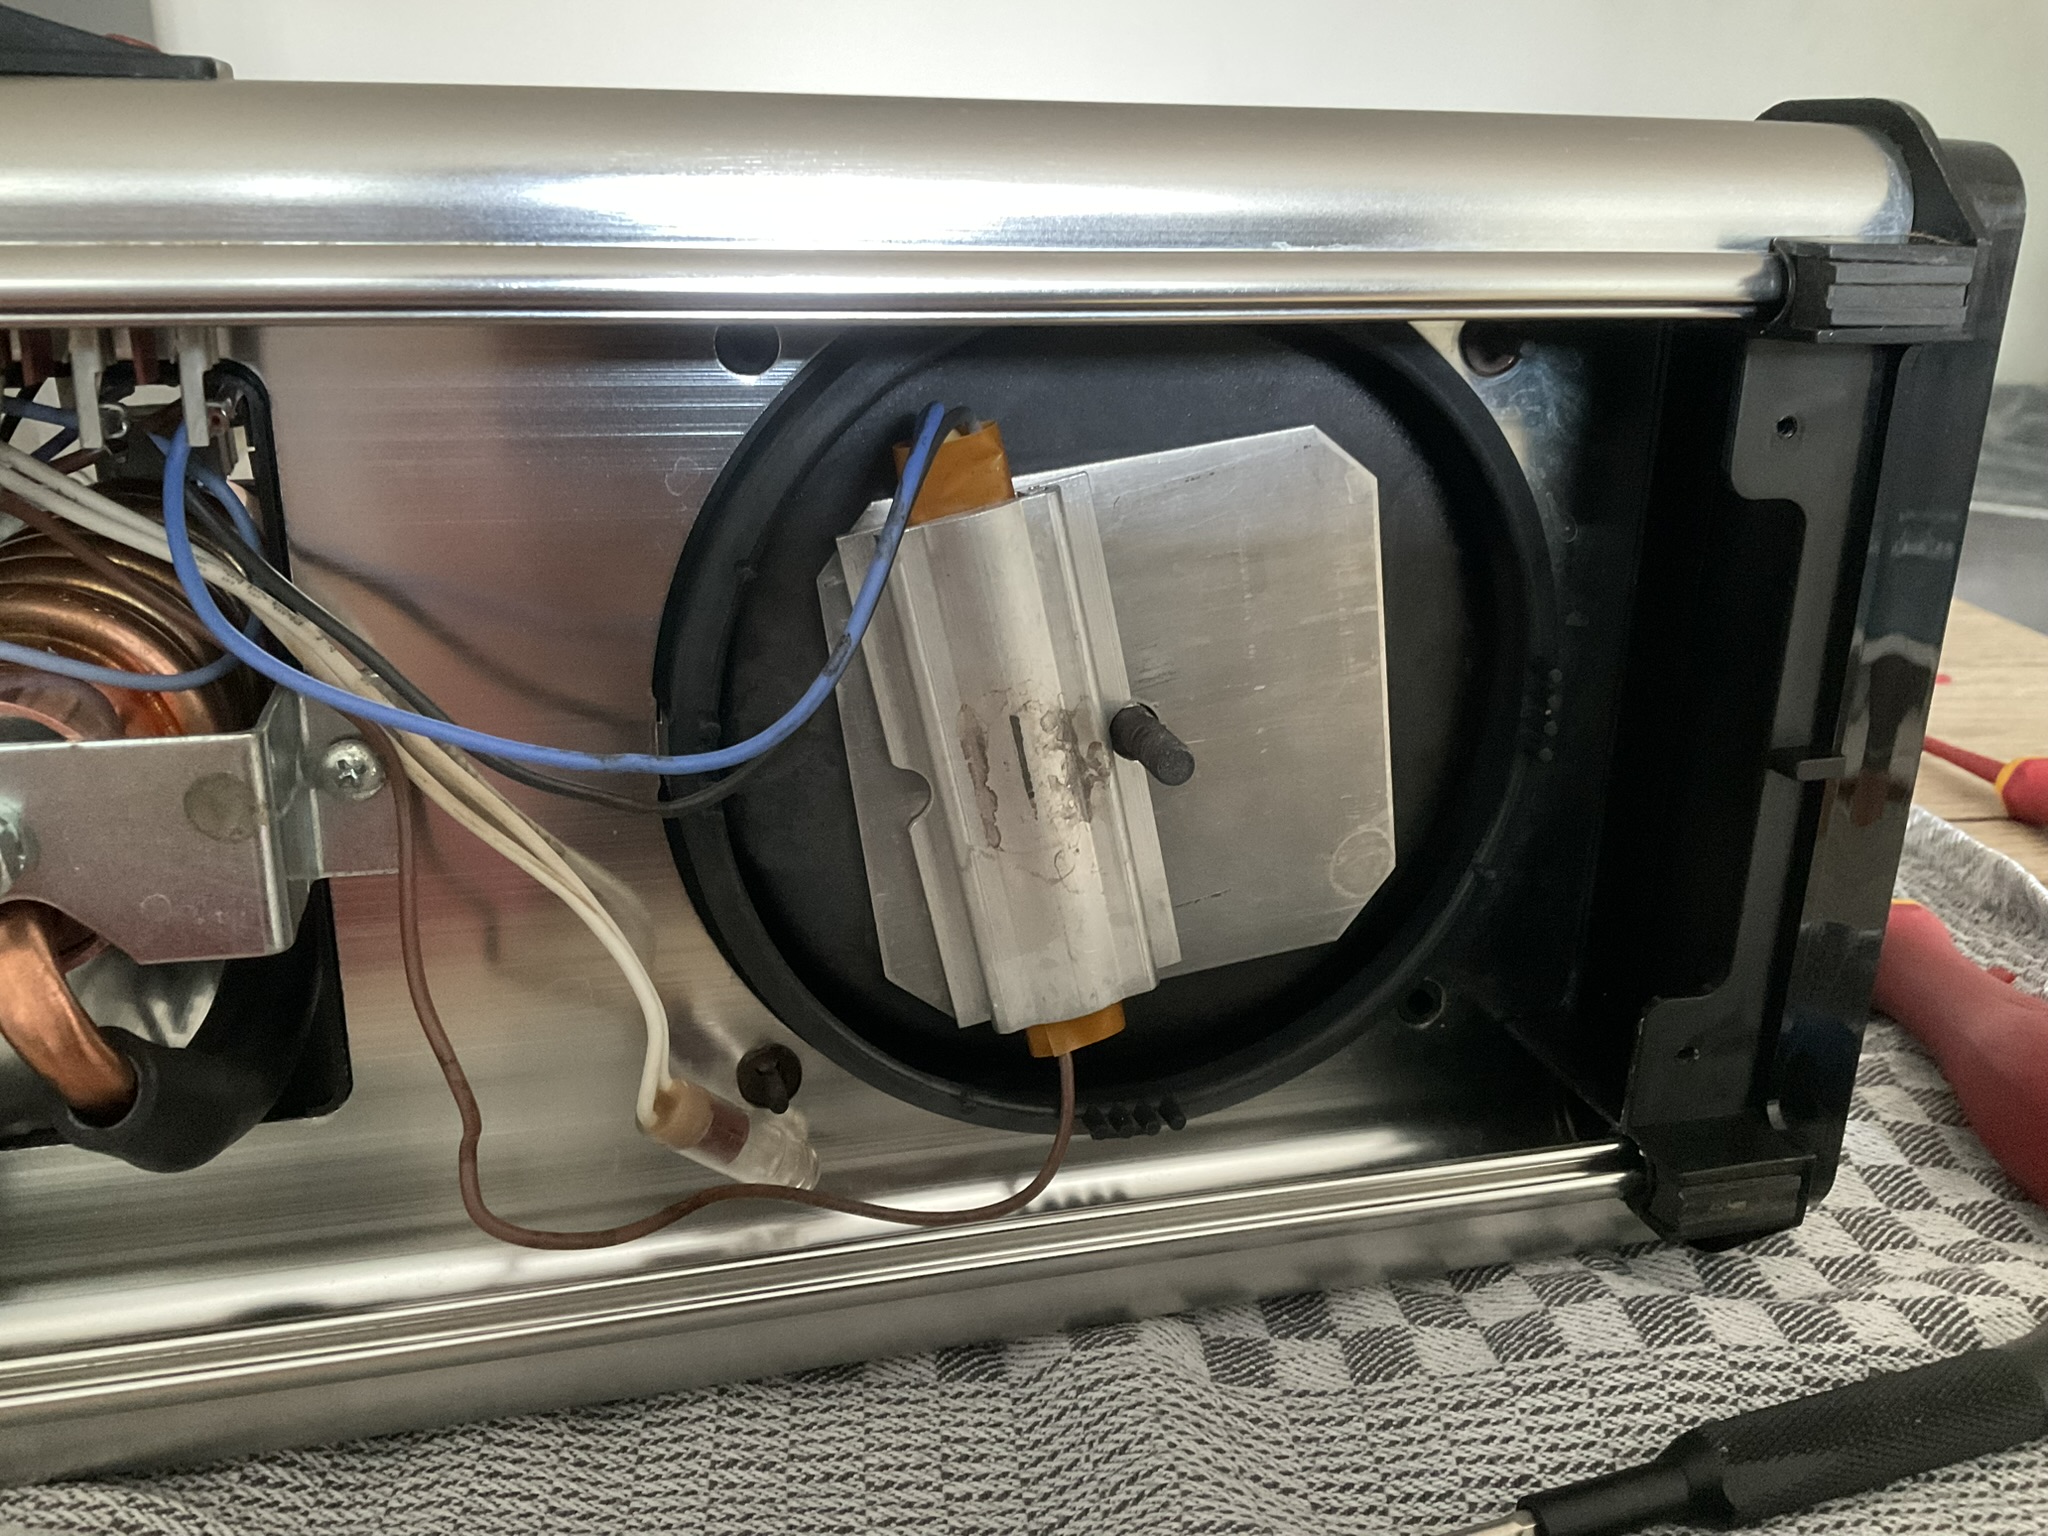
3. Removing The Floating Element Cover
Carefully remove the floating element cover by prying it open with a flathead screwdriver.

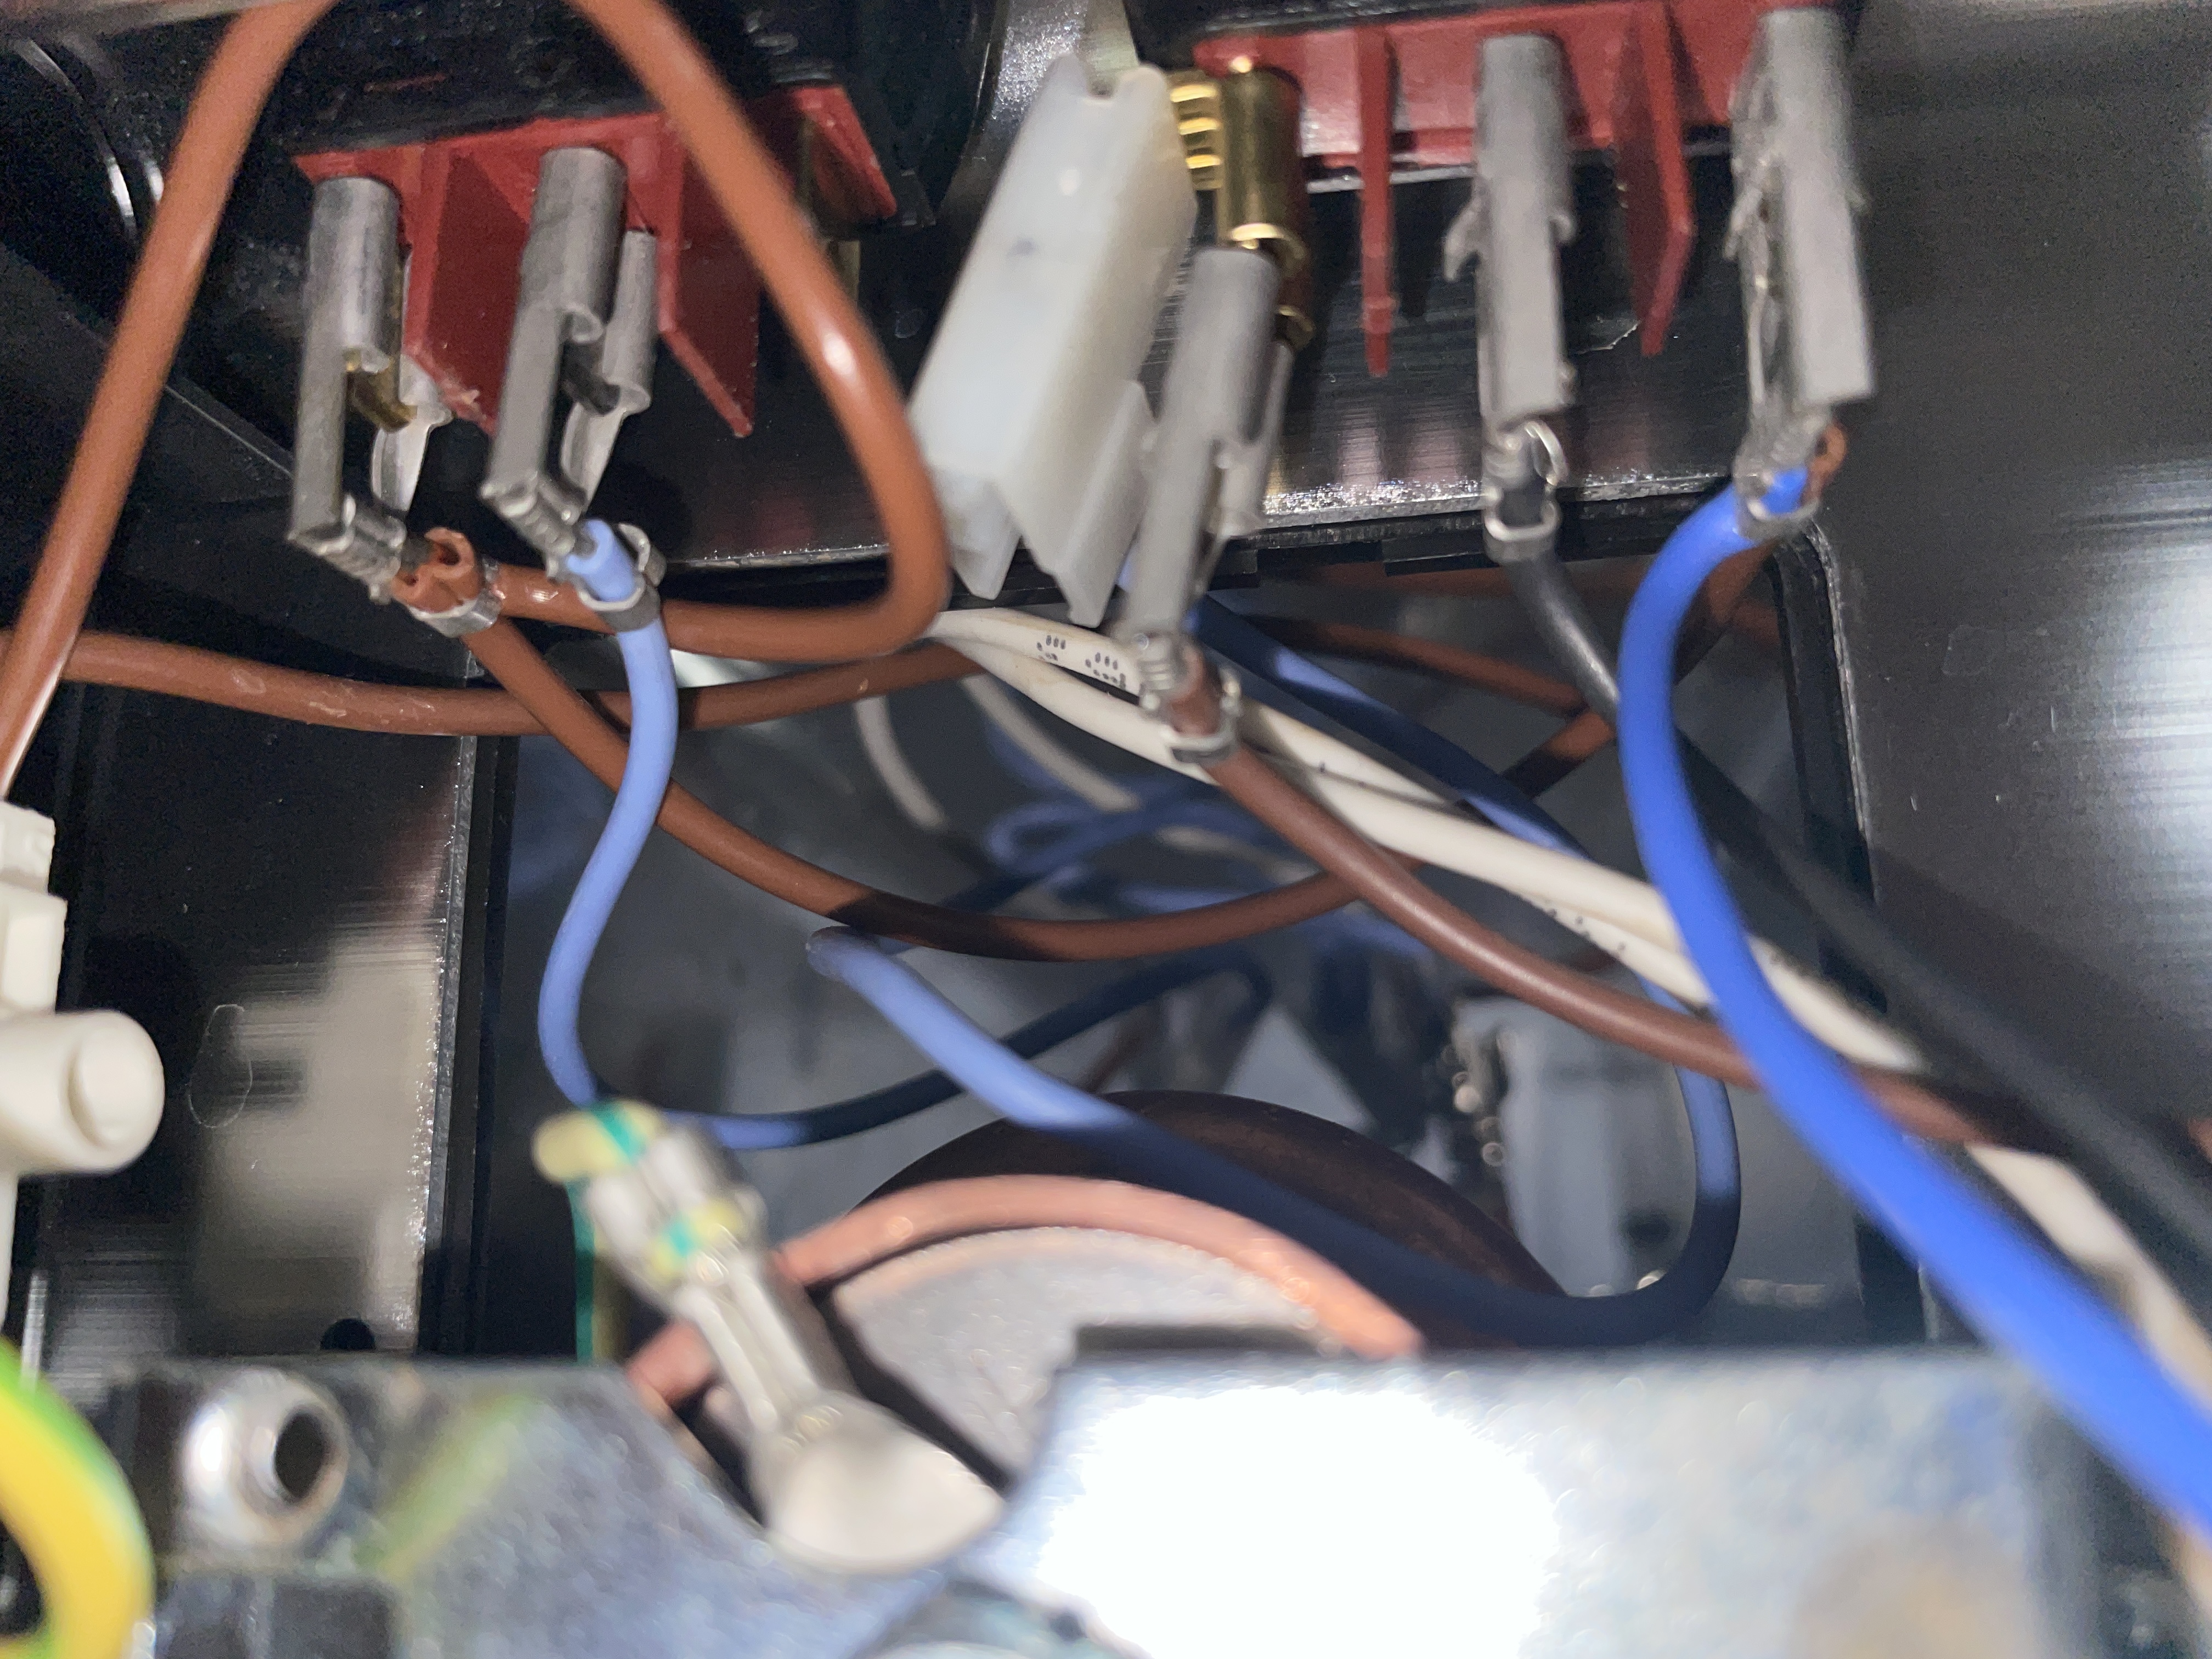
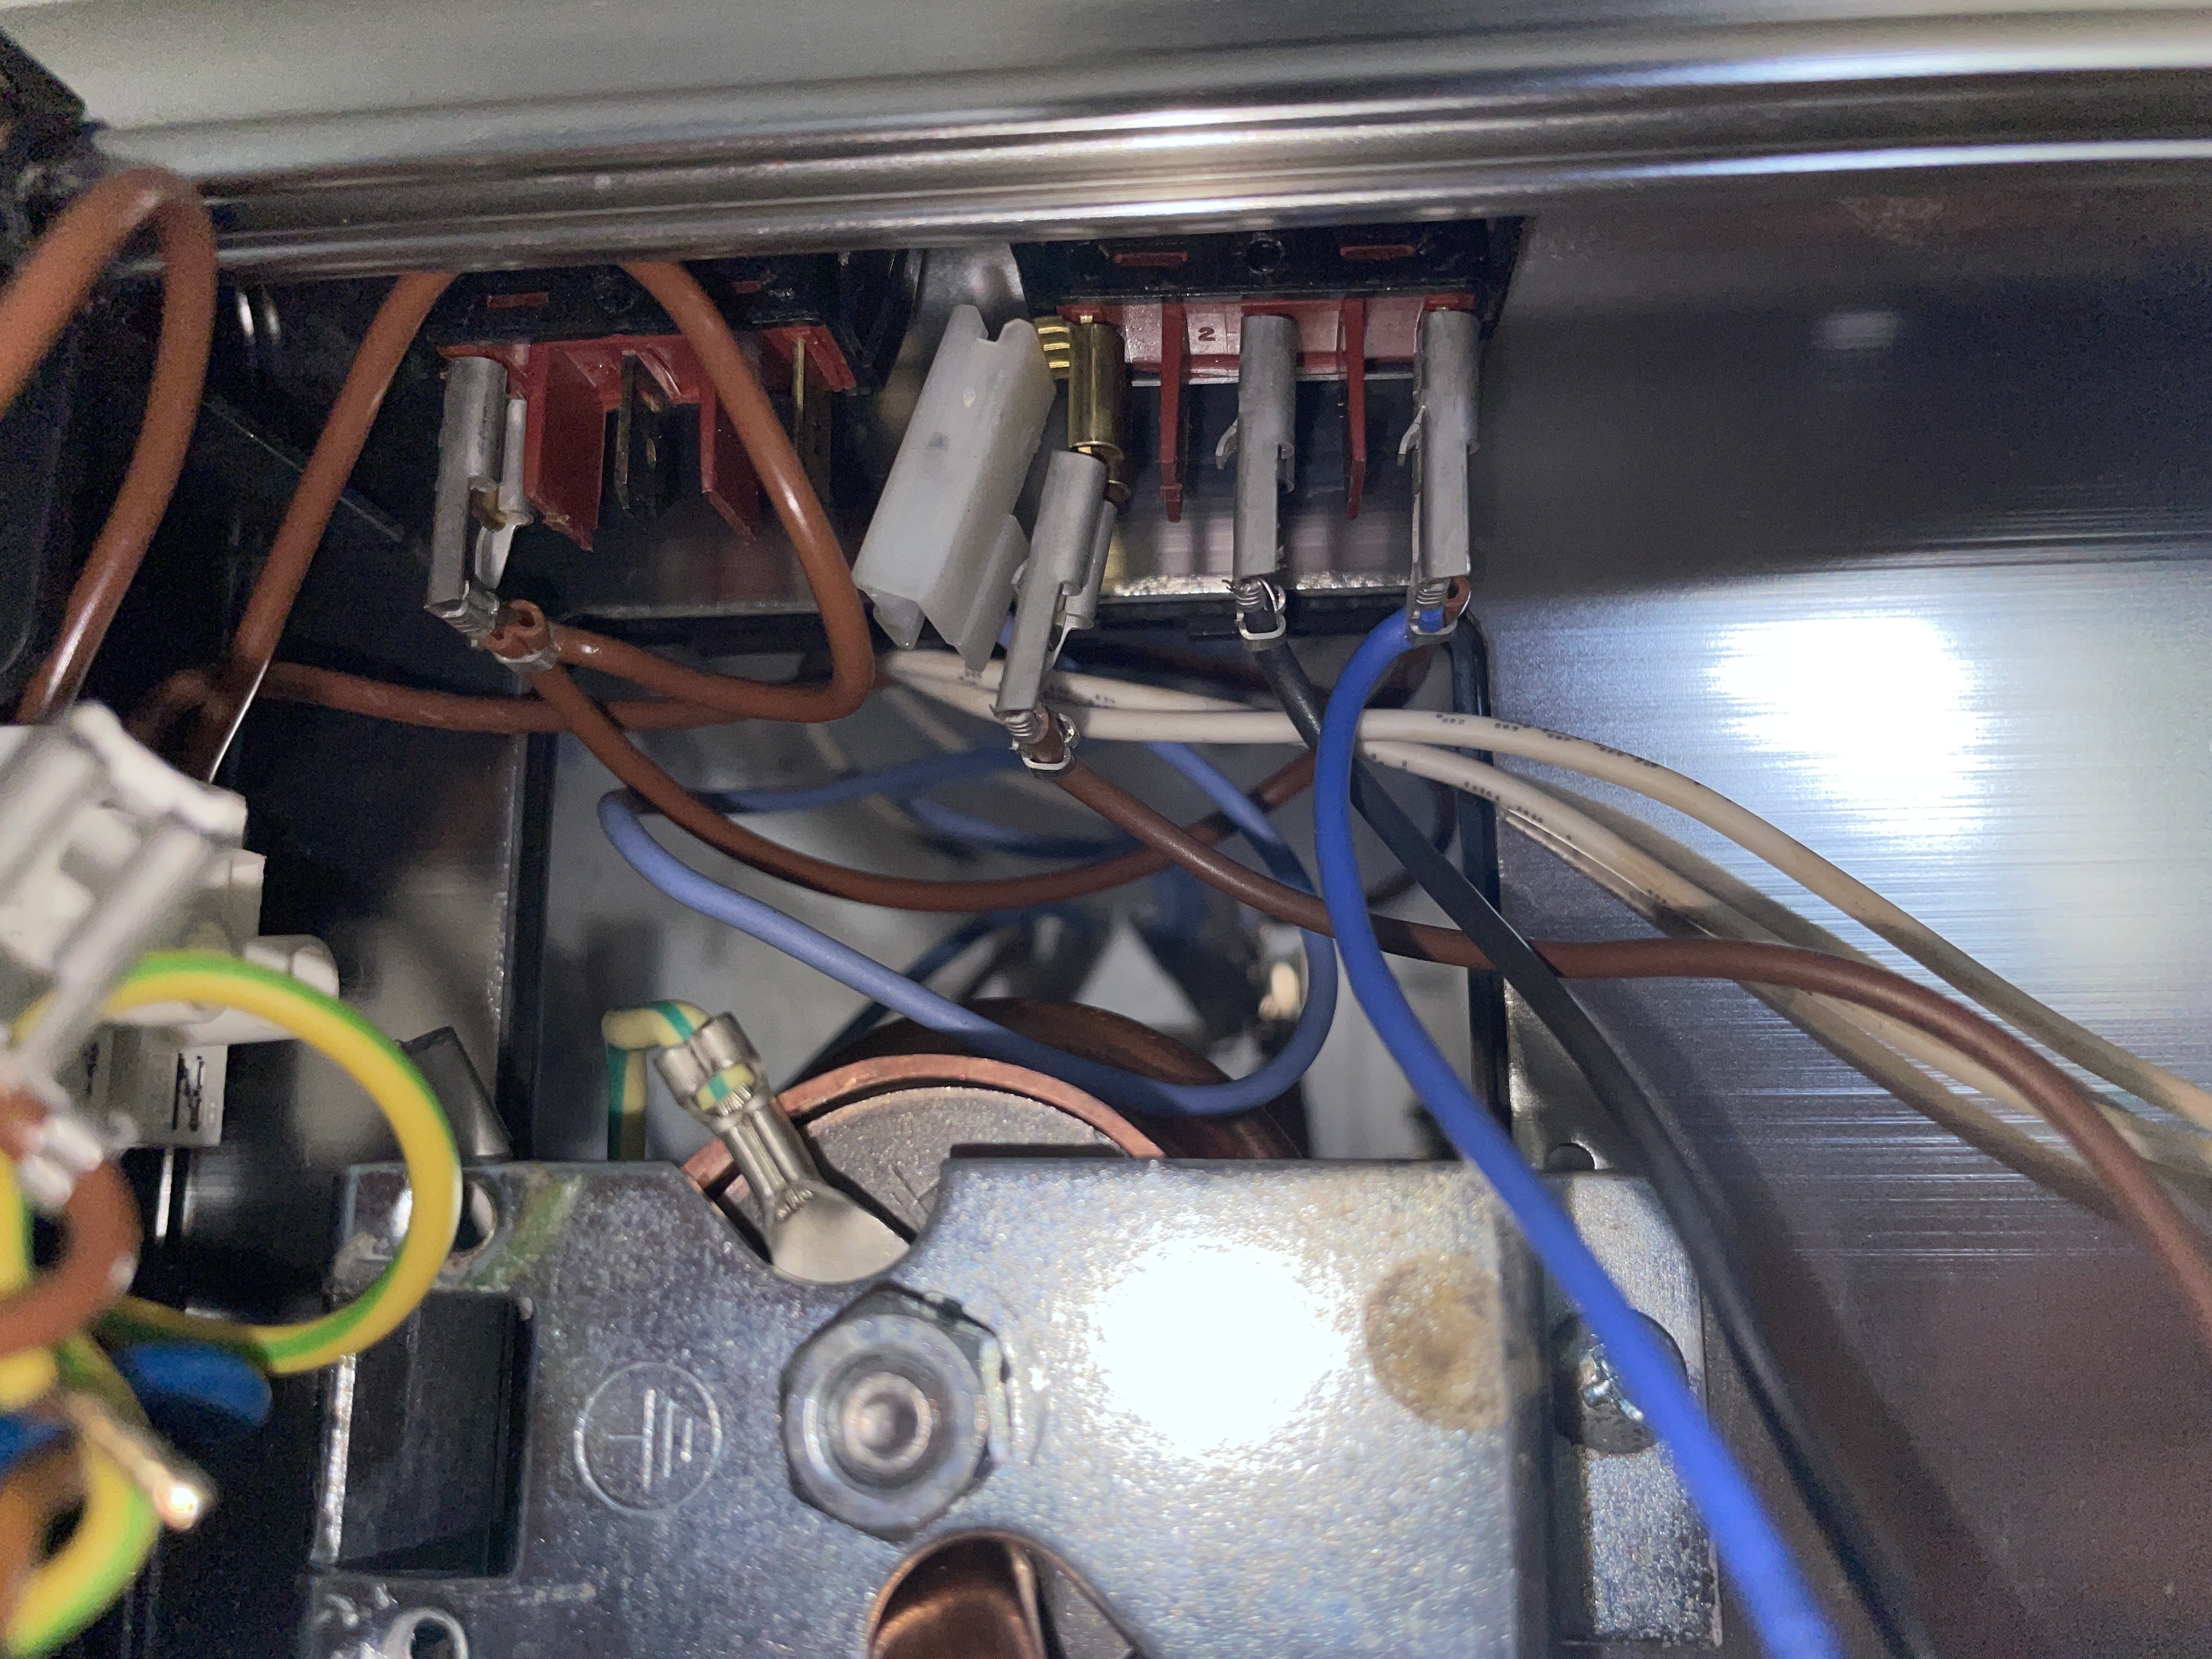
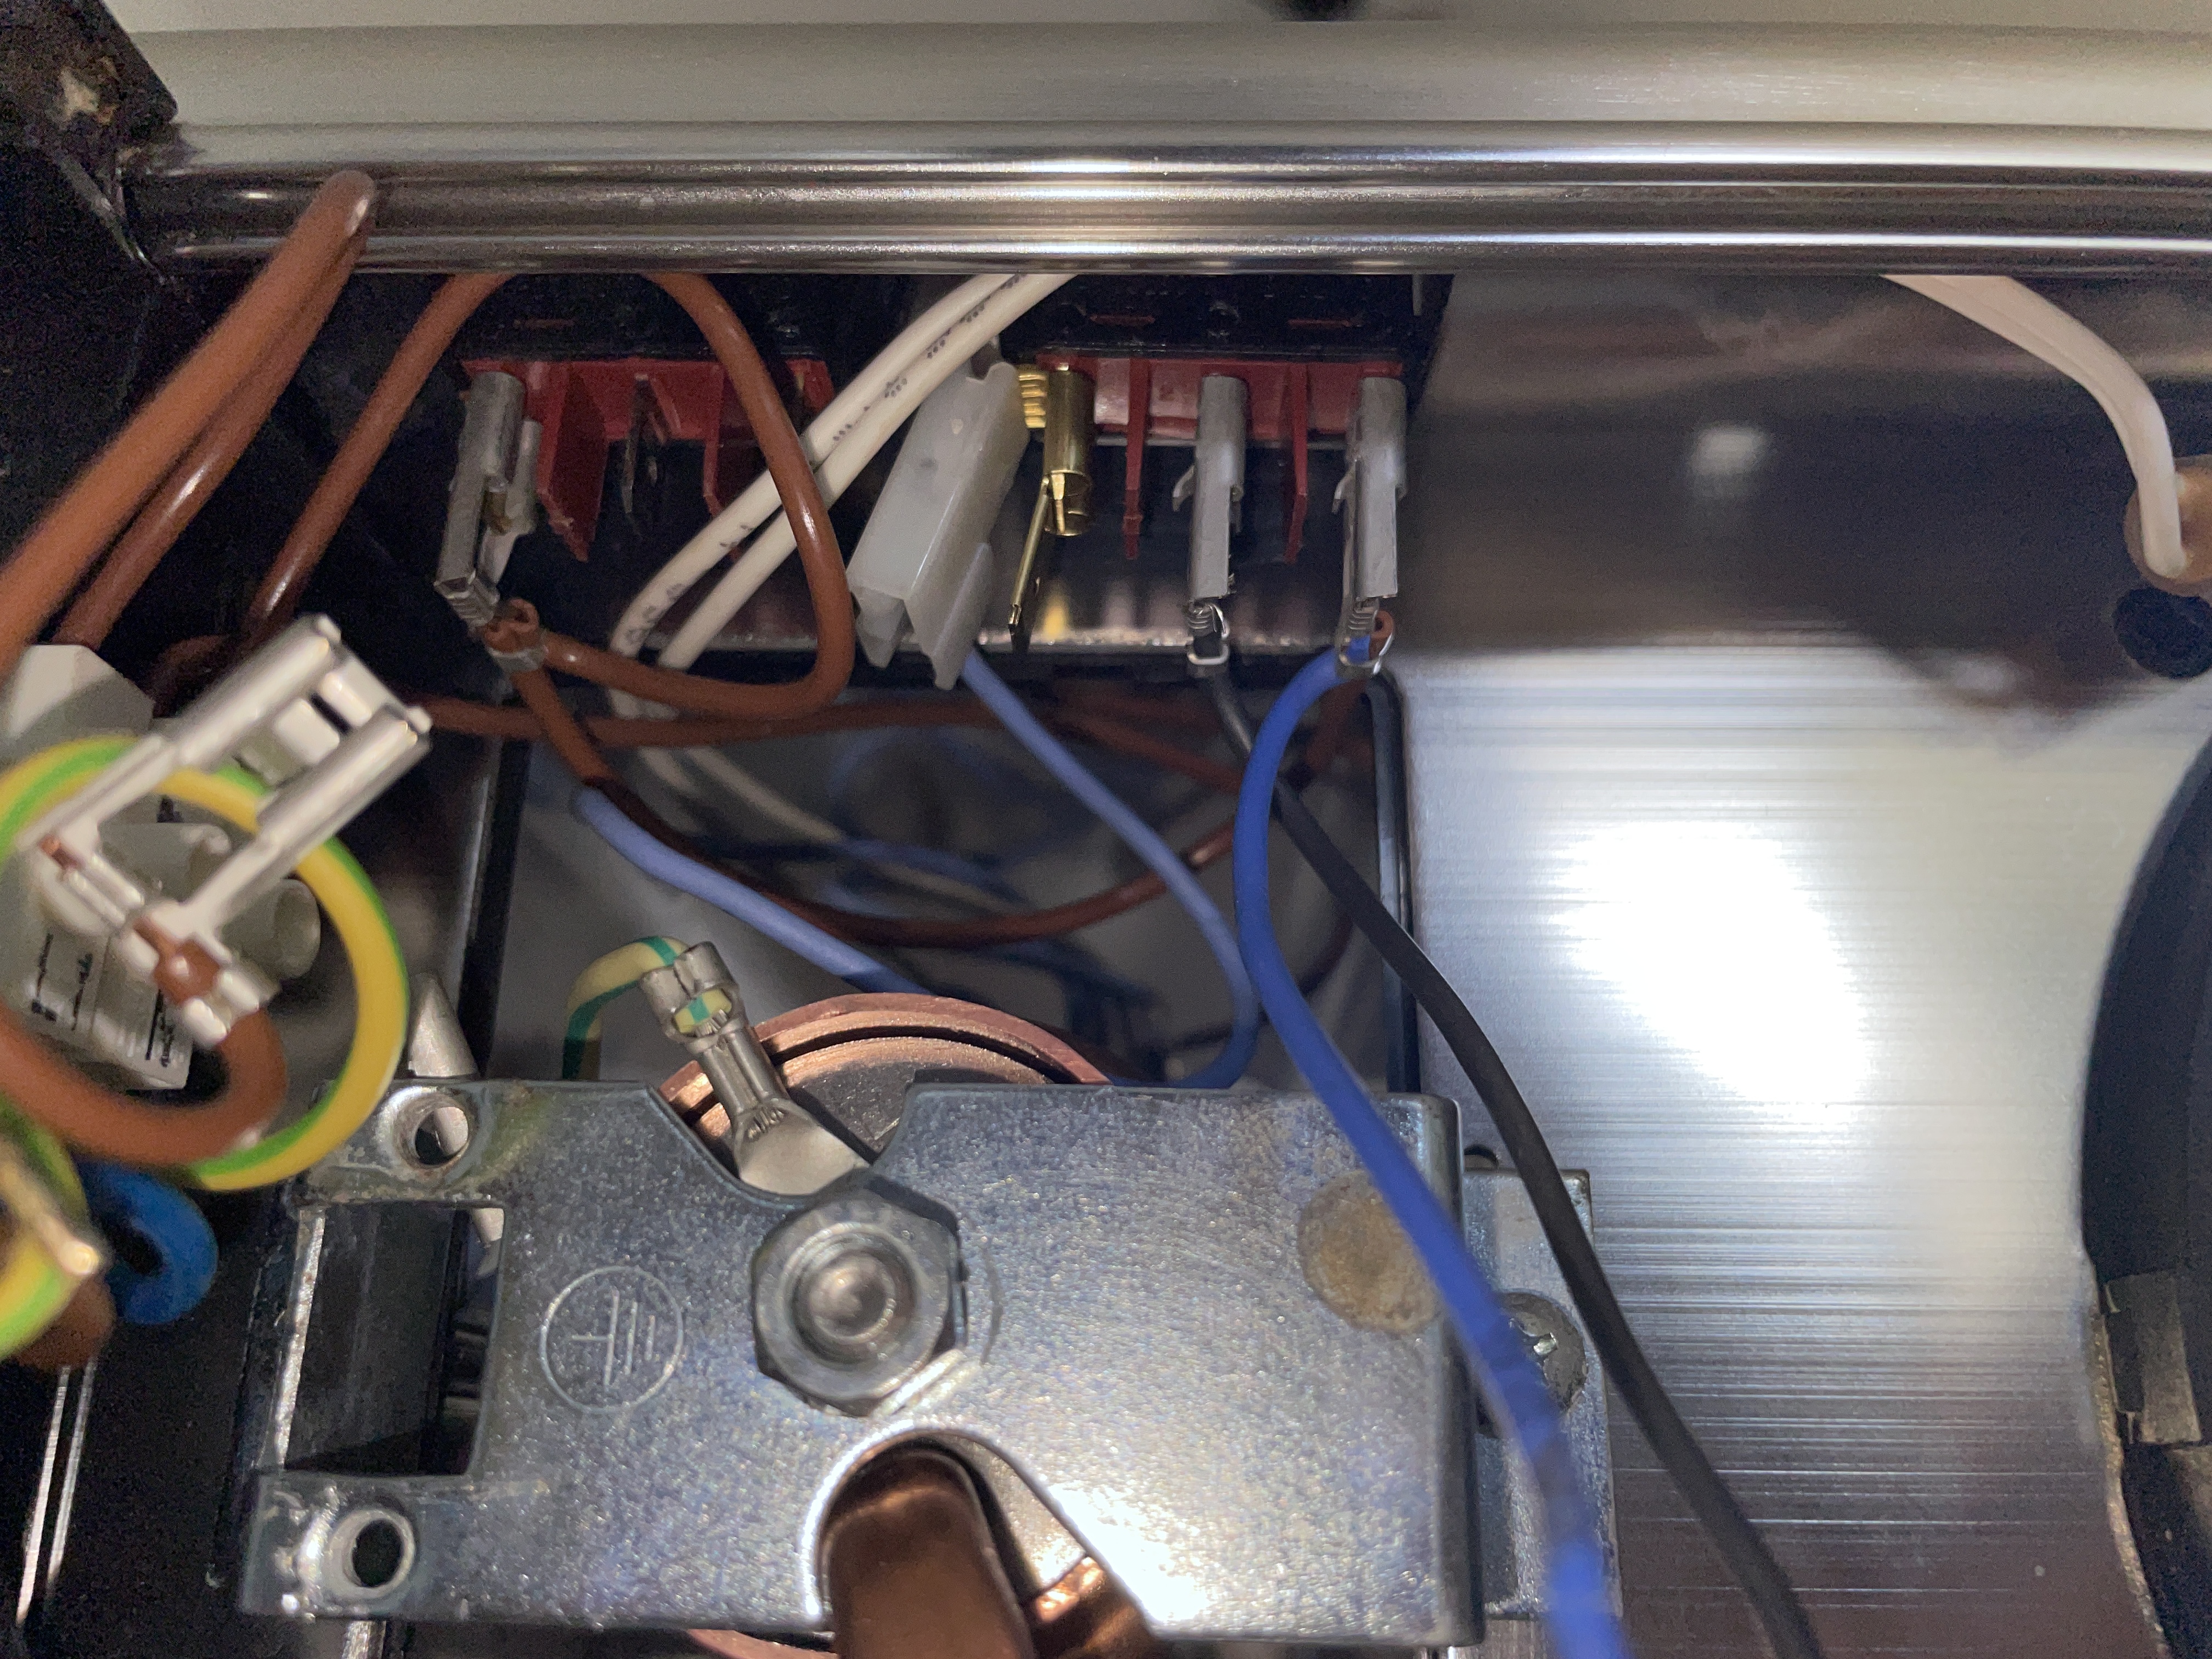
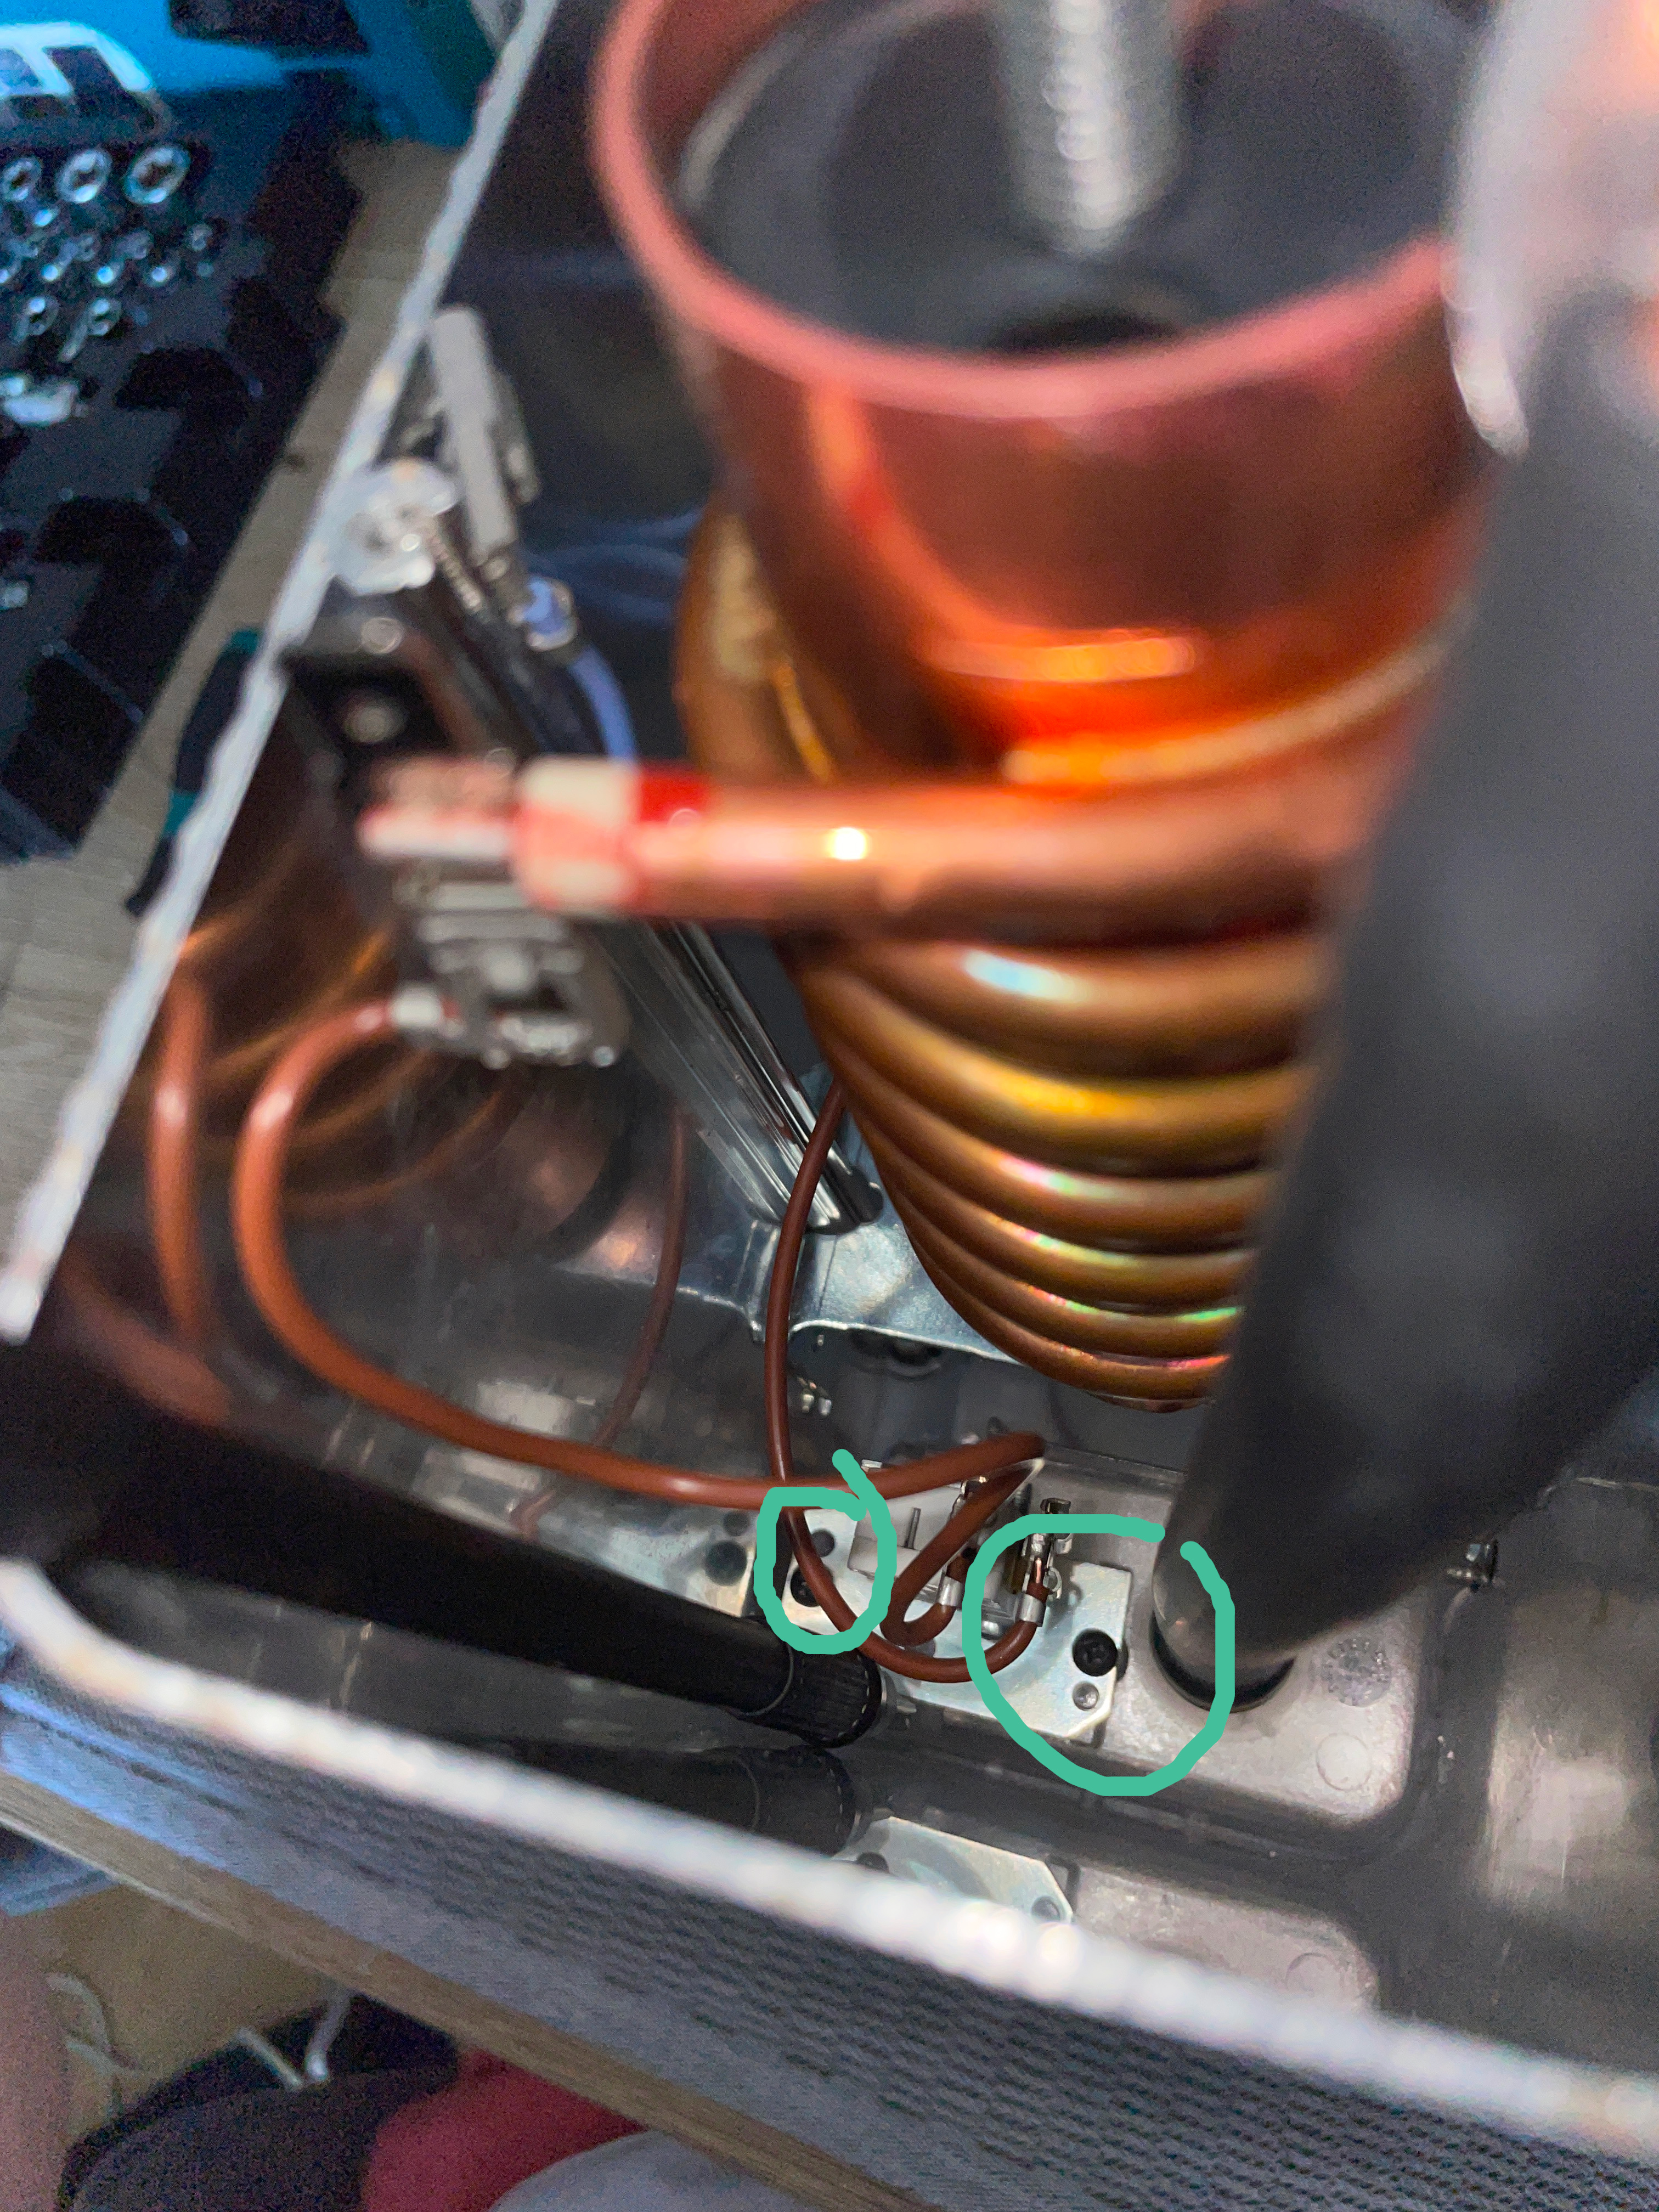
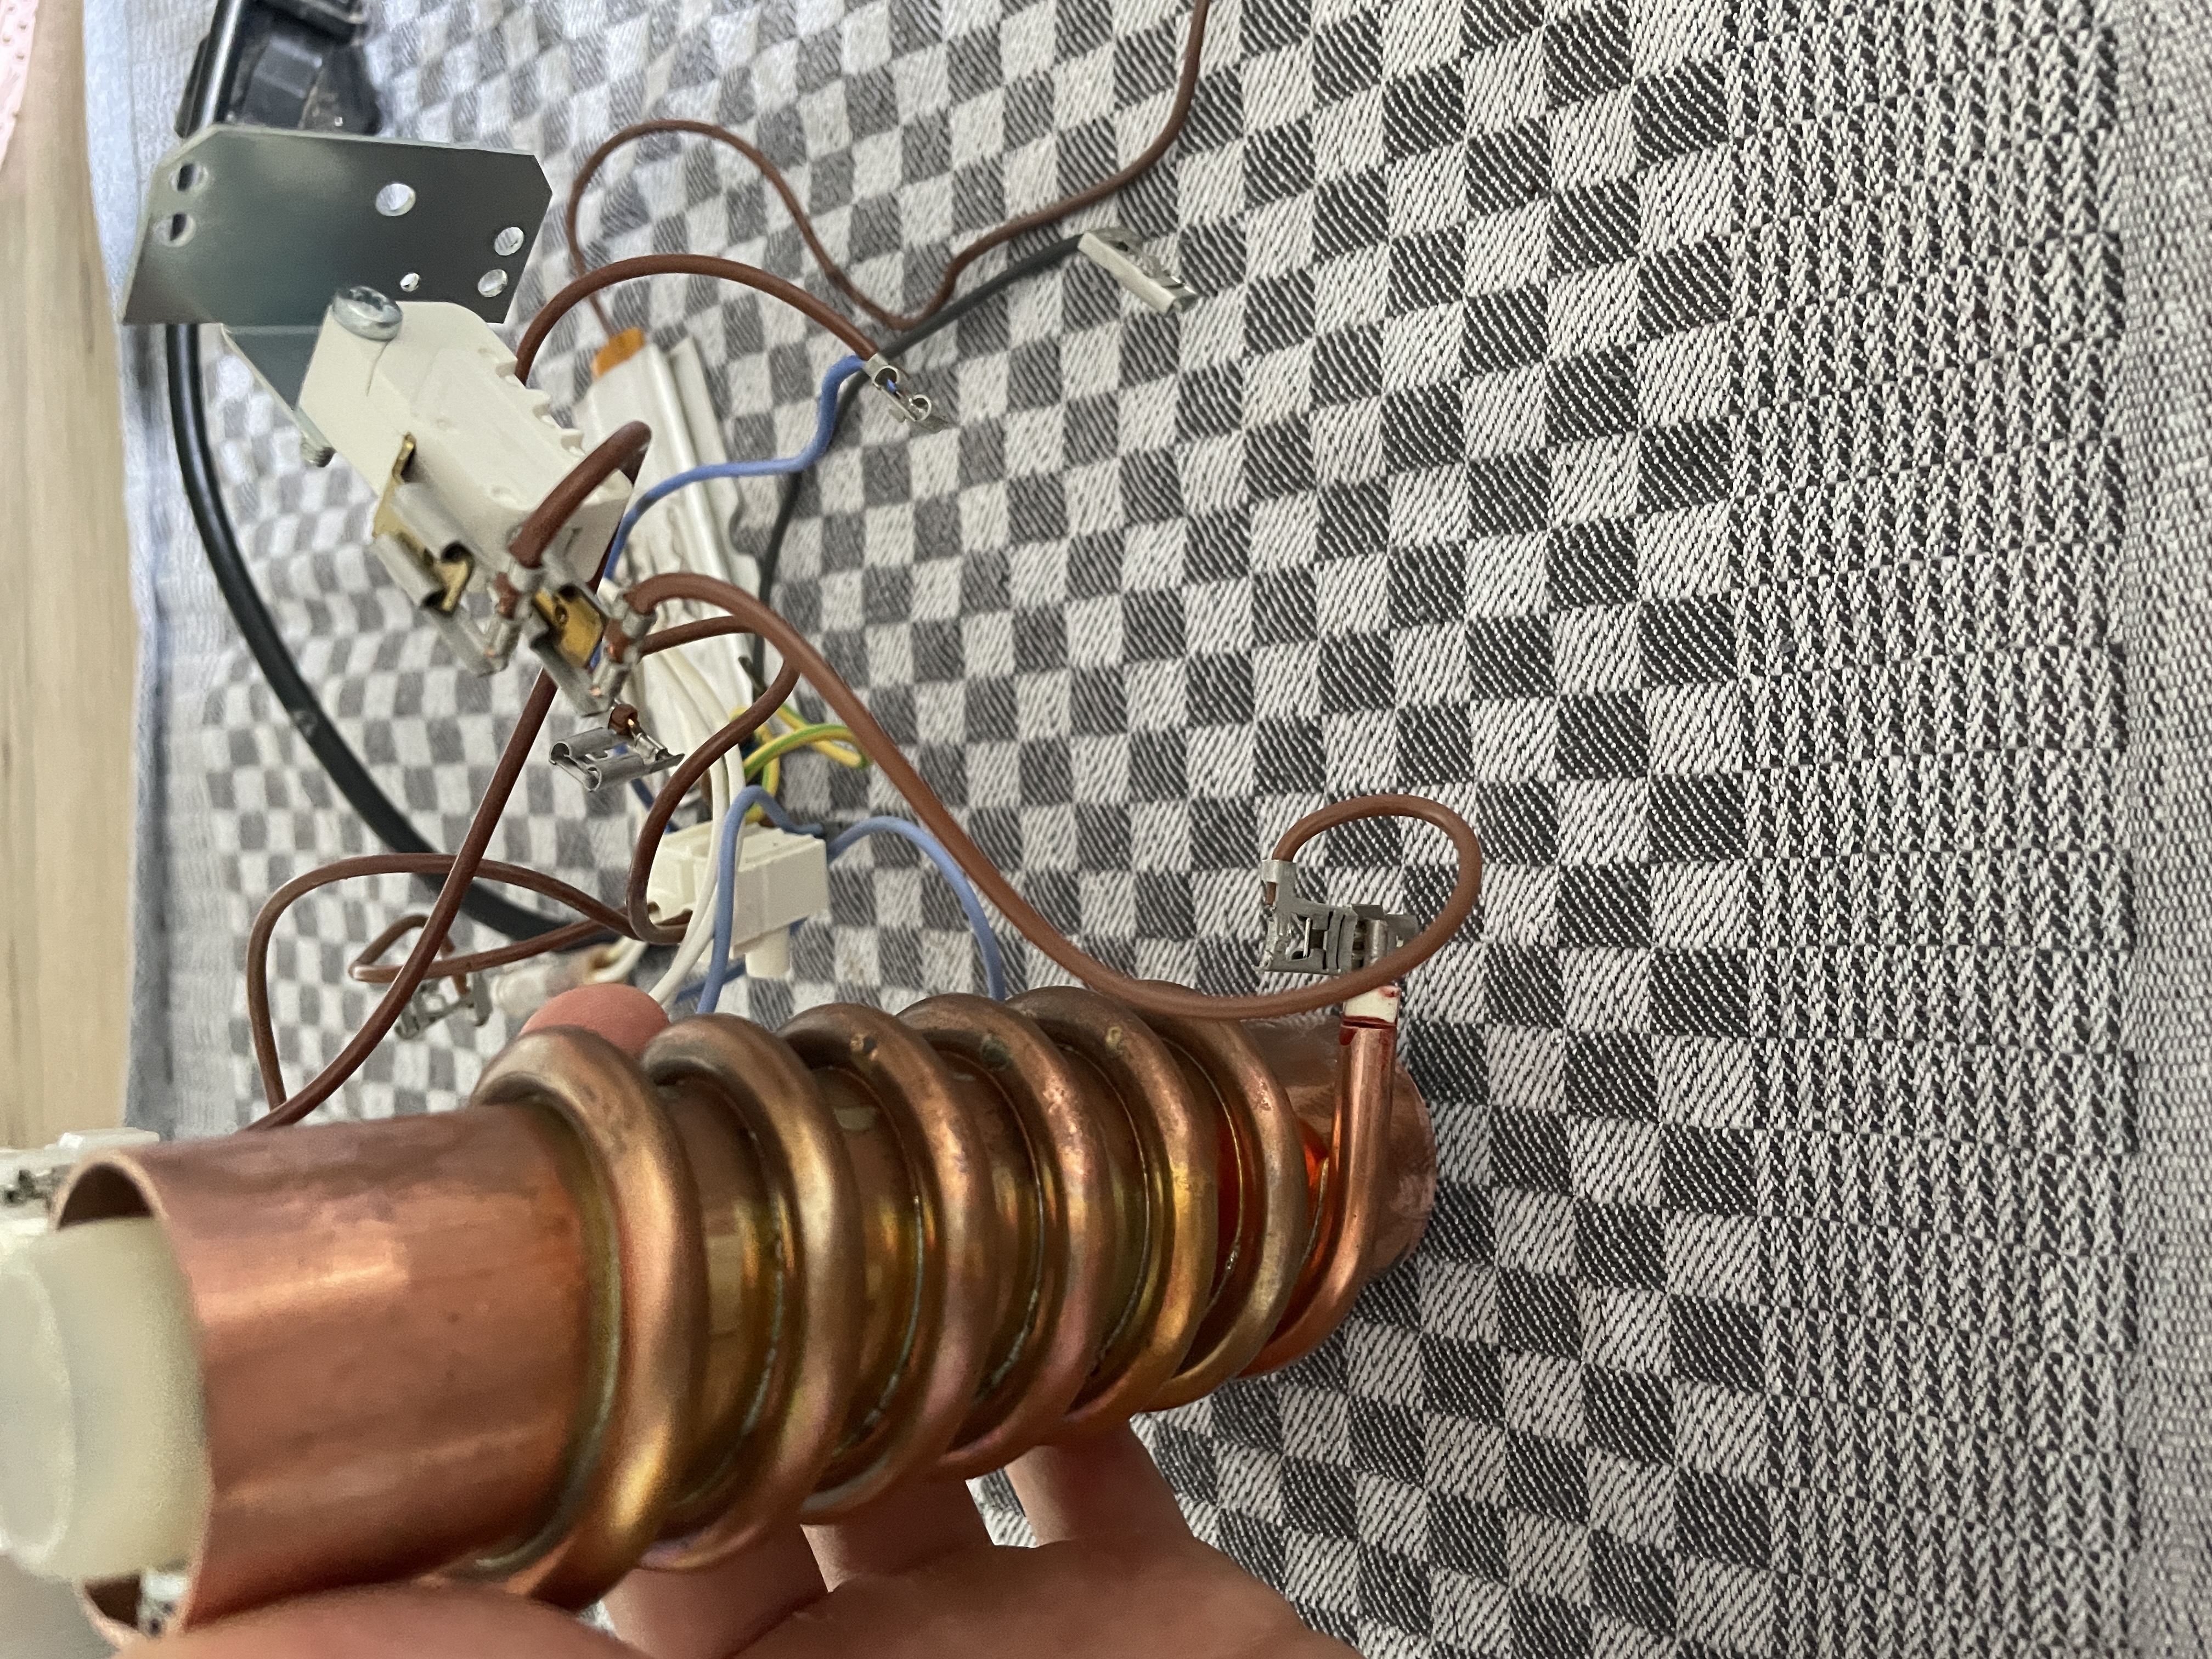
4. Disconnecting The Electrical Components
This is the most critical step, be sure to take pictures of all connections before disconnecting anything. Also, remember to place the screws in a logical and safe place to avoid switching them up.
 I swear, there is a system to this.
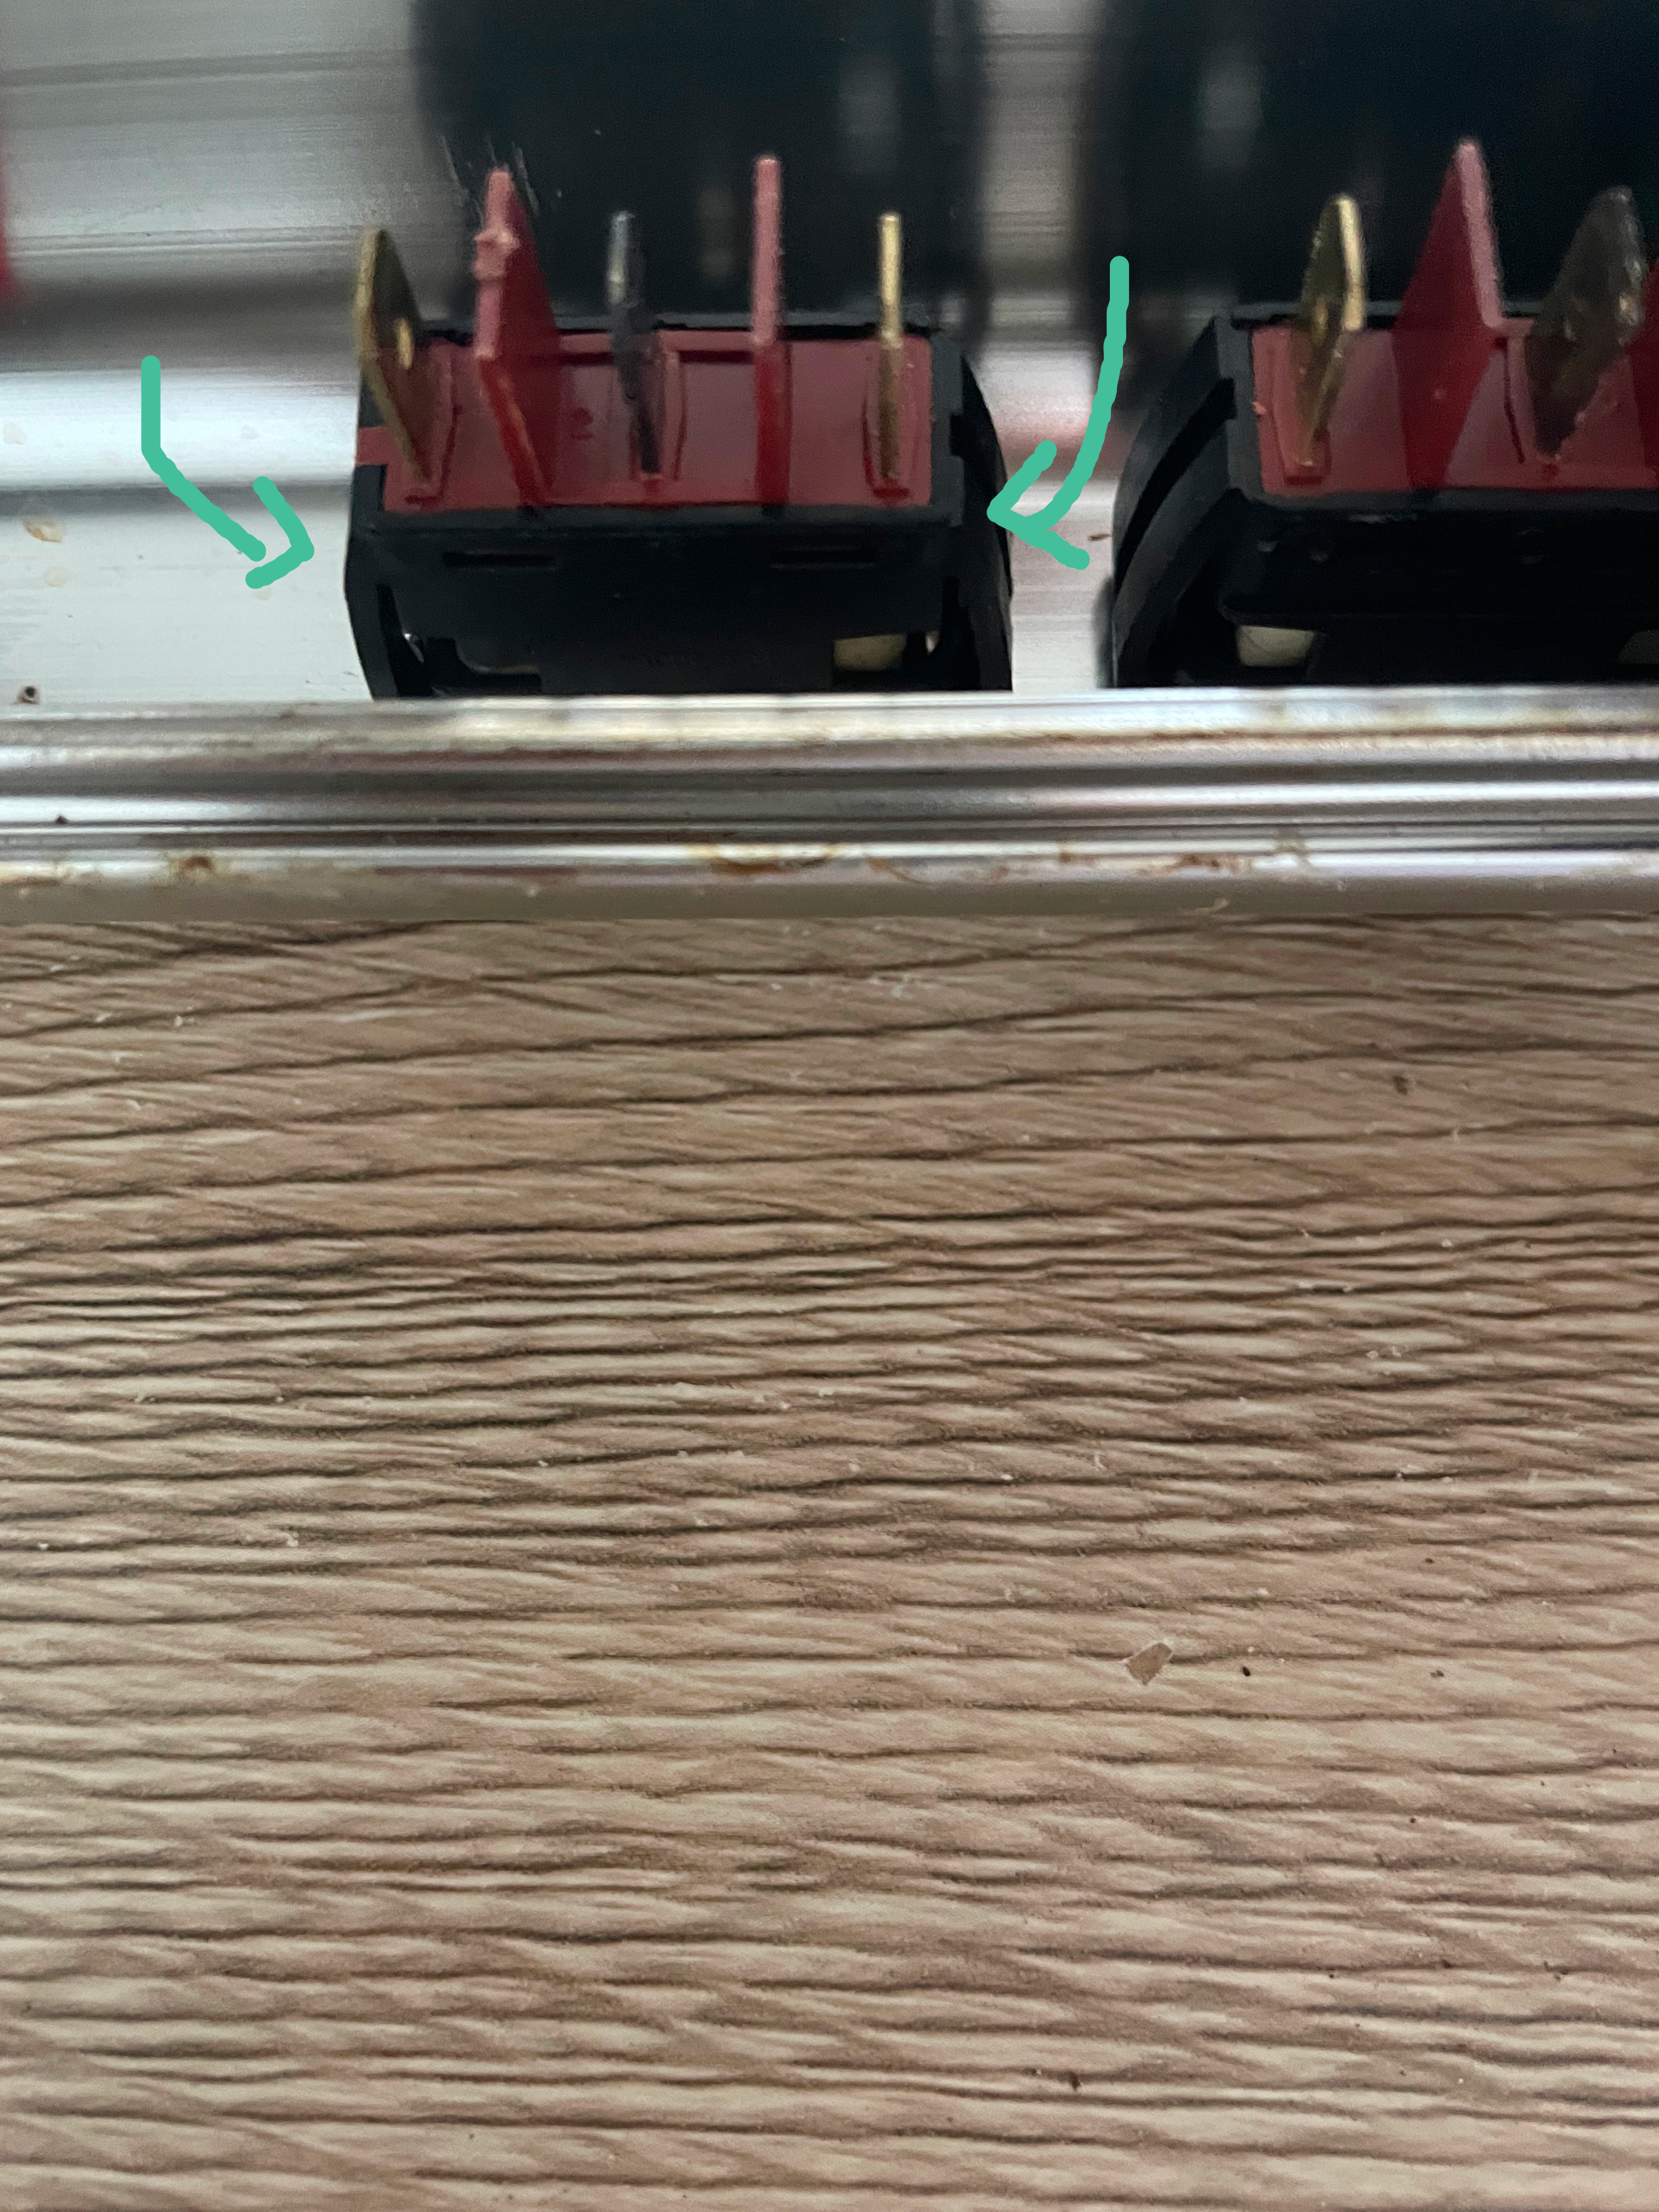
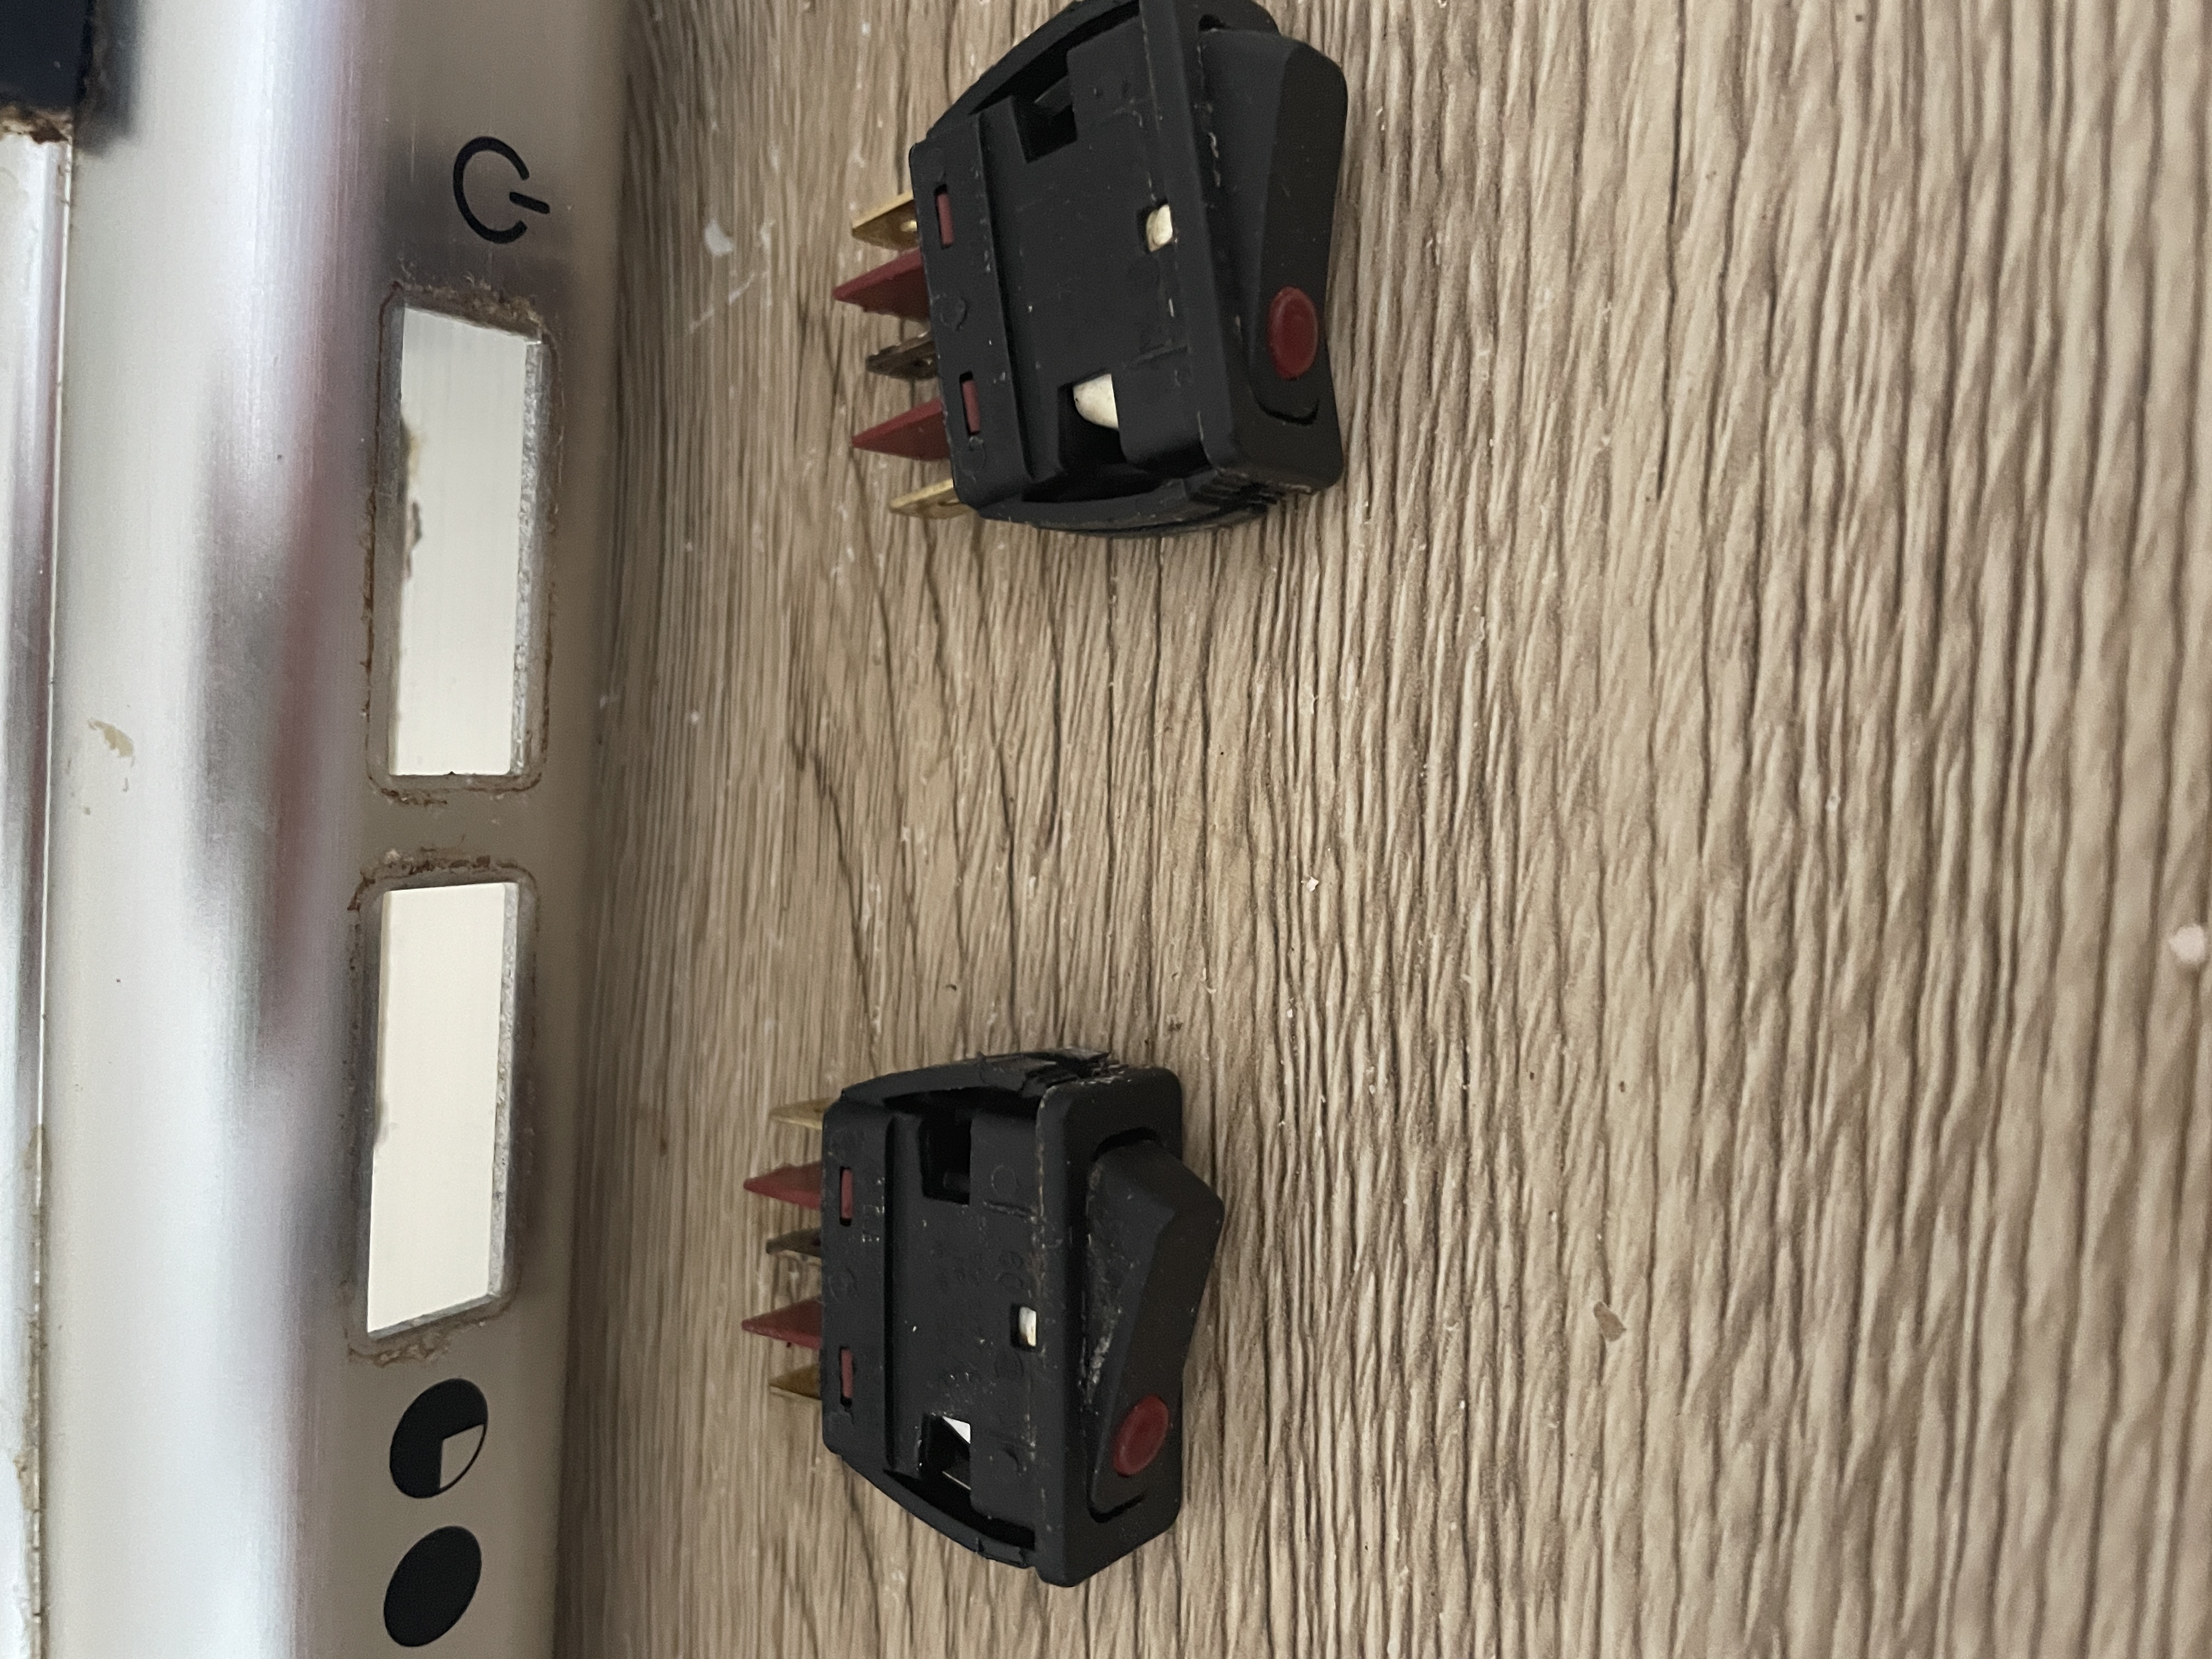
Starting with the switches:
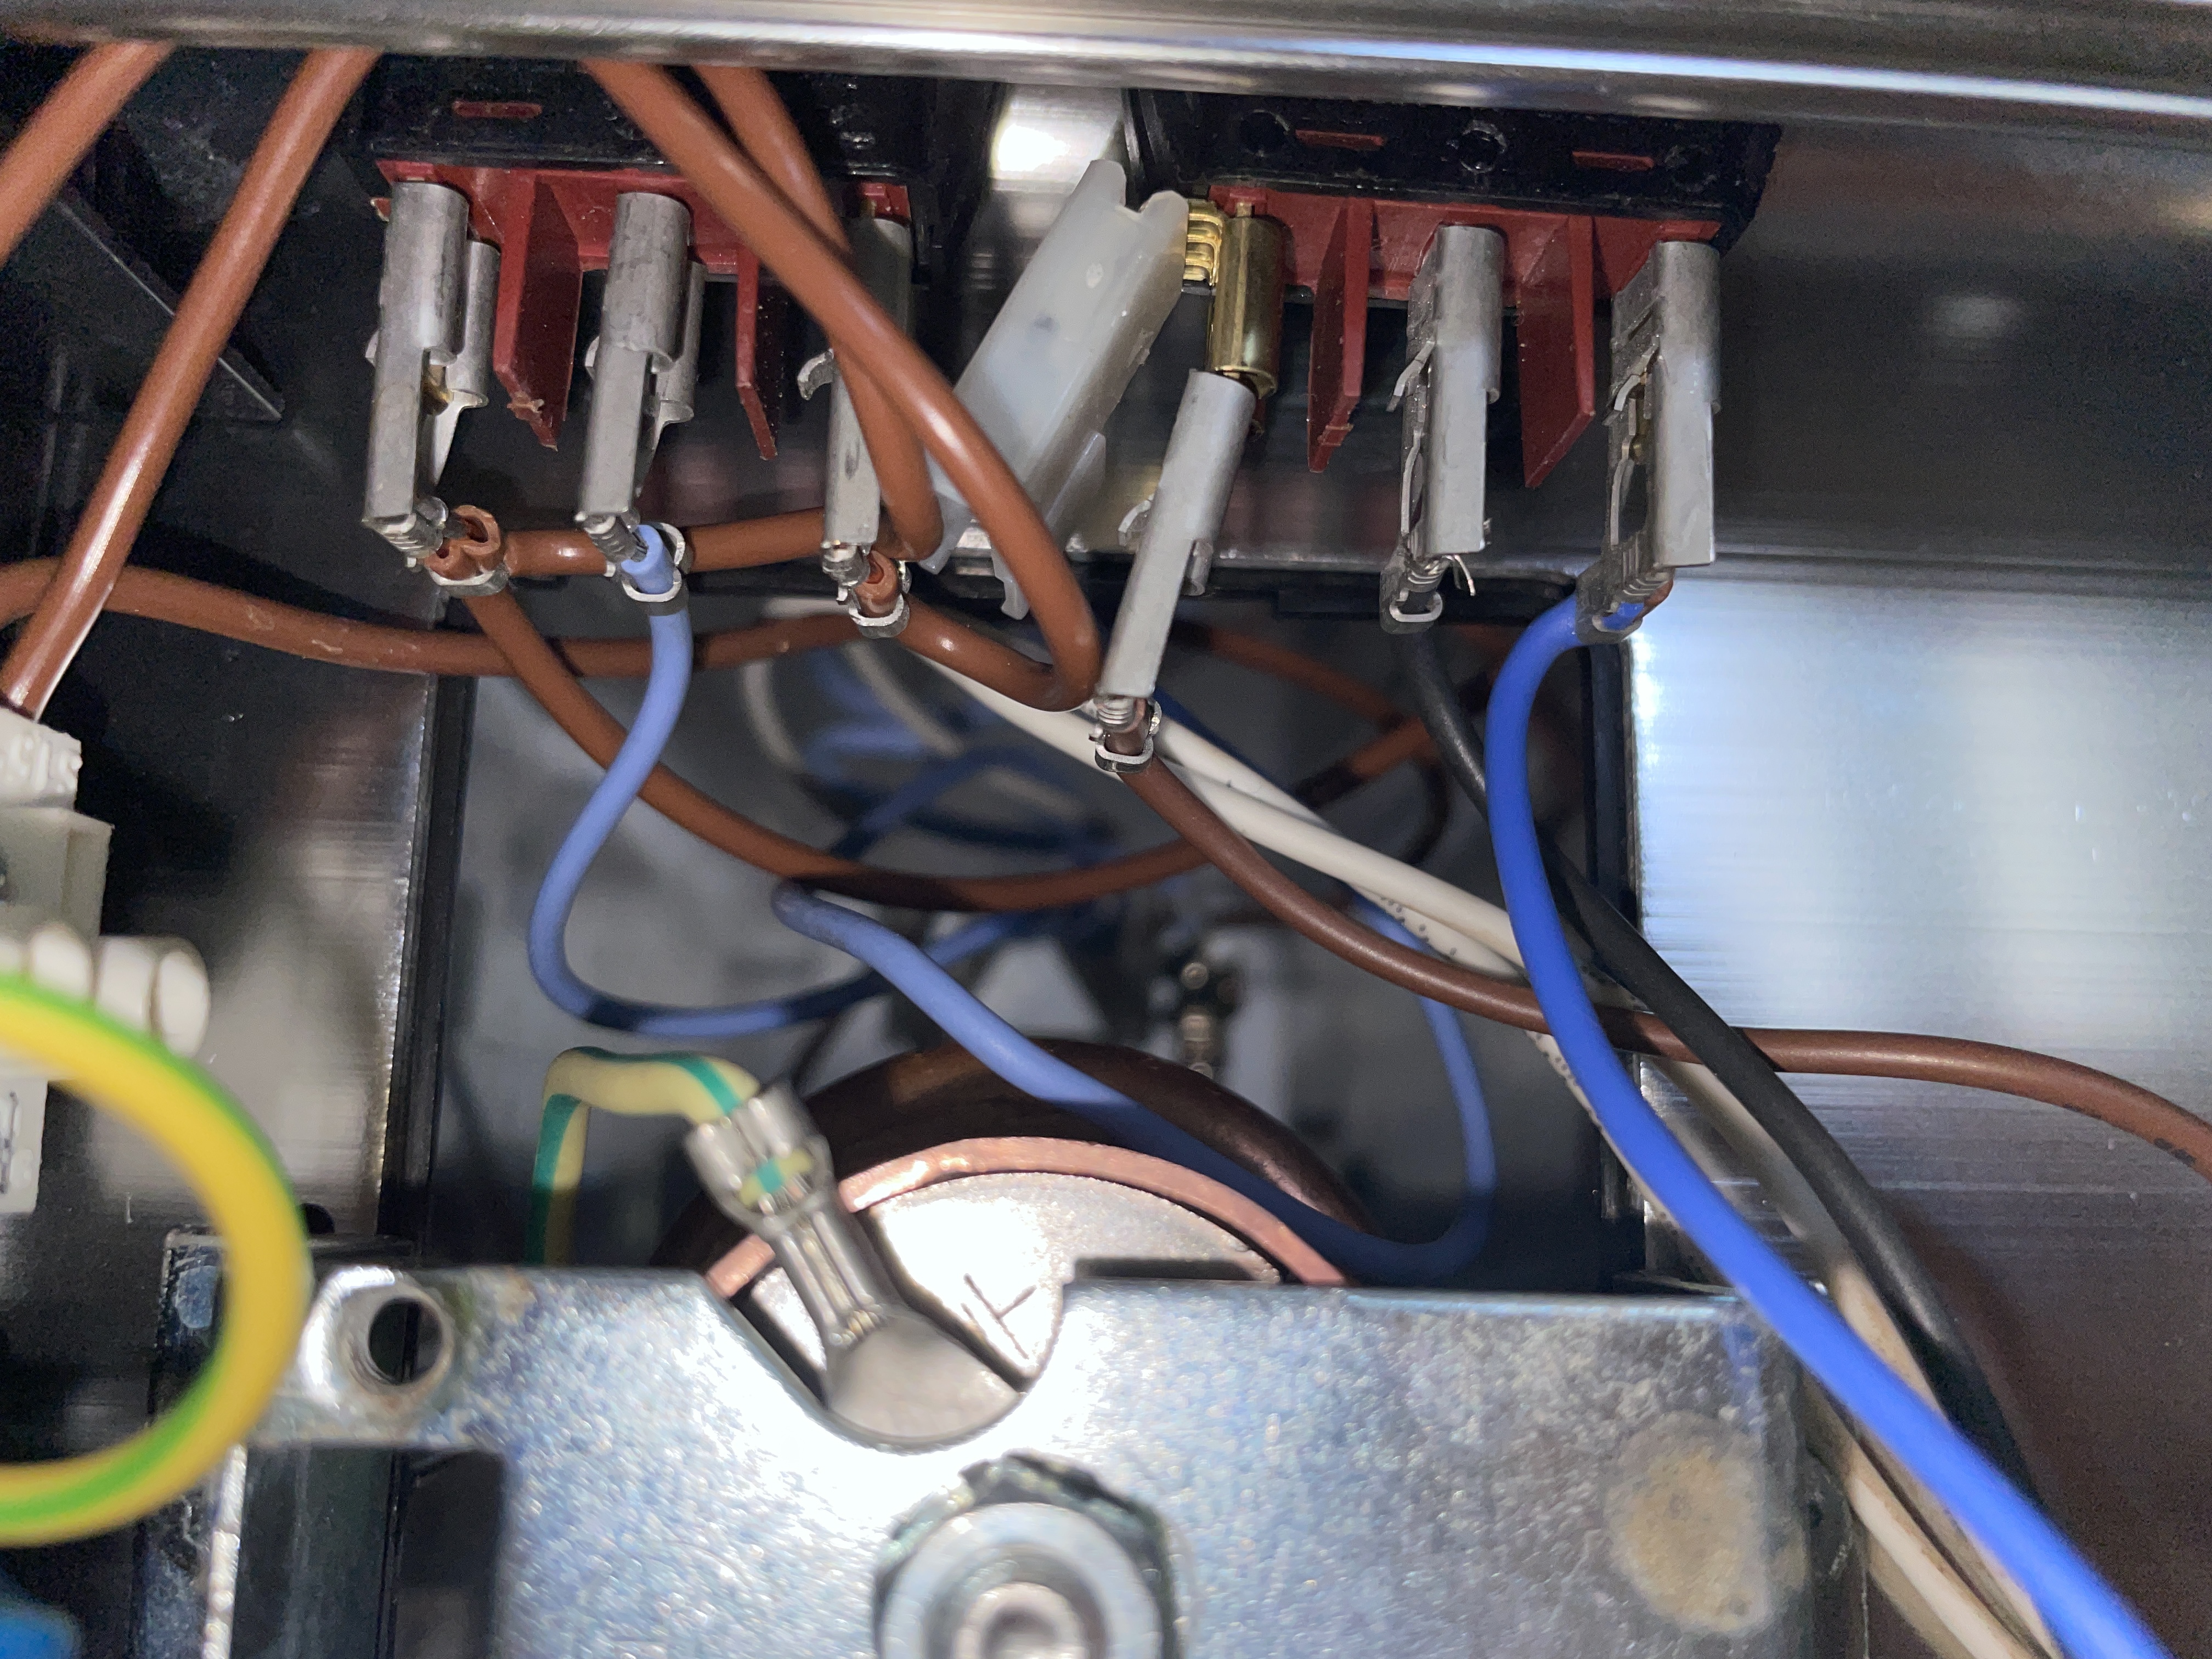
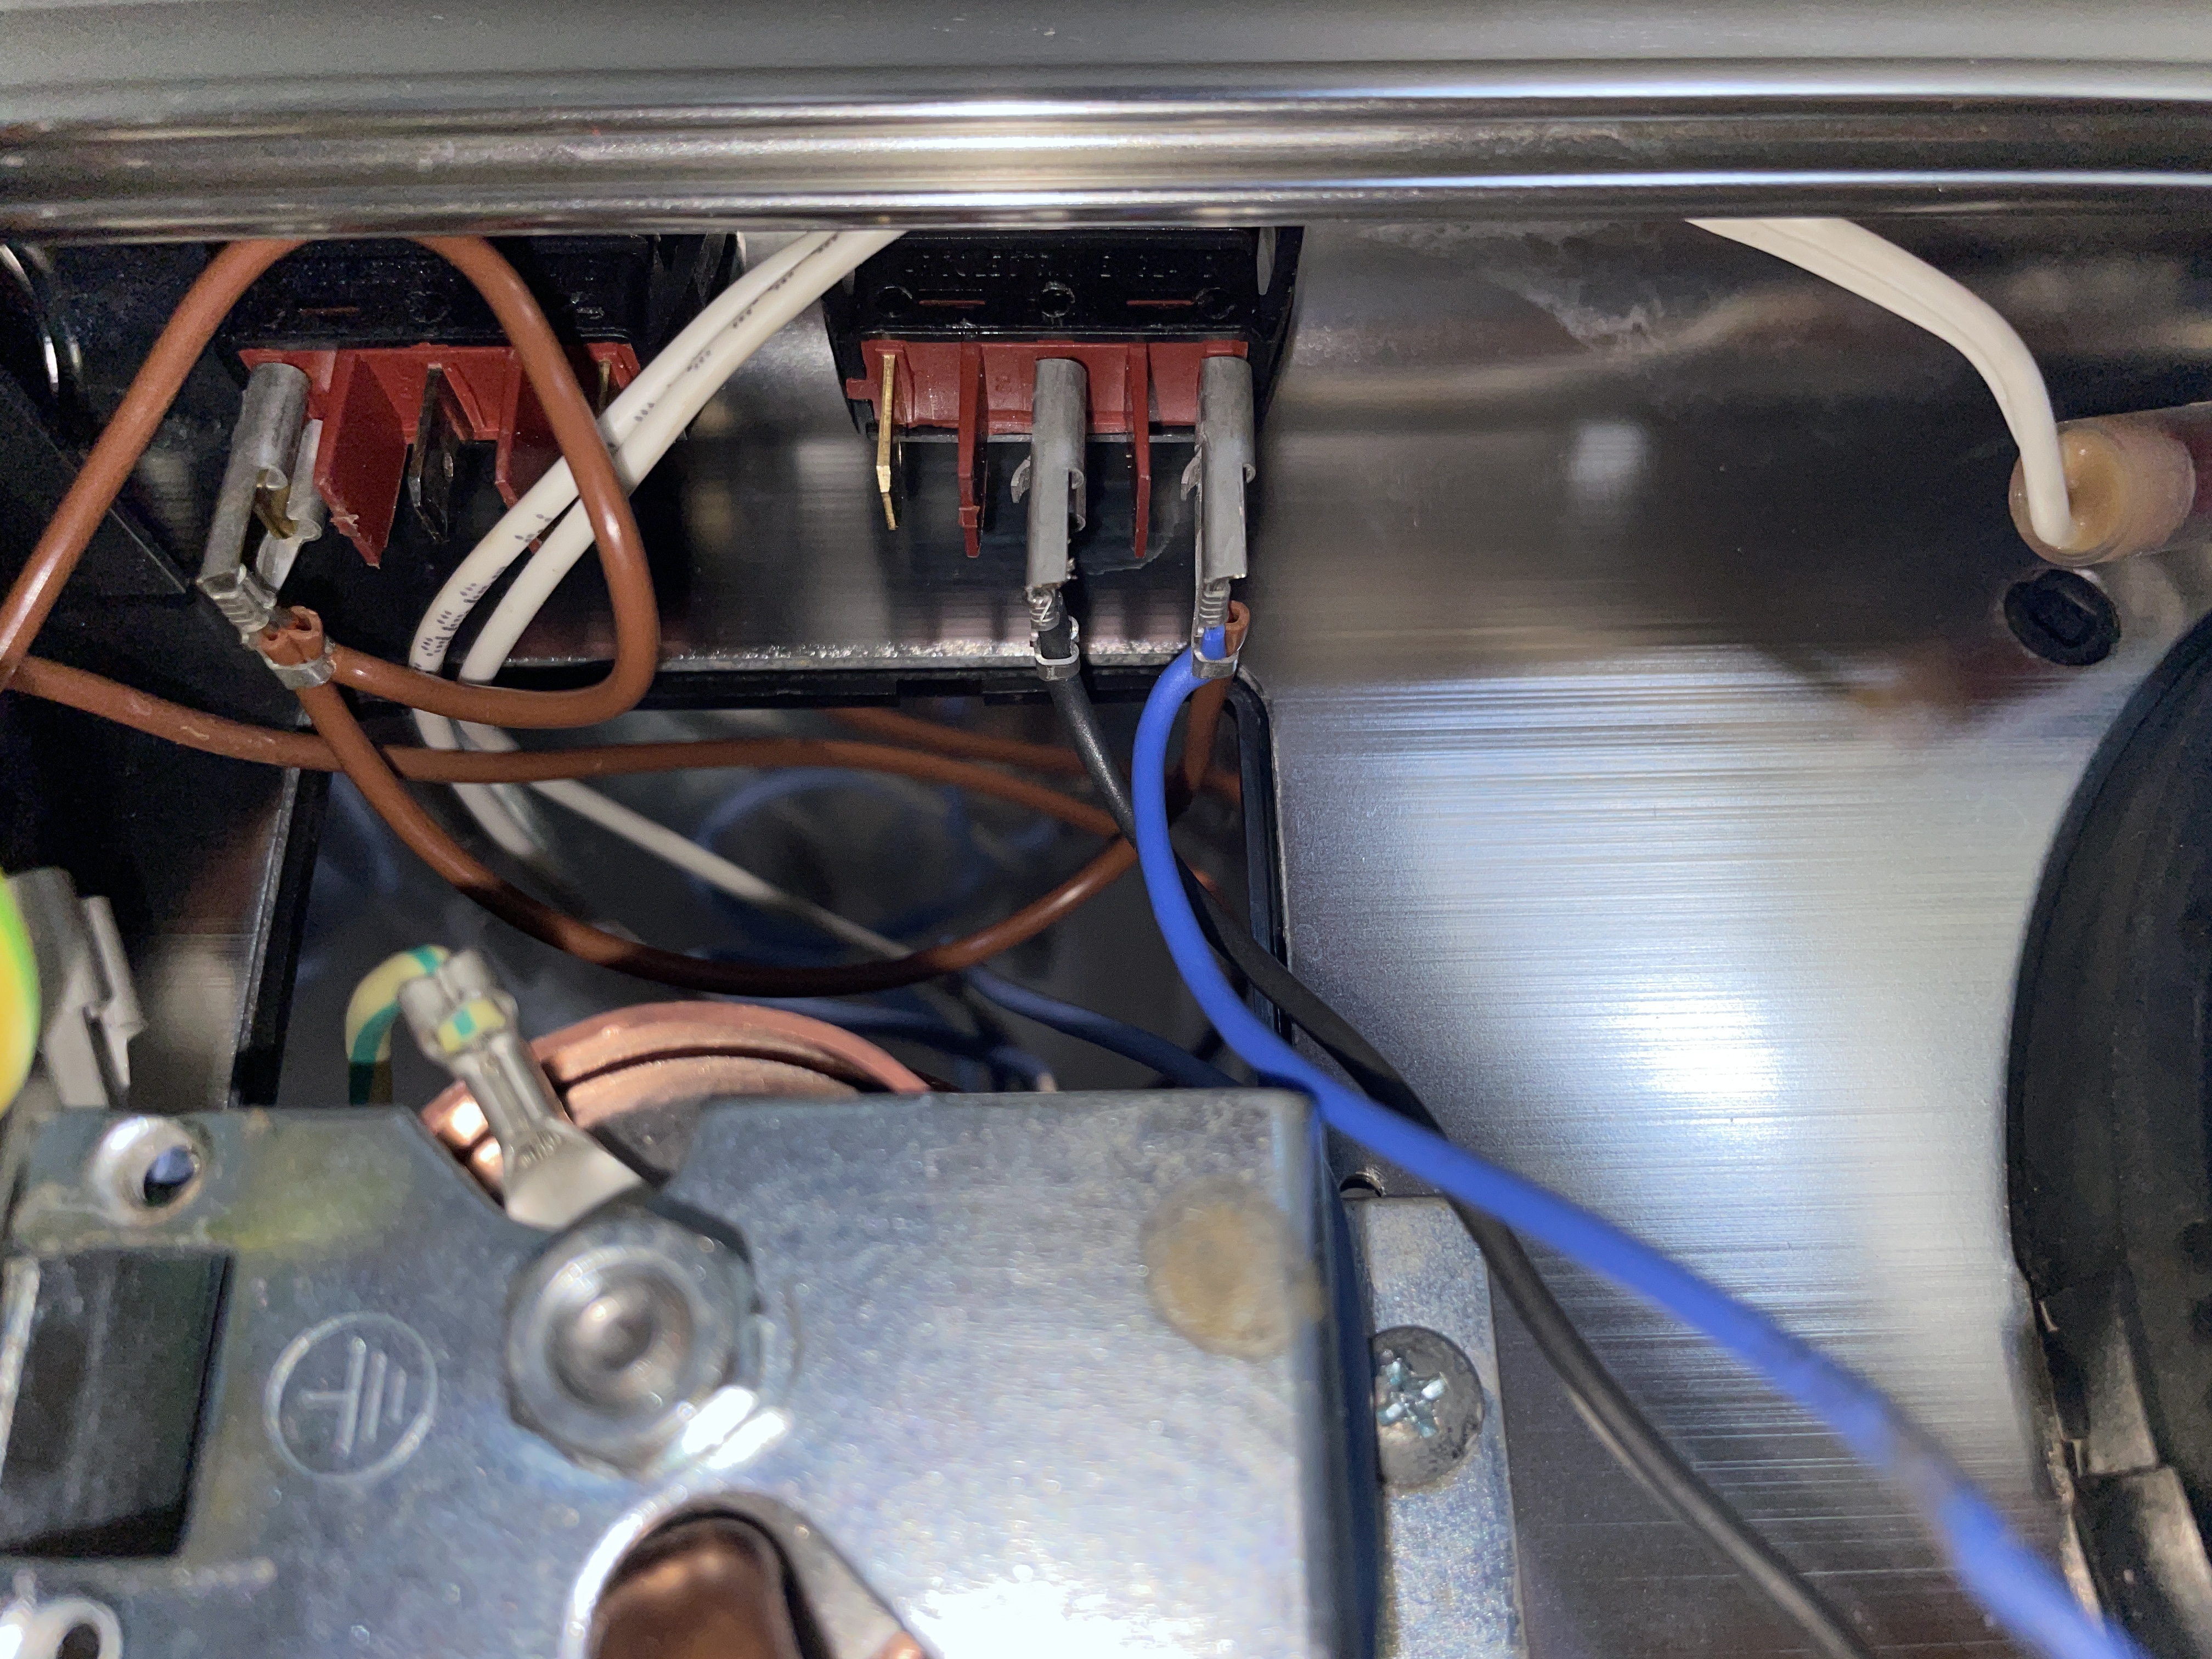
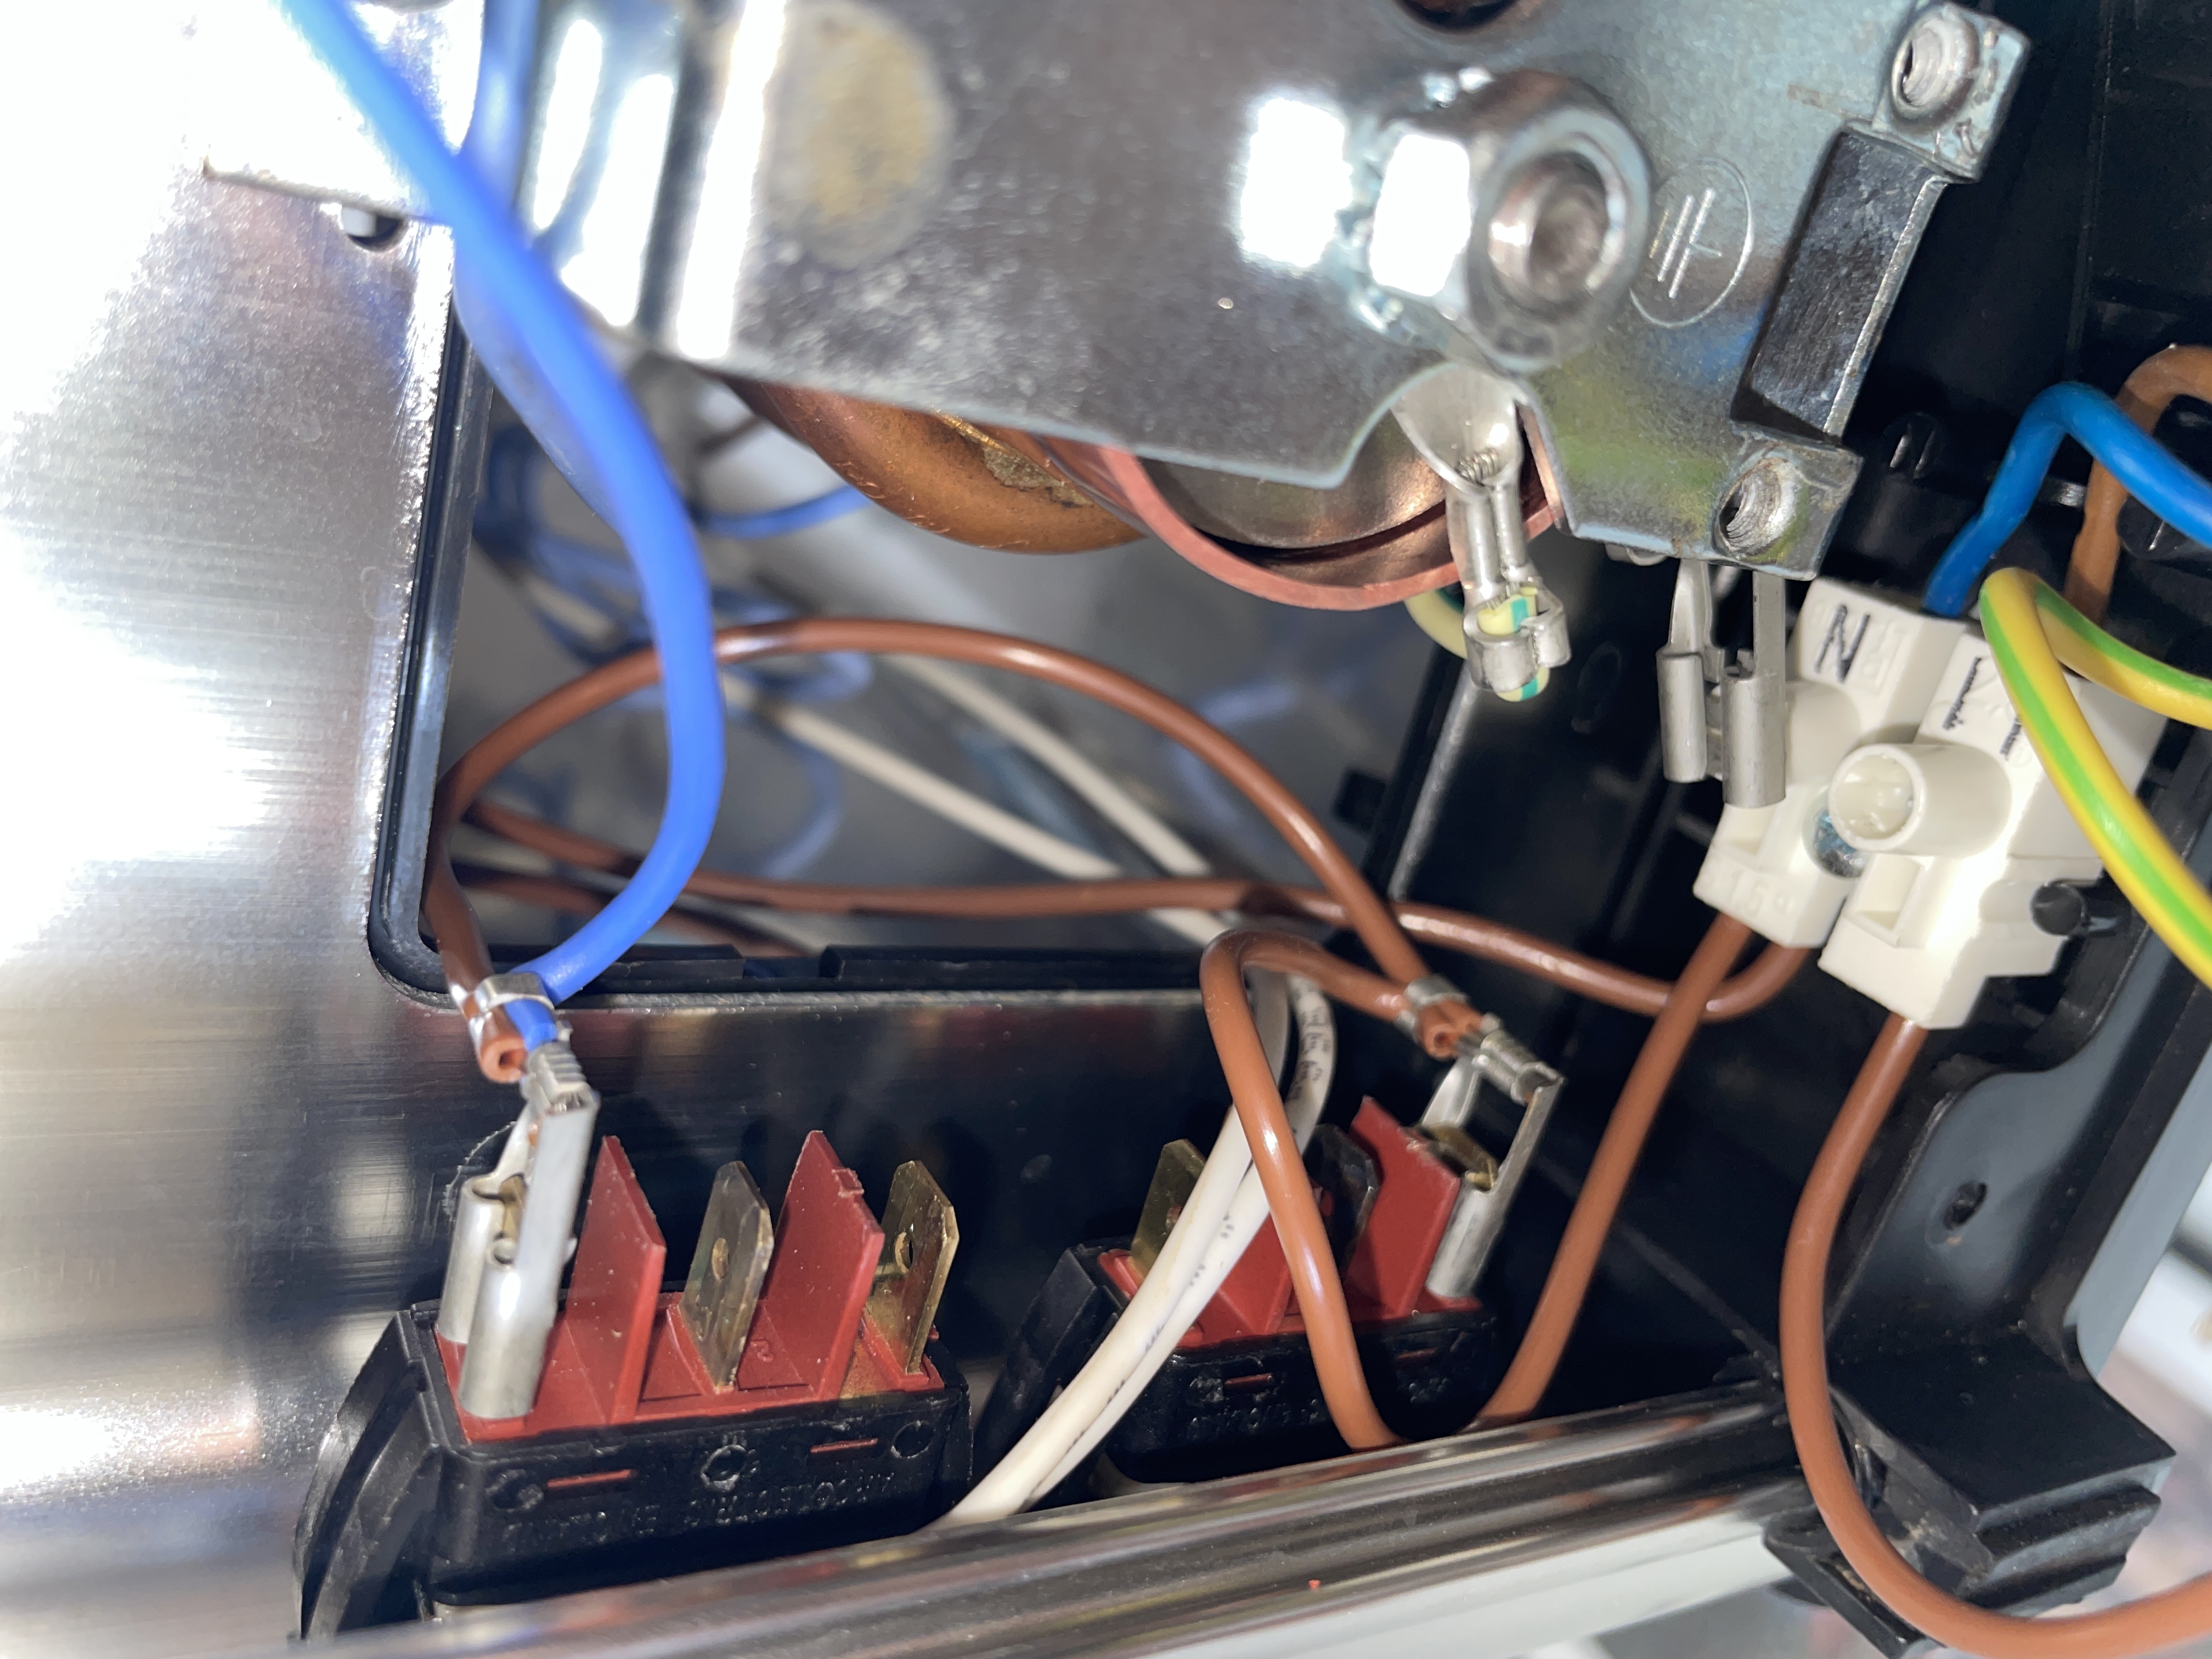
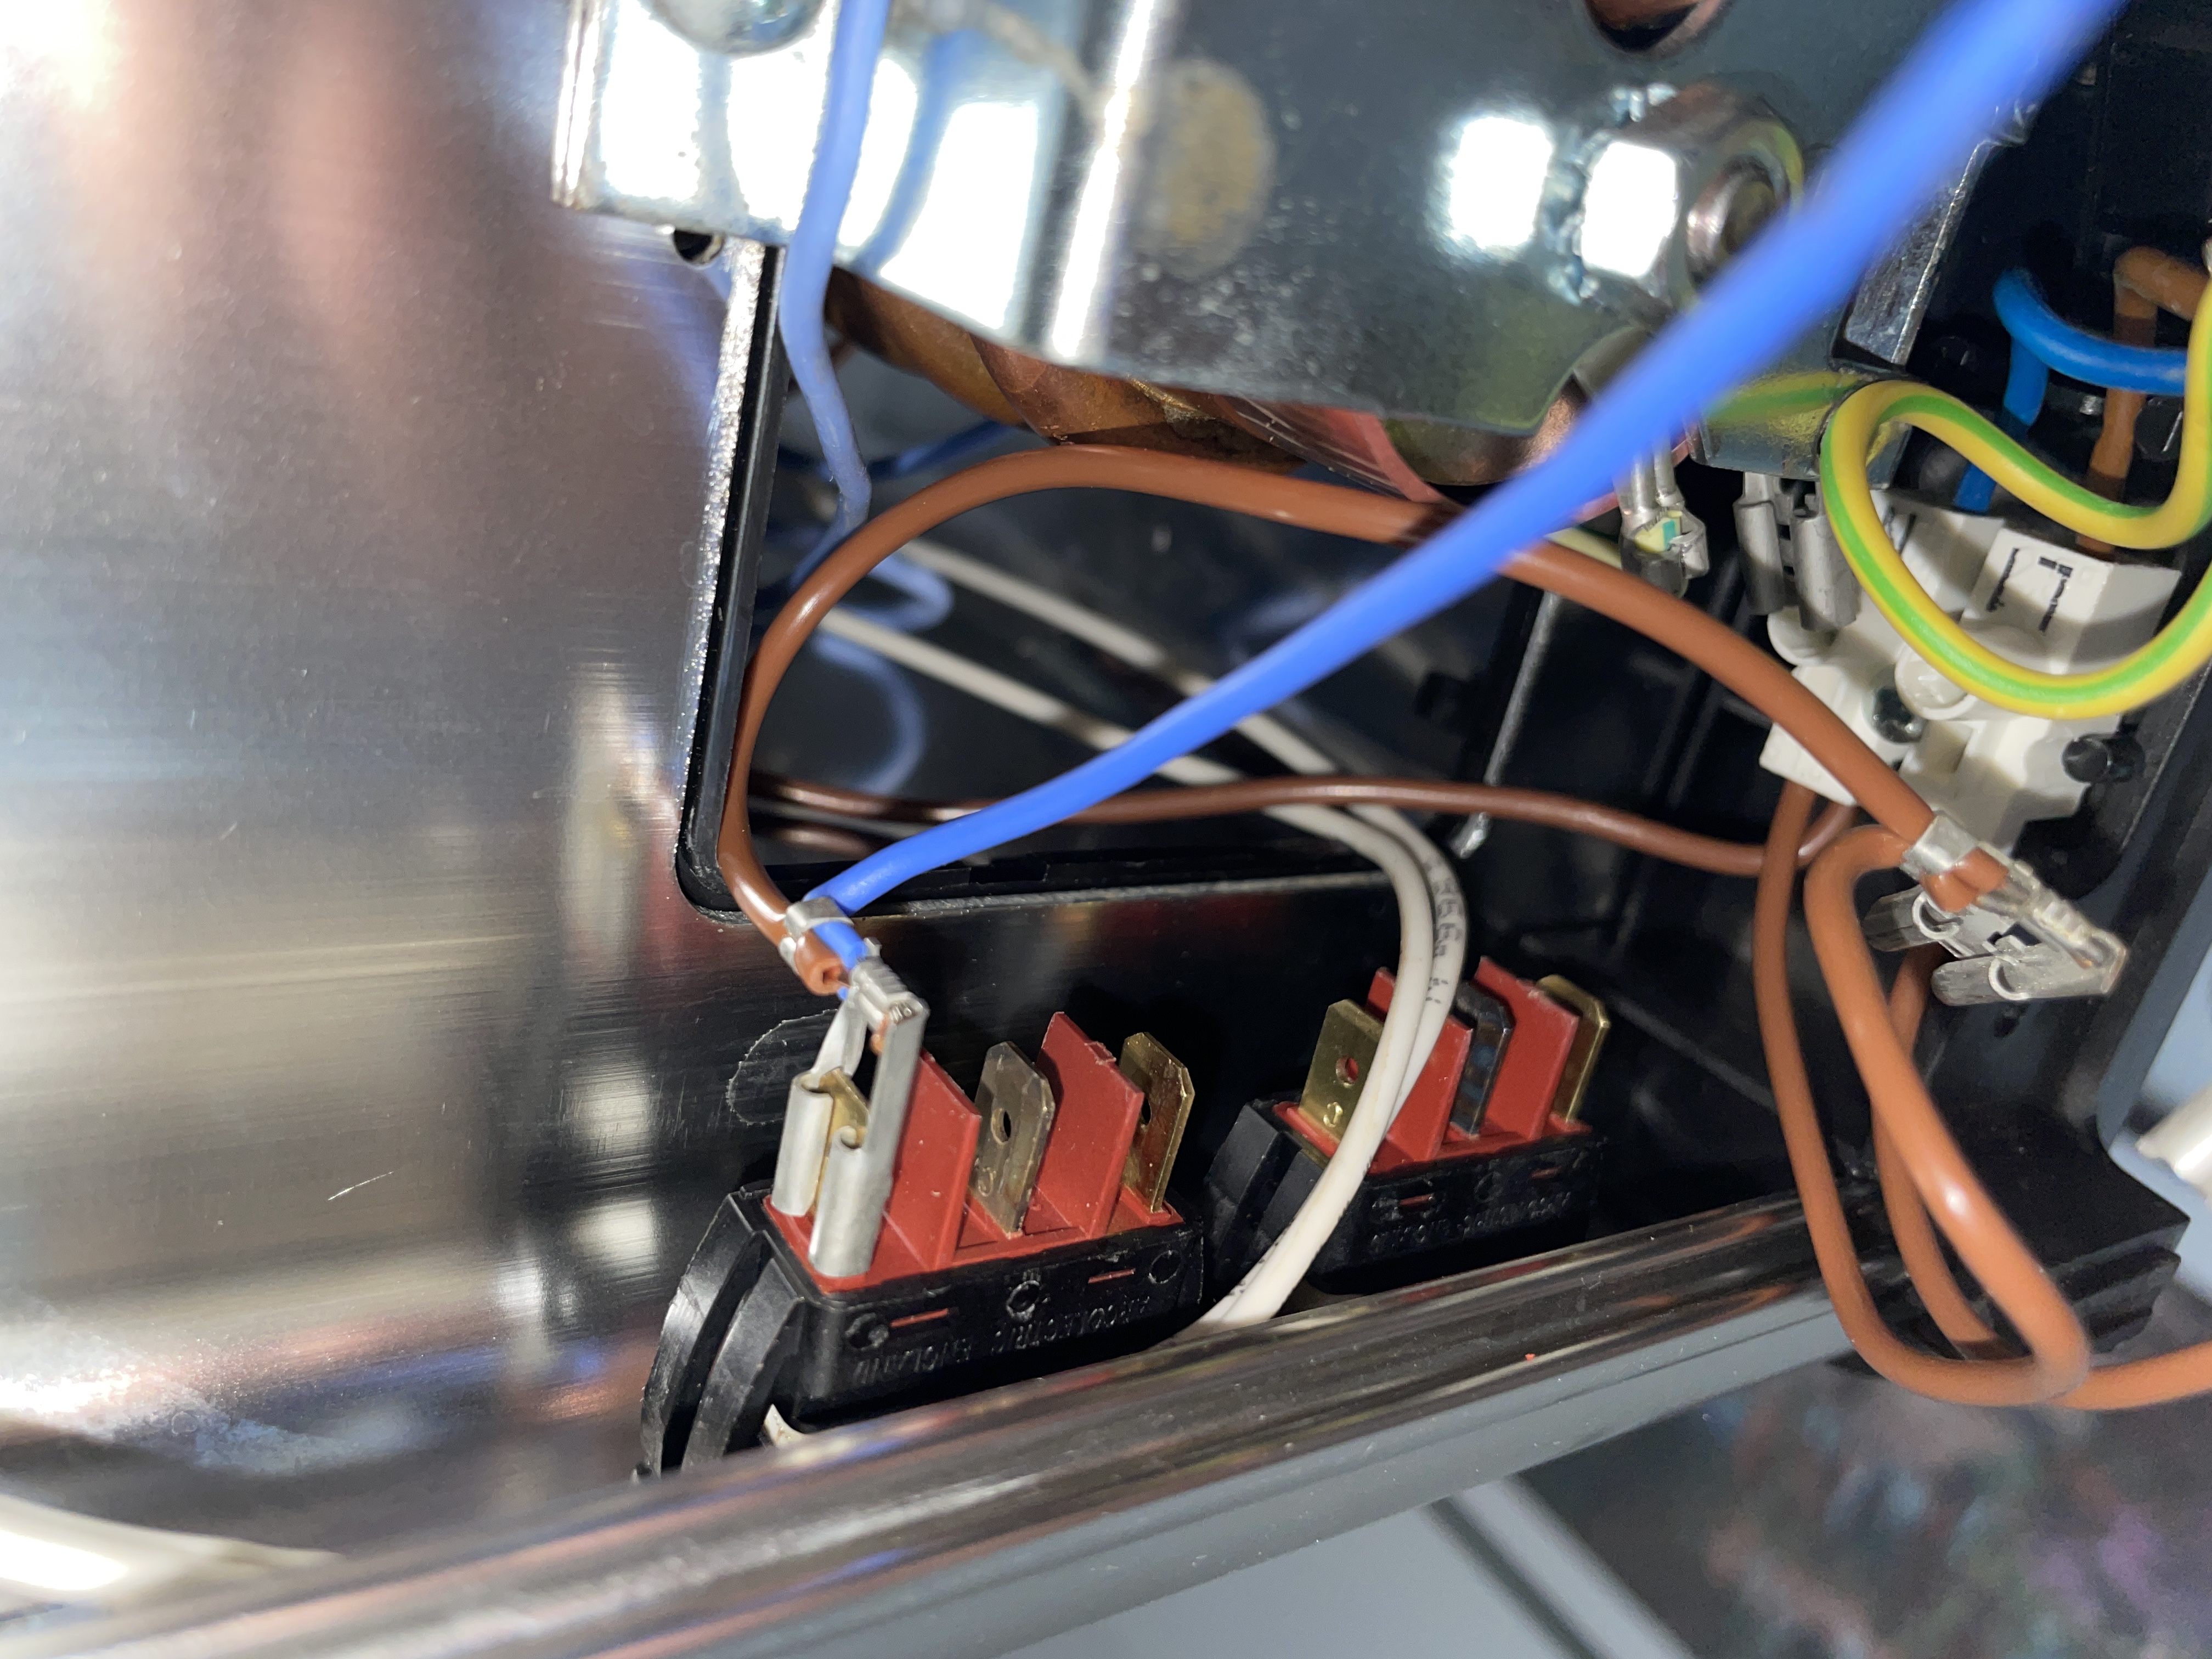
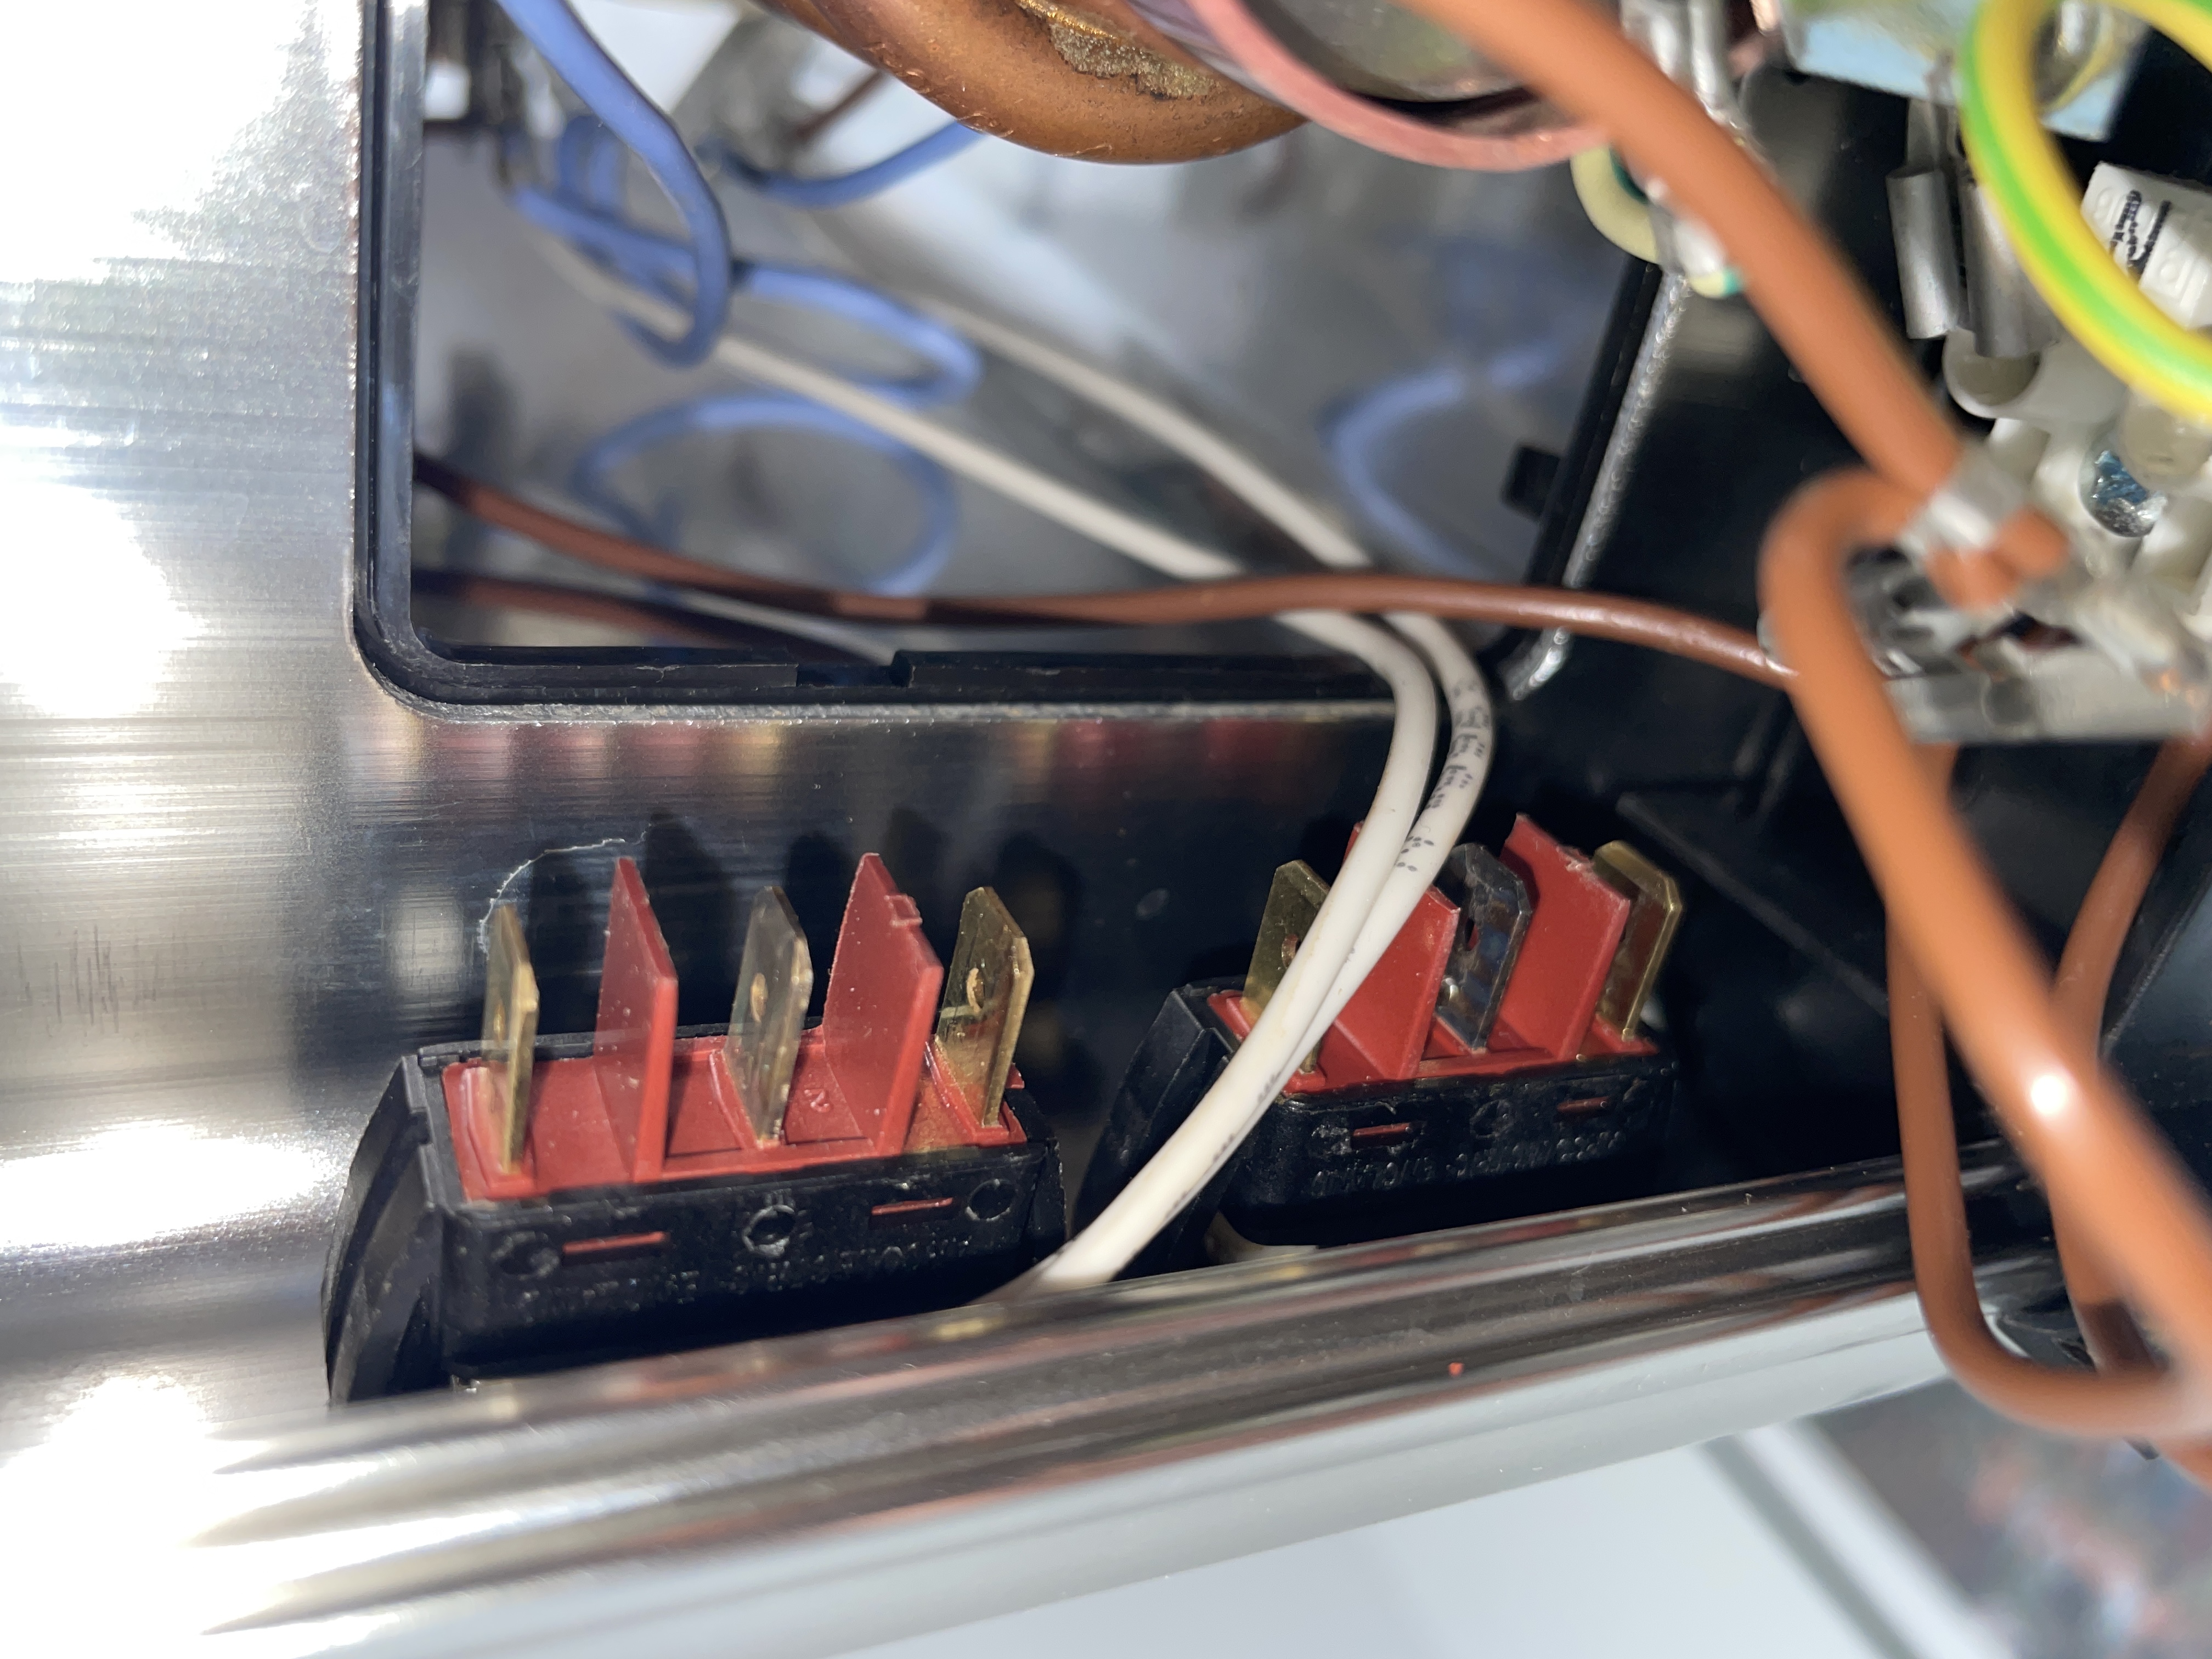
After disconnecting them, they can then be removed by pressing against the sides and pulling them out. This is a bit tricky and requires some wiggling them out.
Continue by disconnecting the hotplate. Unscrew it and remove the wire.
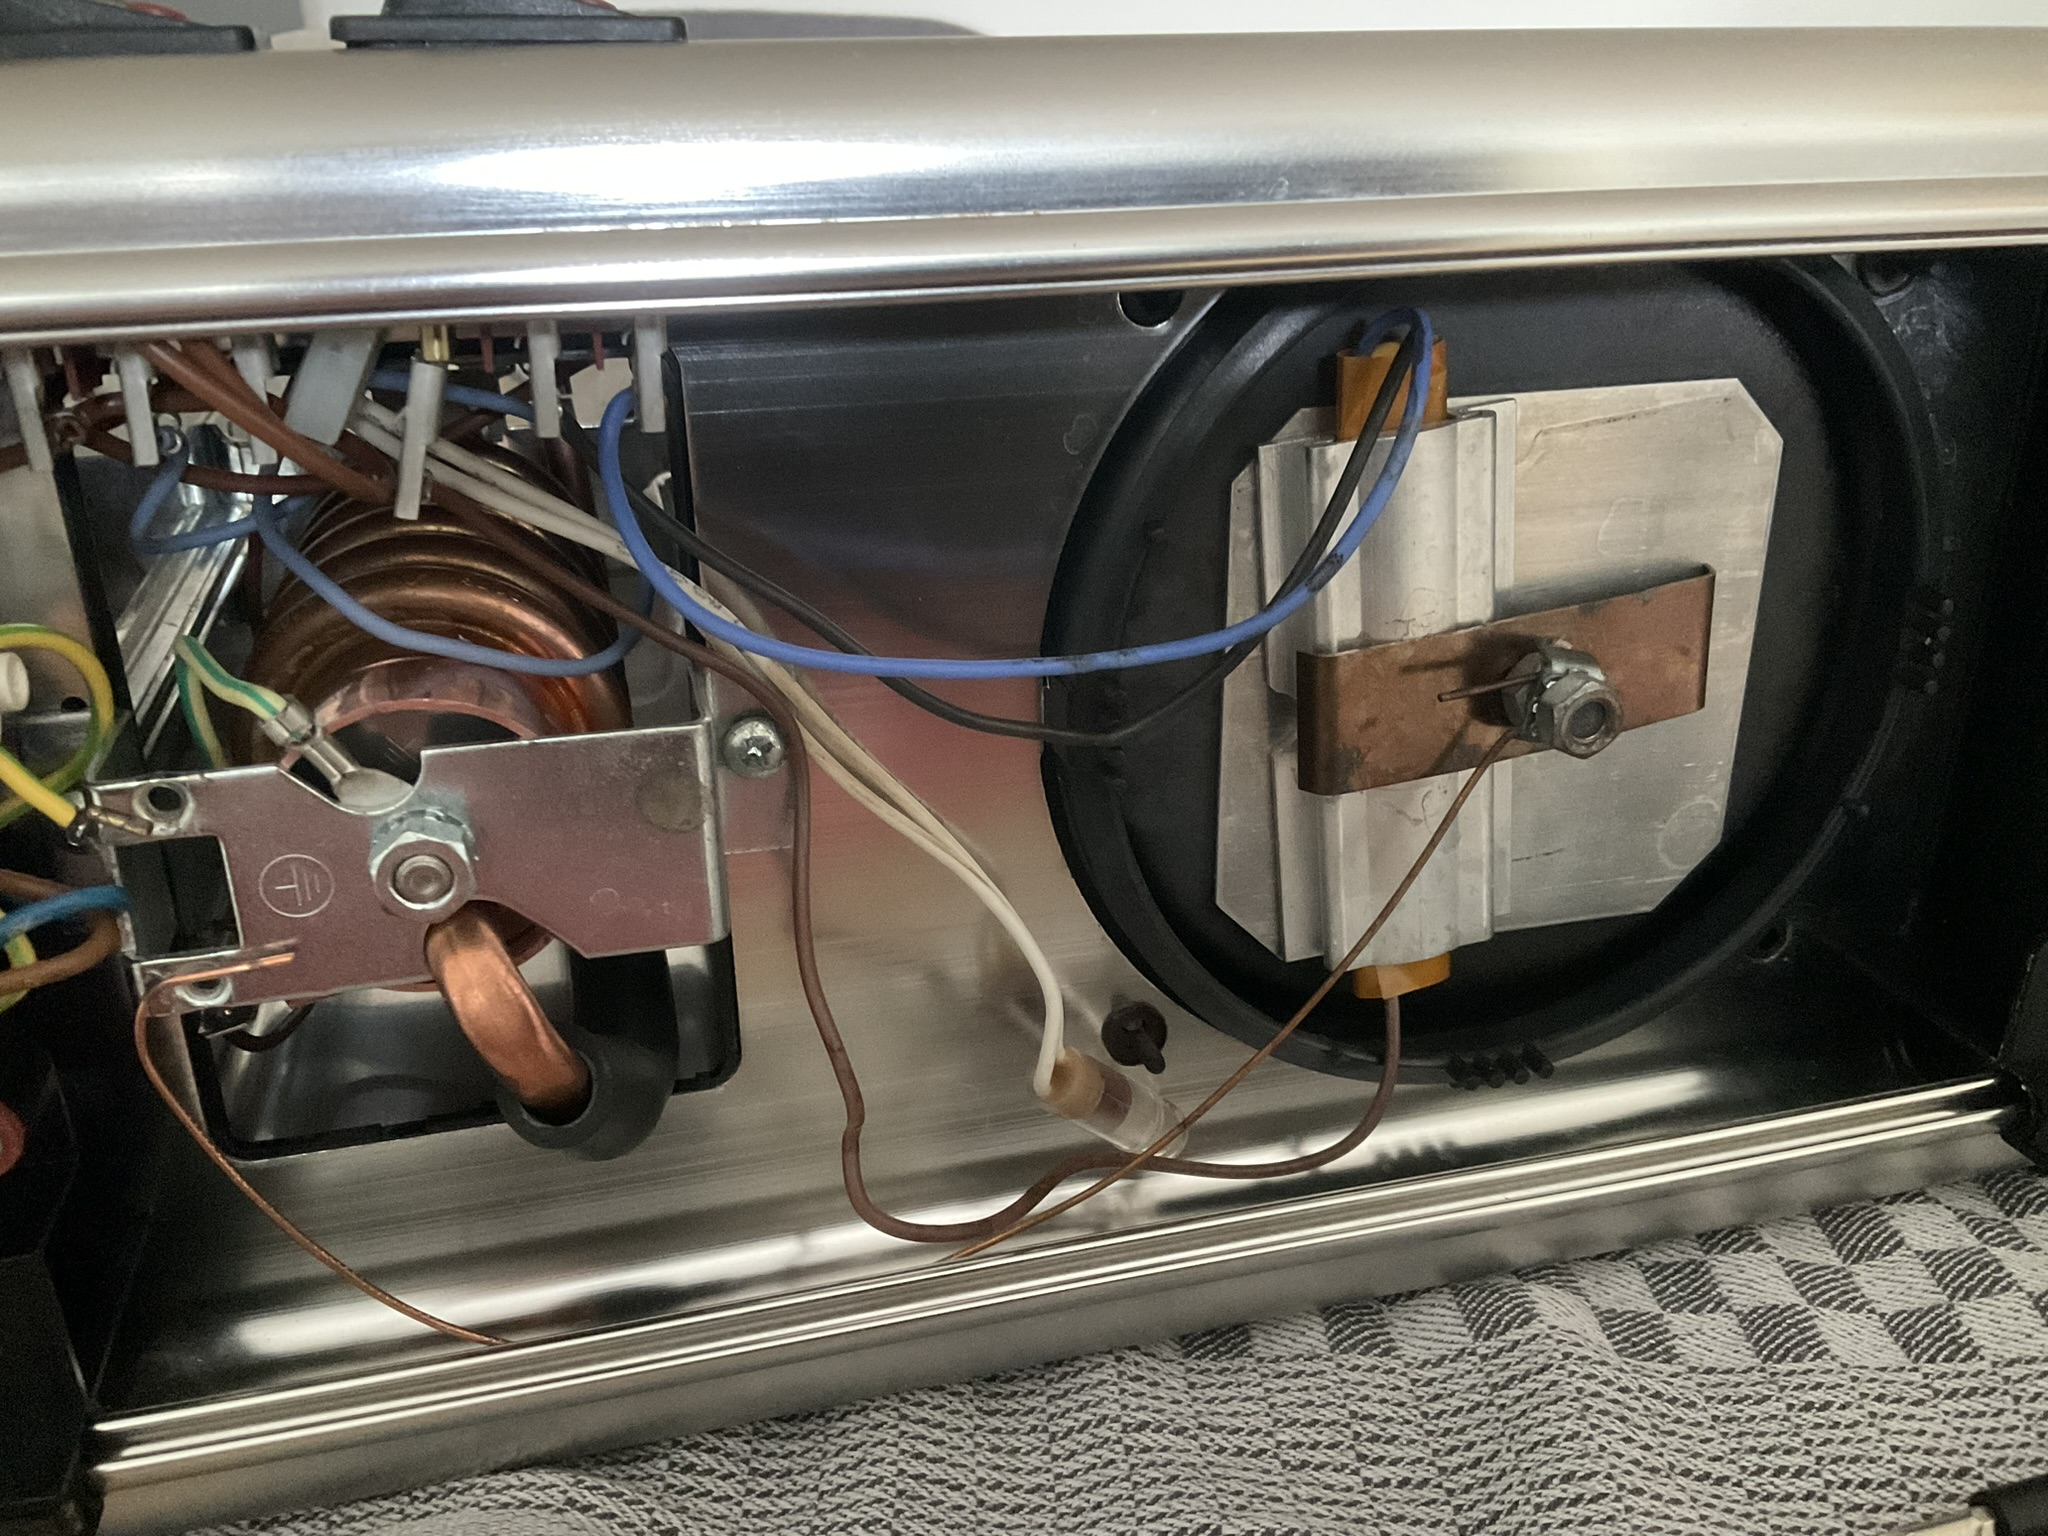
The wires and the ground connection from the heating element can then be unscrewed and removed

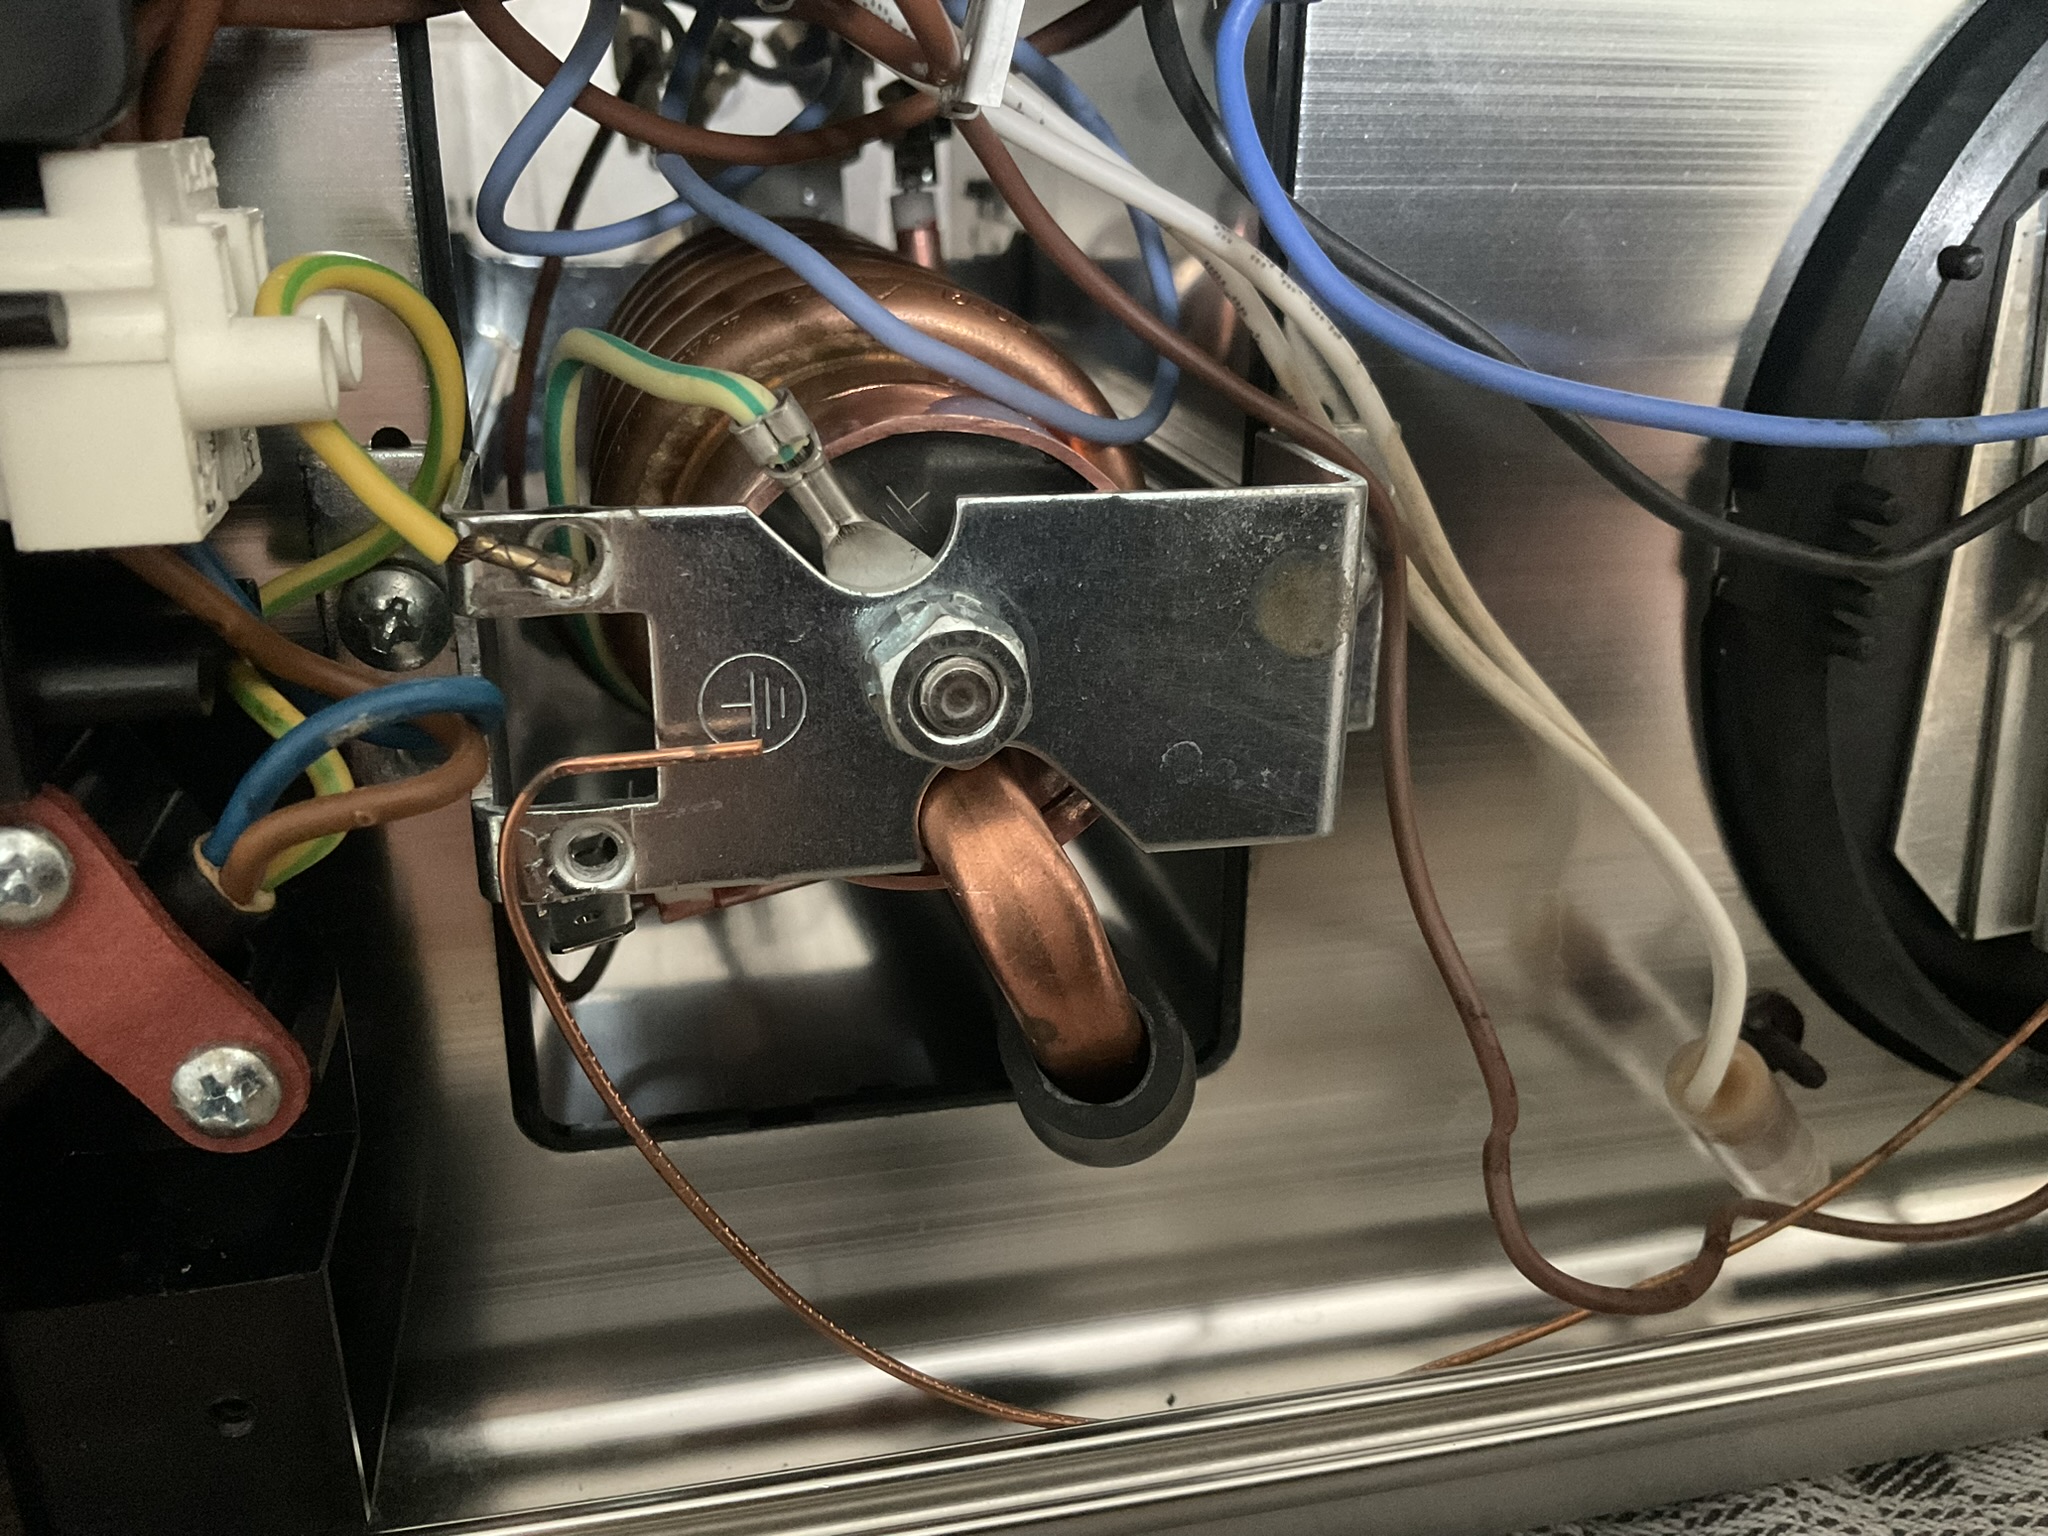
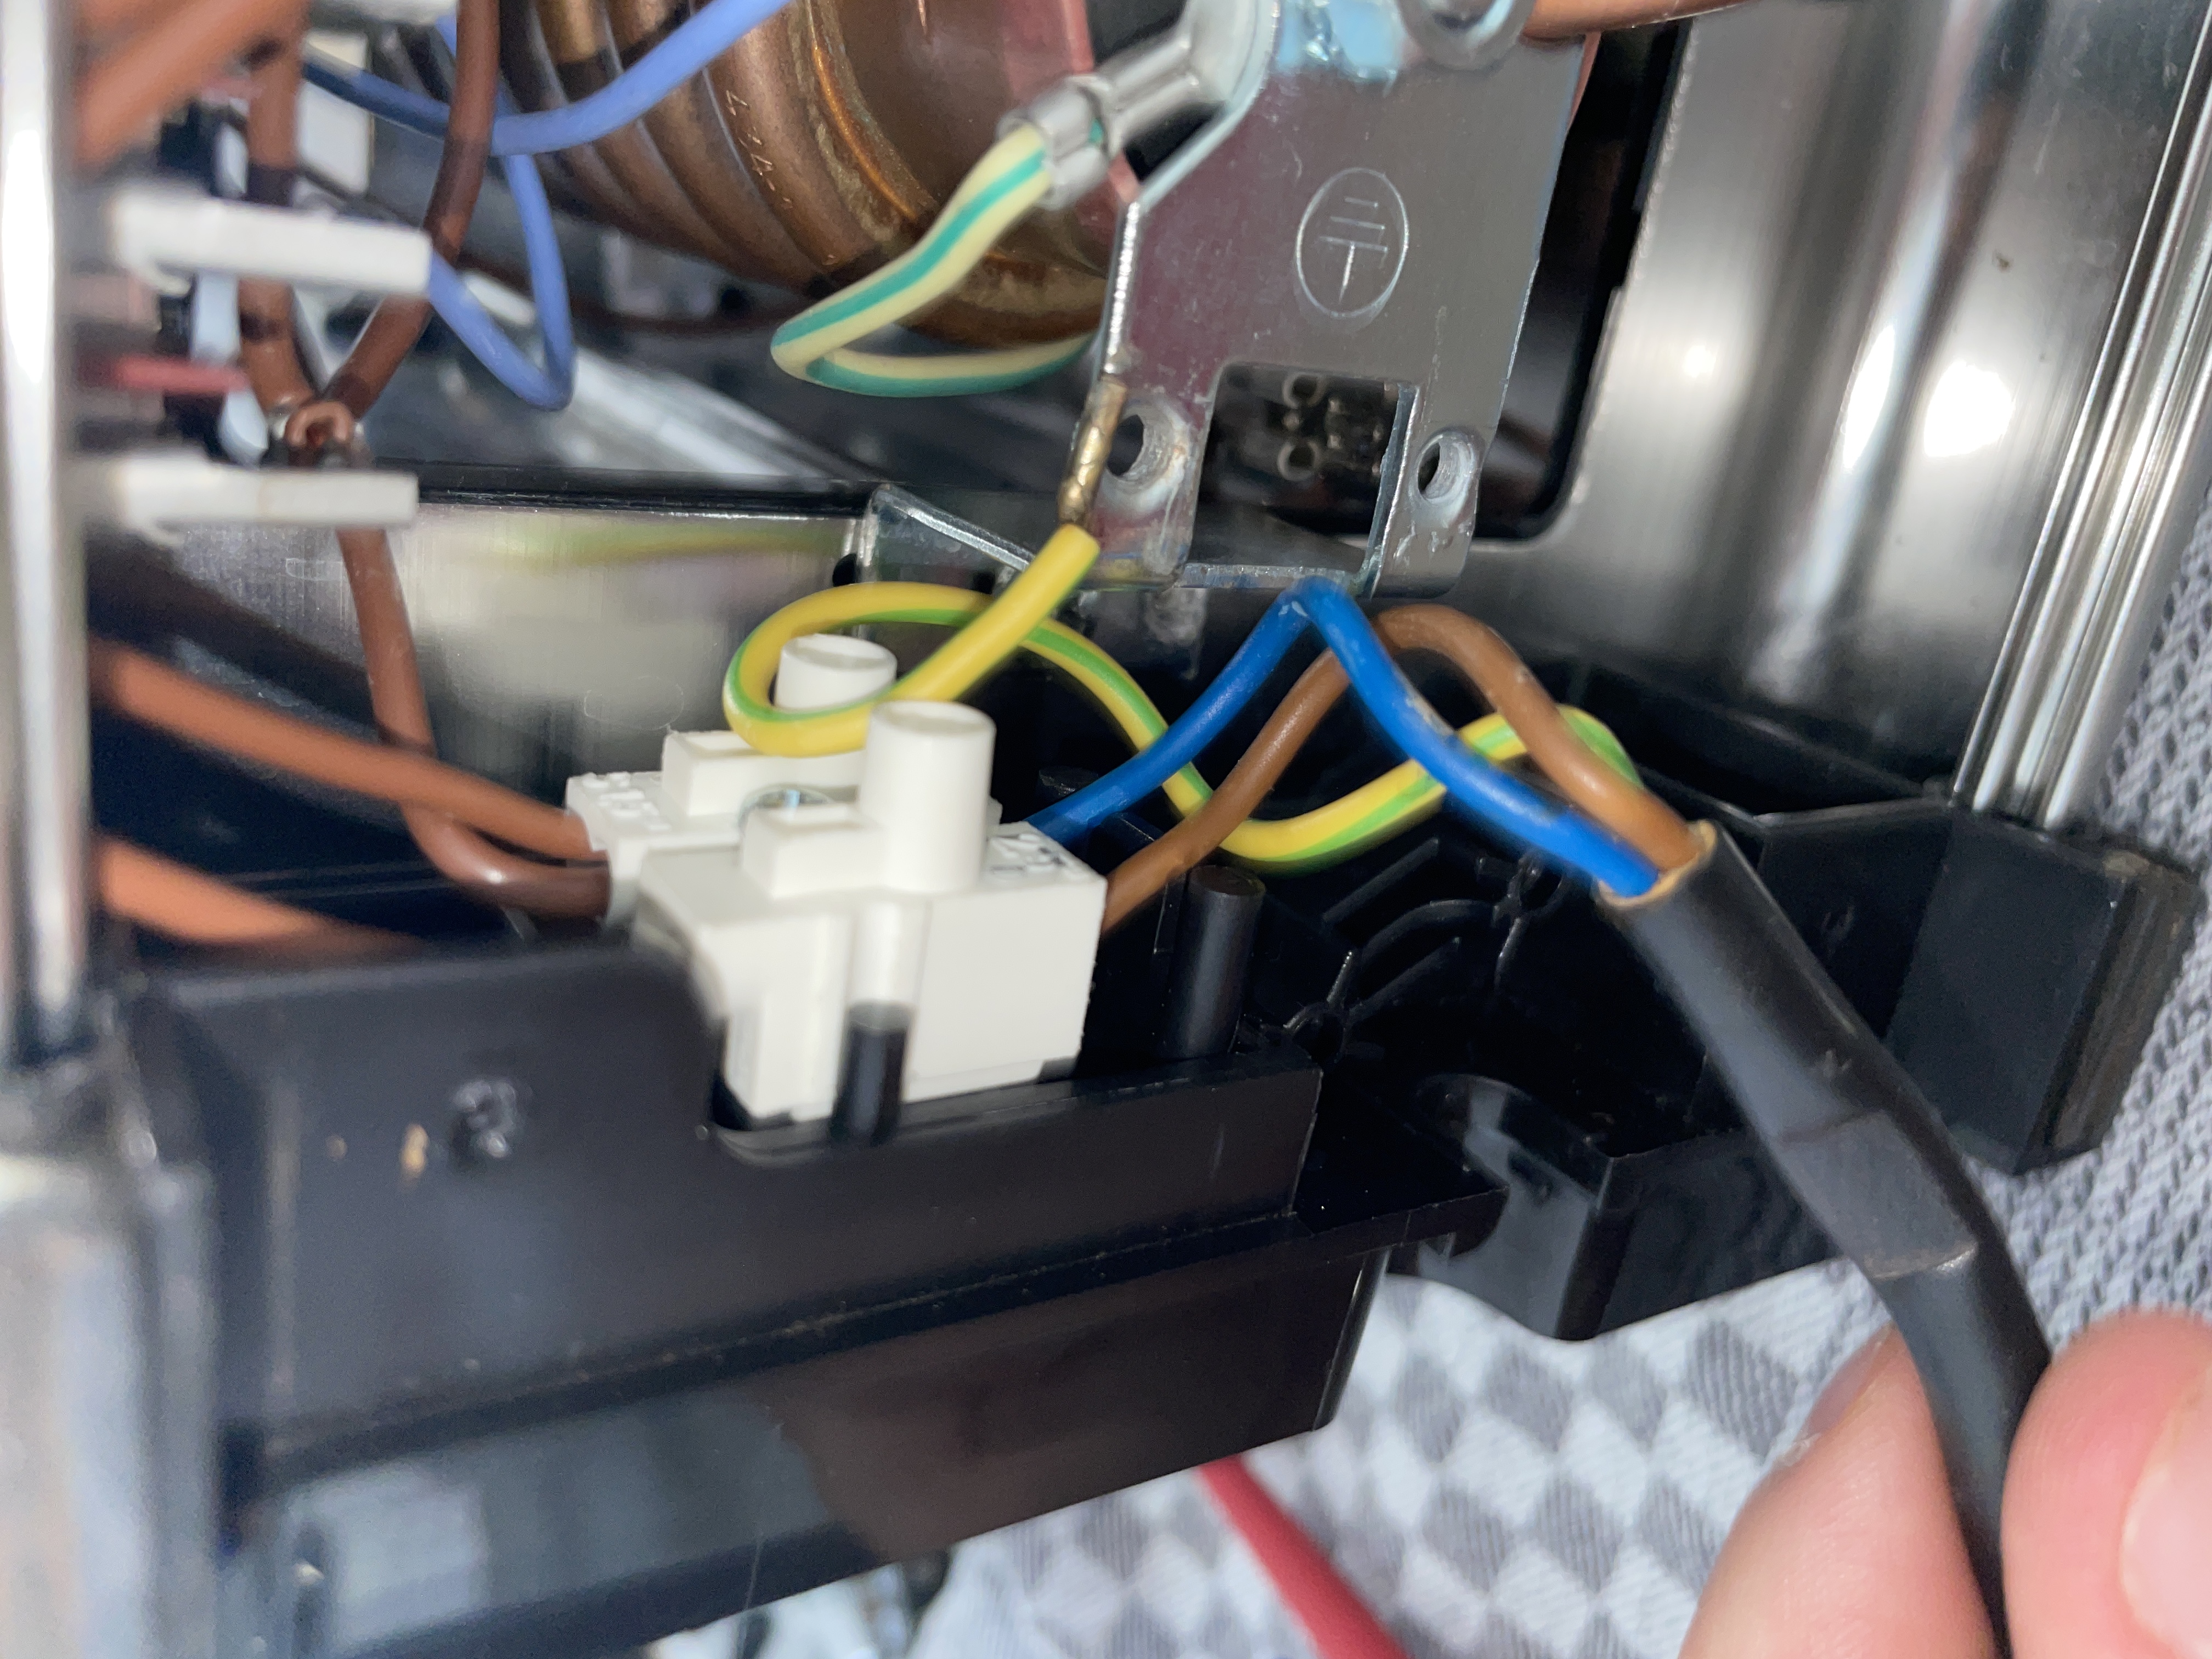
After everything is disconnected, it is not possible to disconnect the underside from the tower. Be careful when pulling the cables through the hole.
5. Mechanic Cat
Not necessary, but recommended.
$ cat /proc/coffee_status > STATUS: Paw-sing - inspection in progress
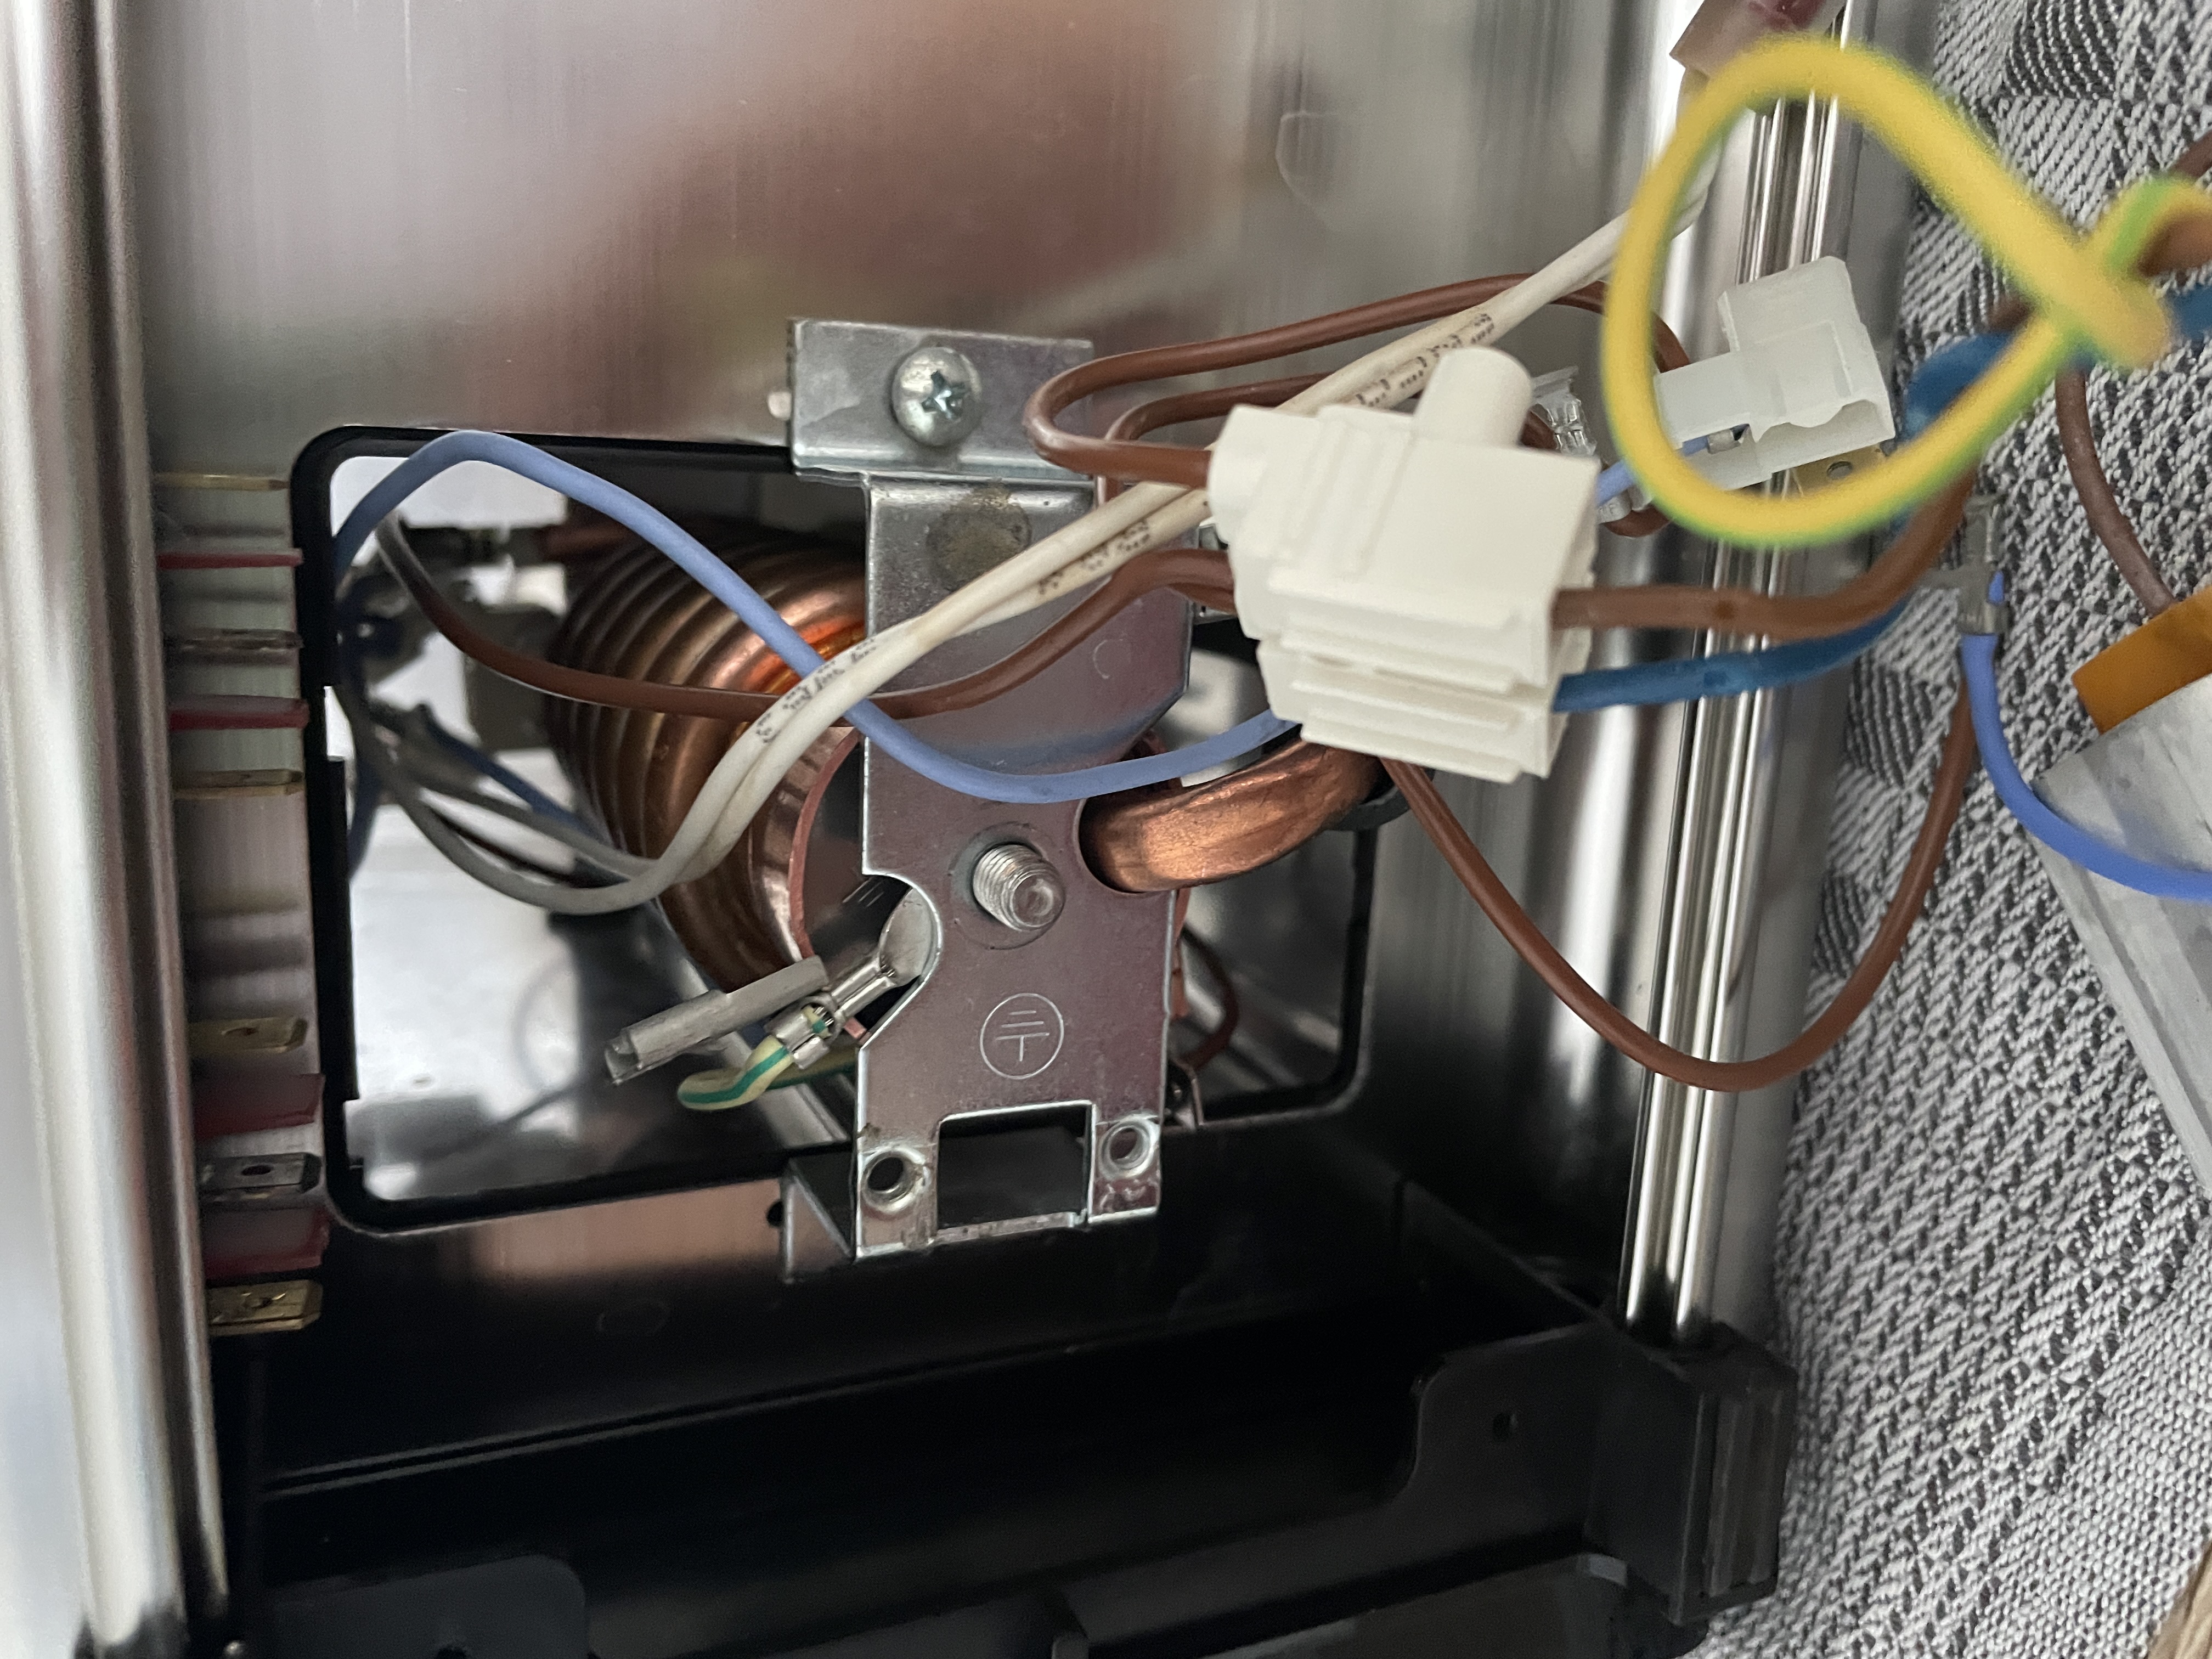
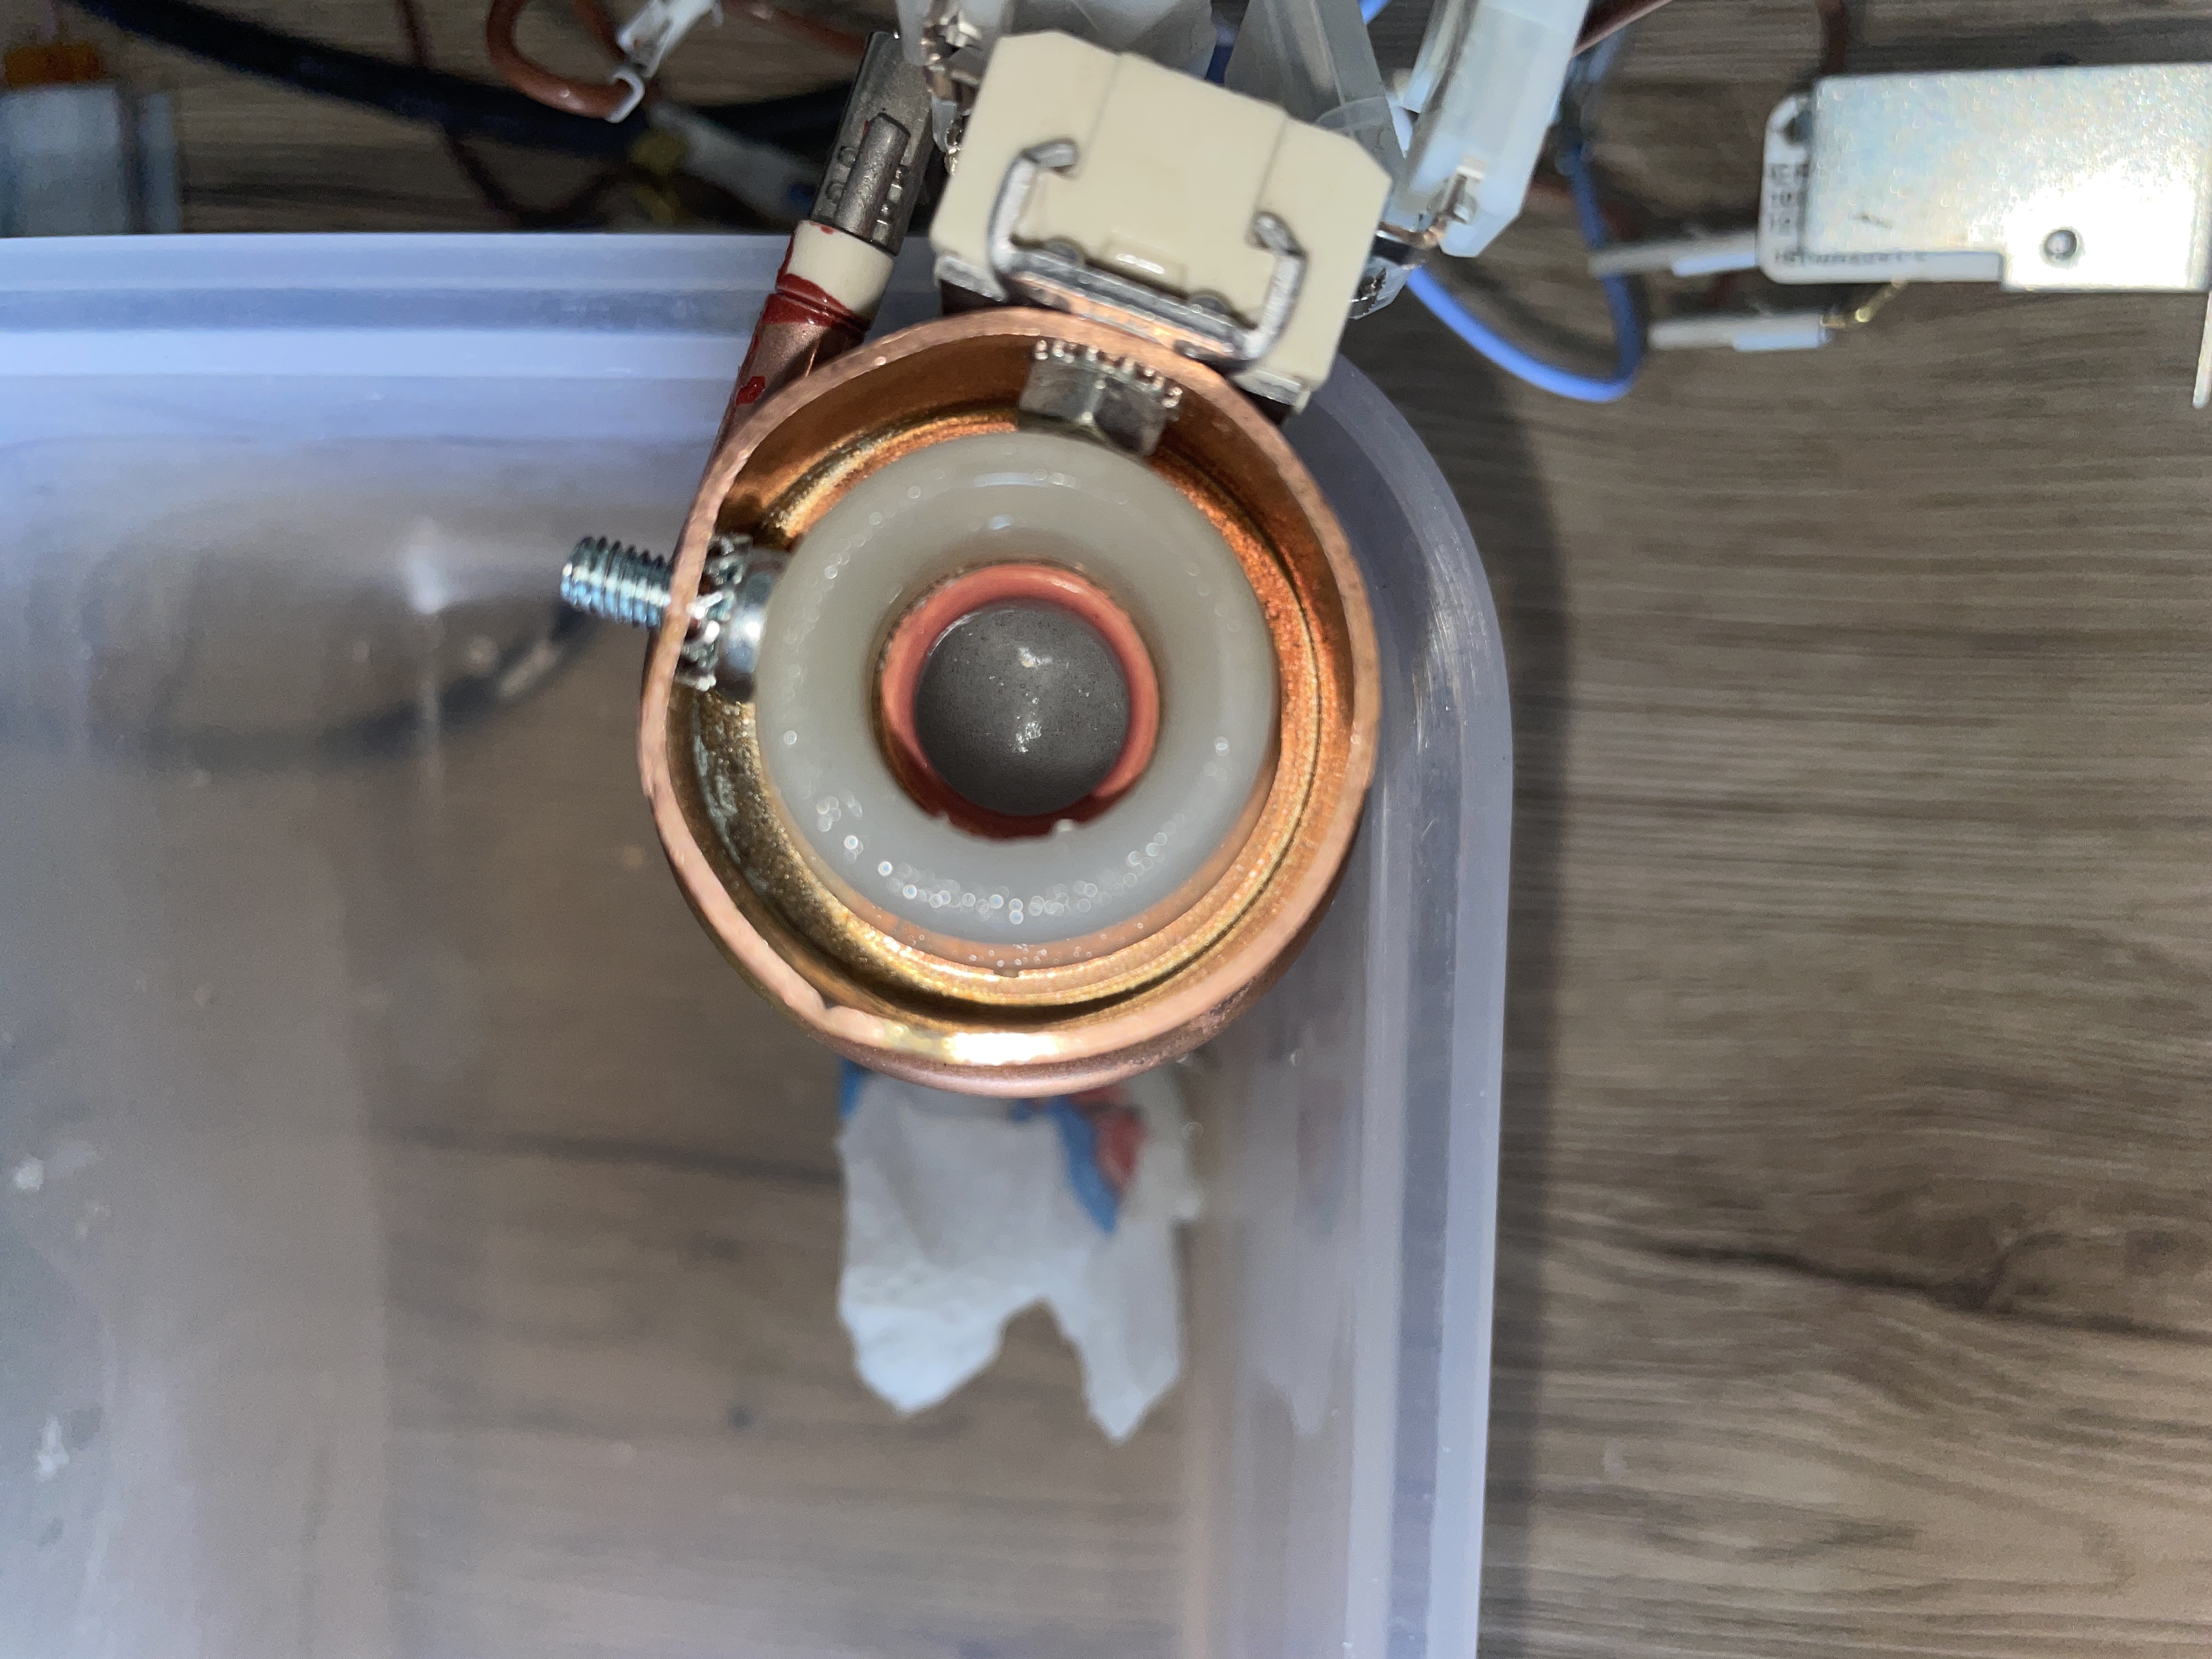
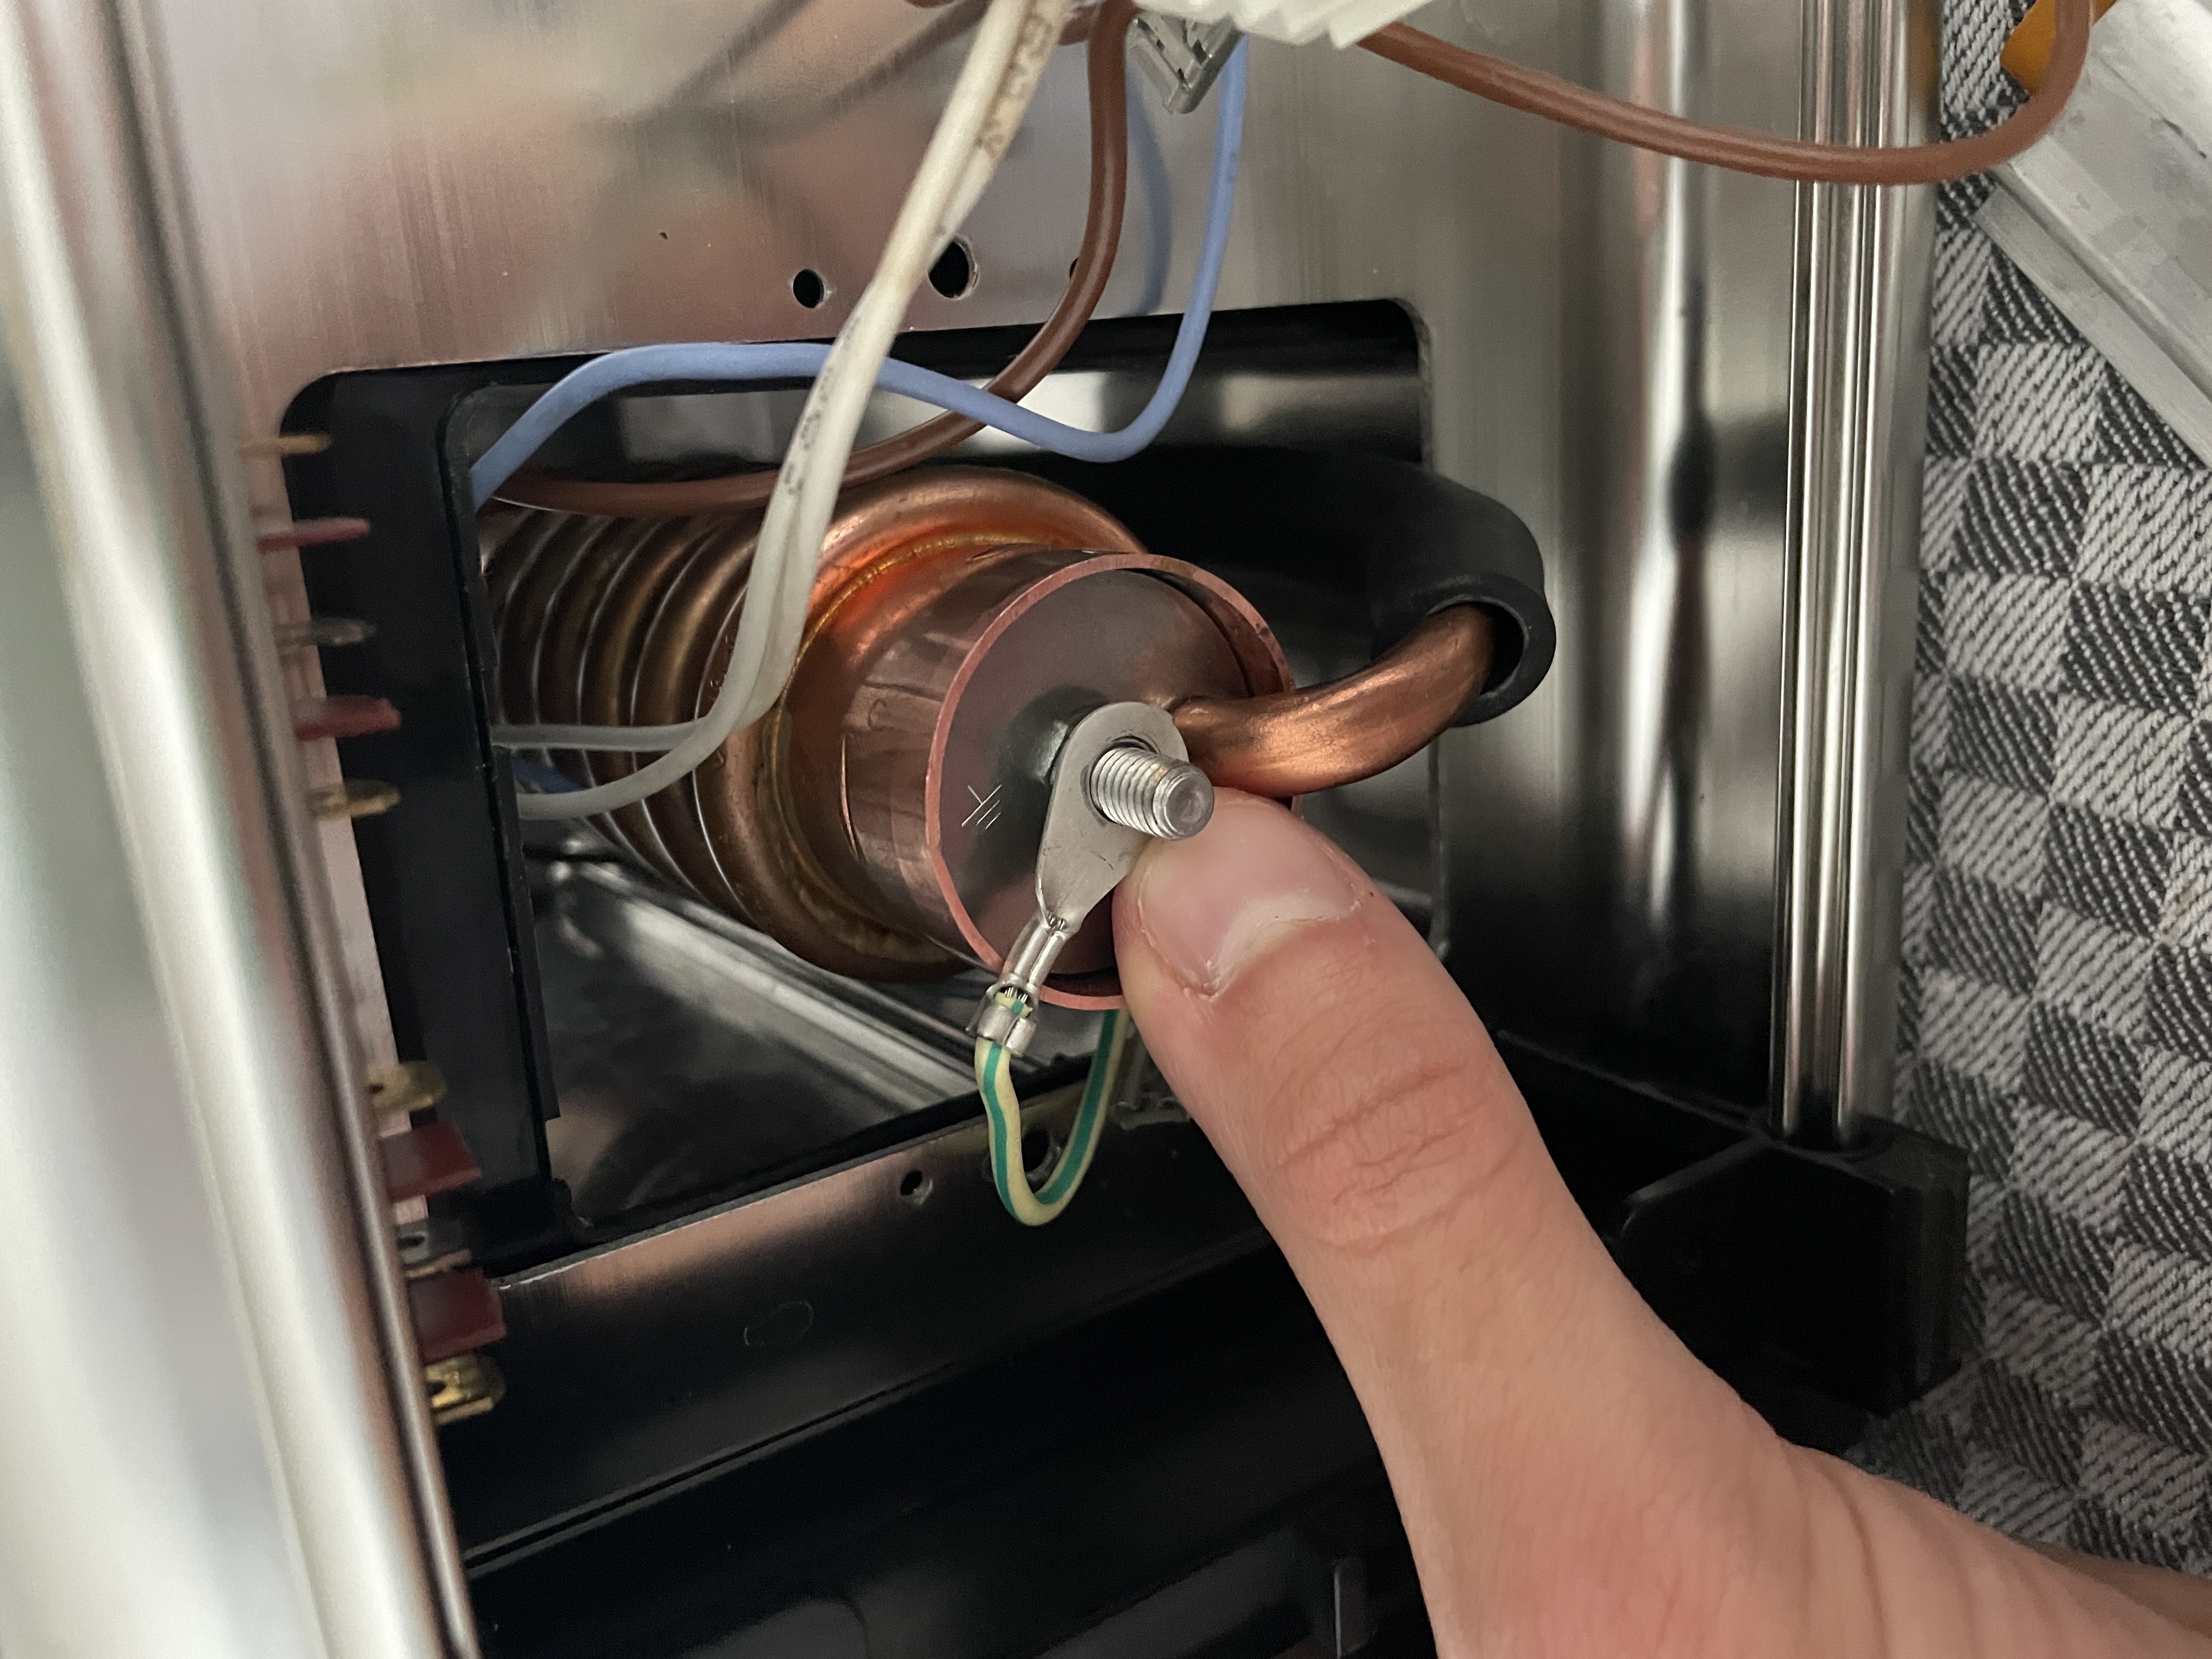
6. Disconnect Copper Tubing
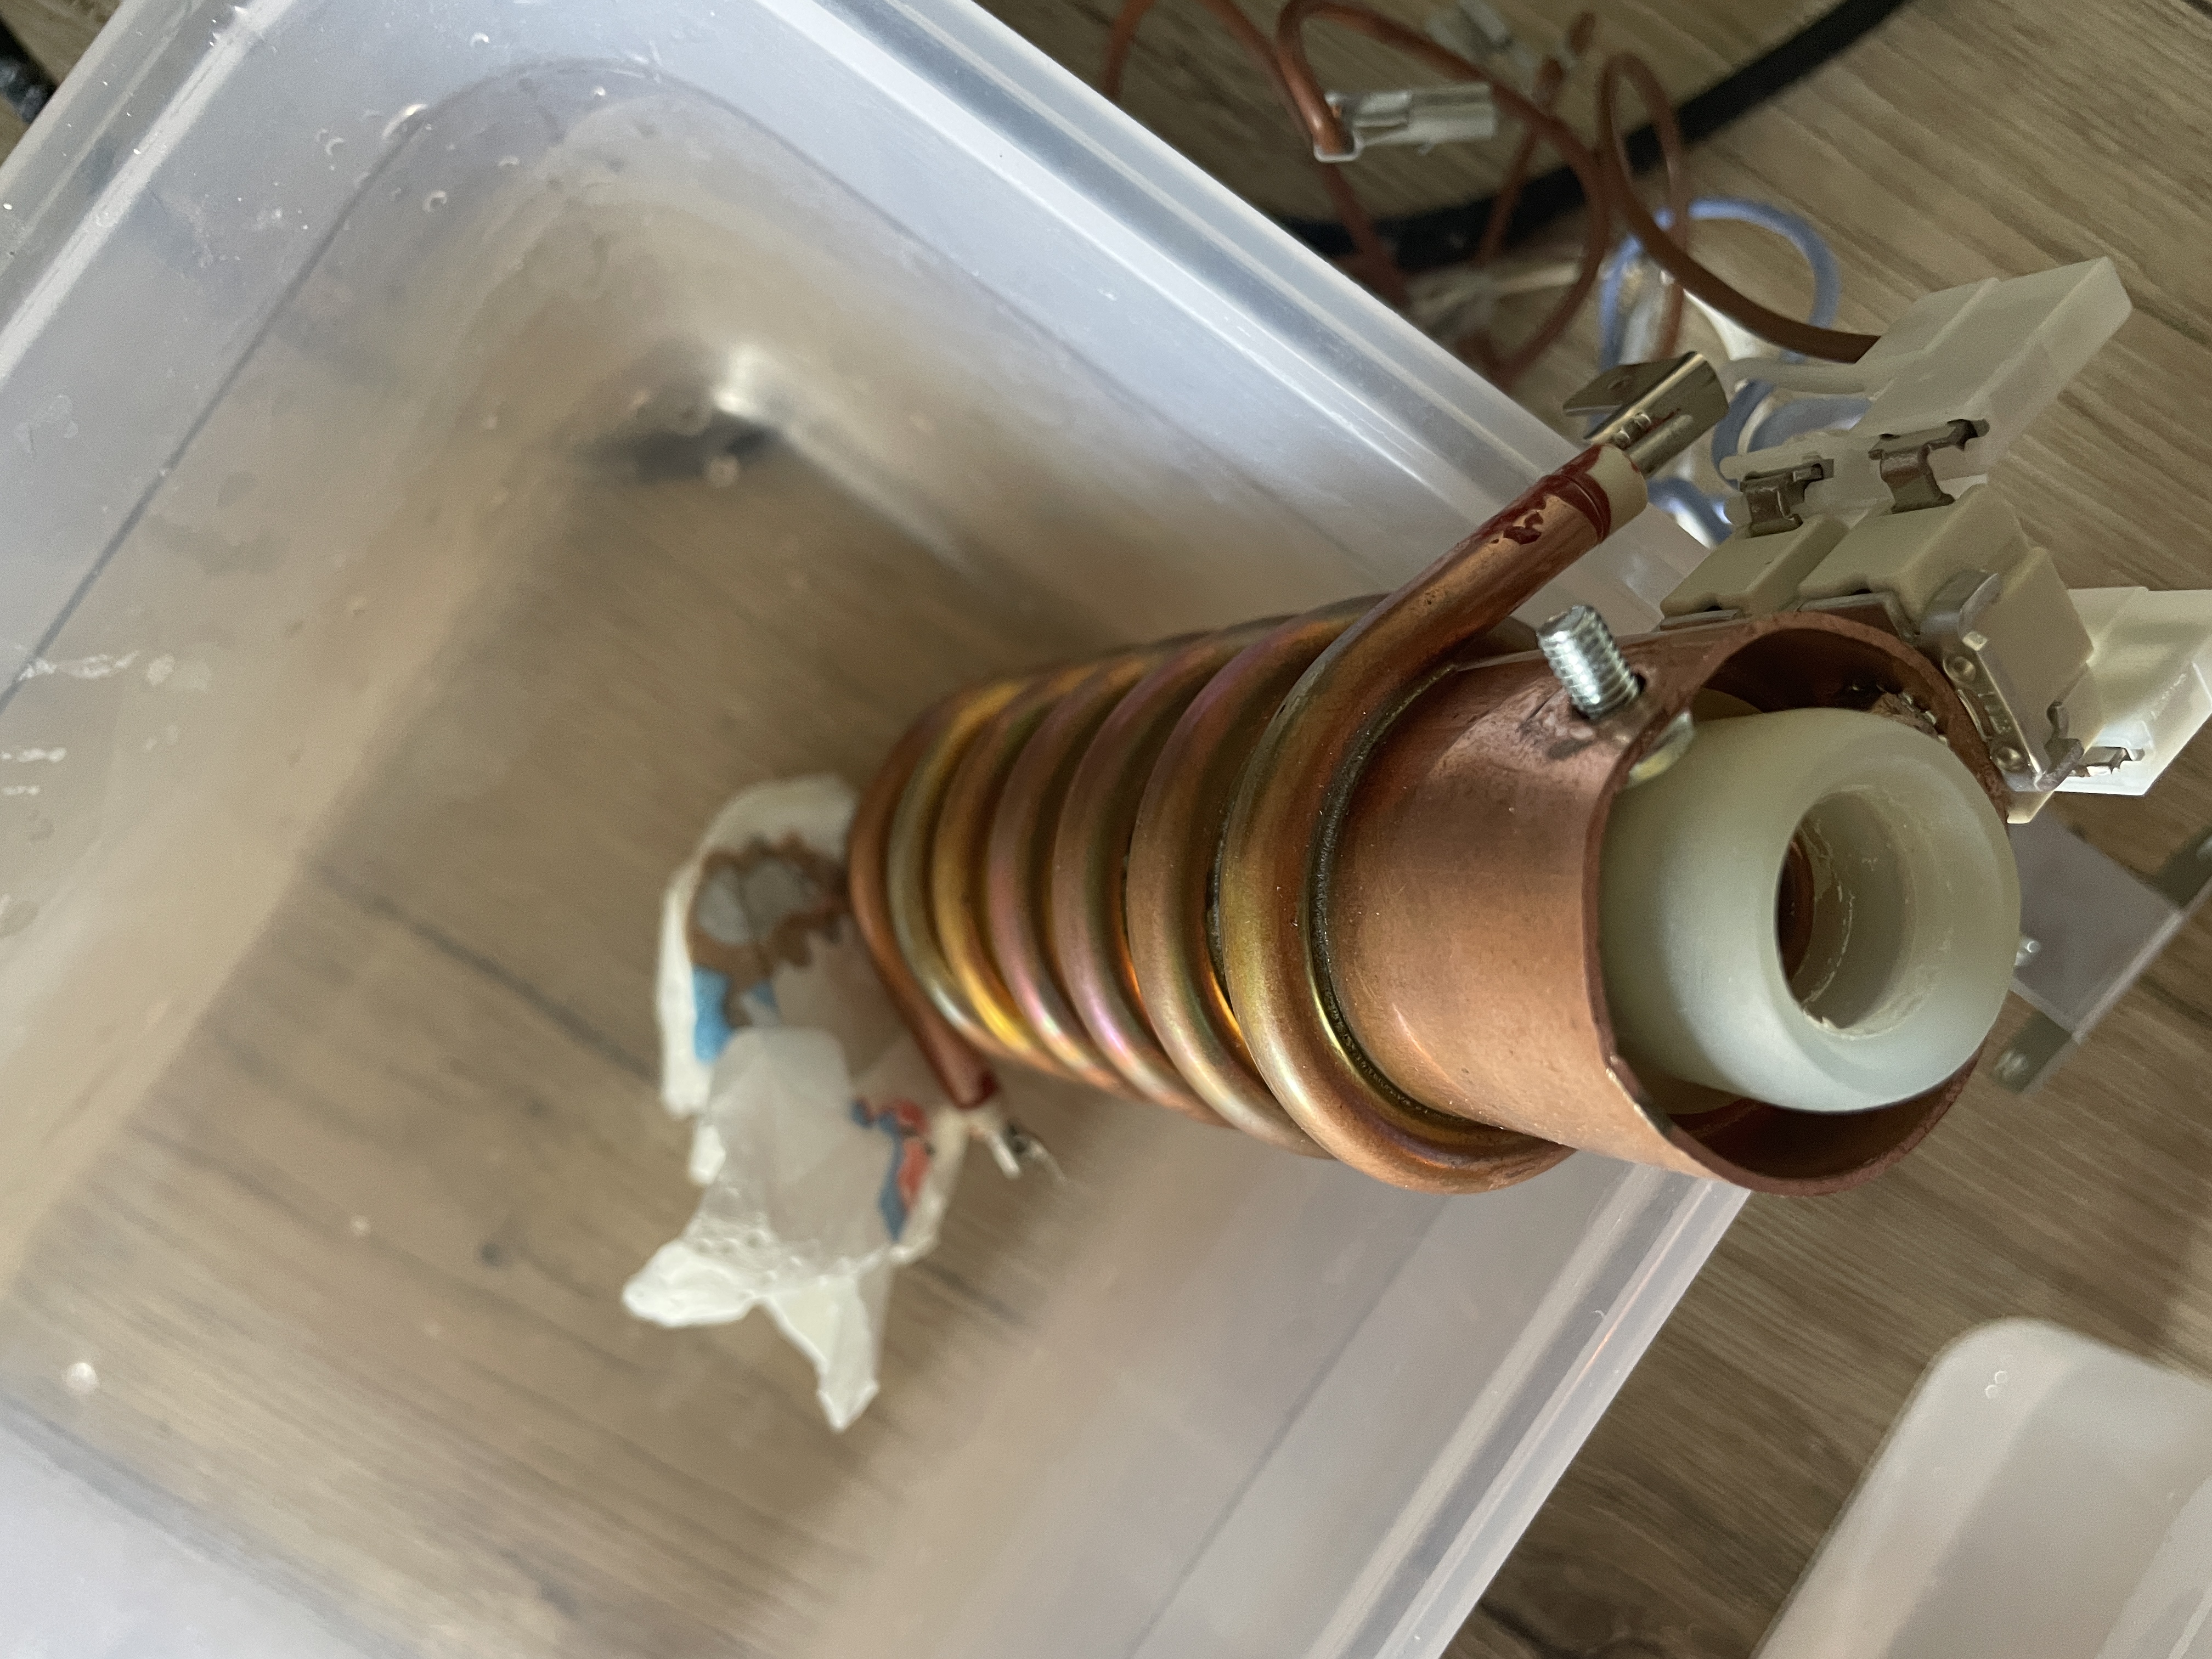
After removing the nut from the heating element, I removed the copper tubing.
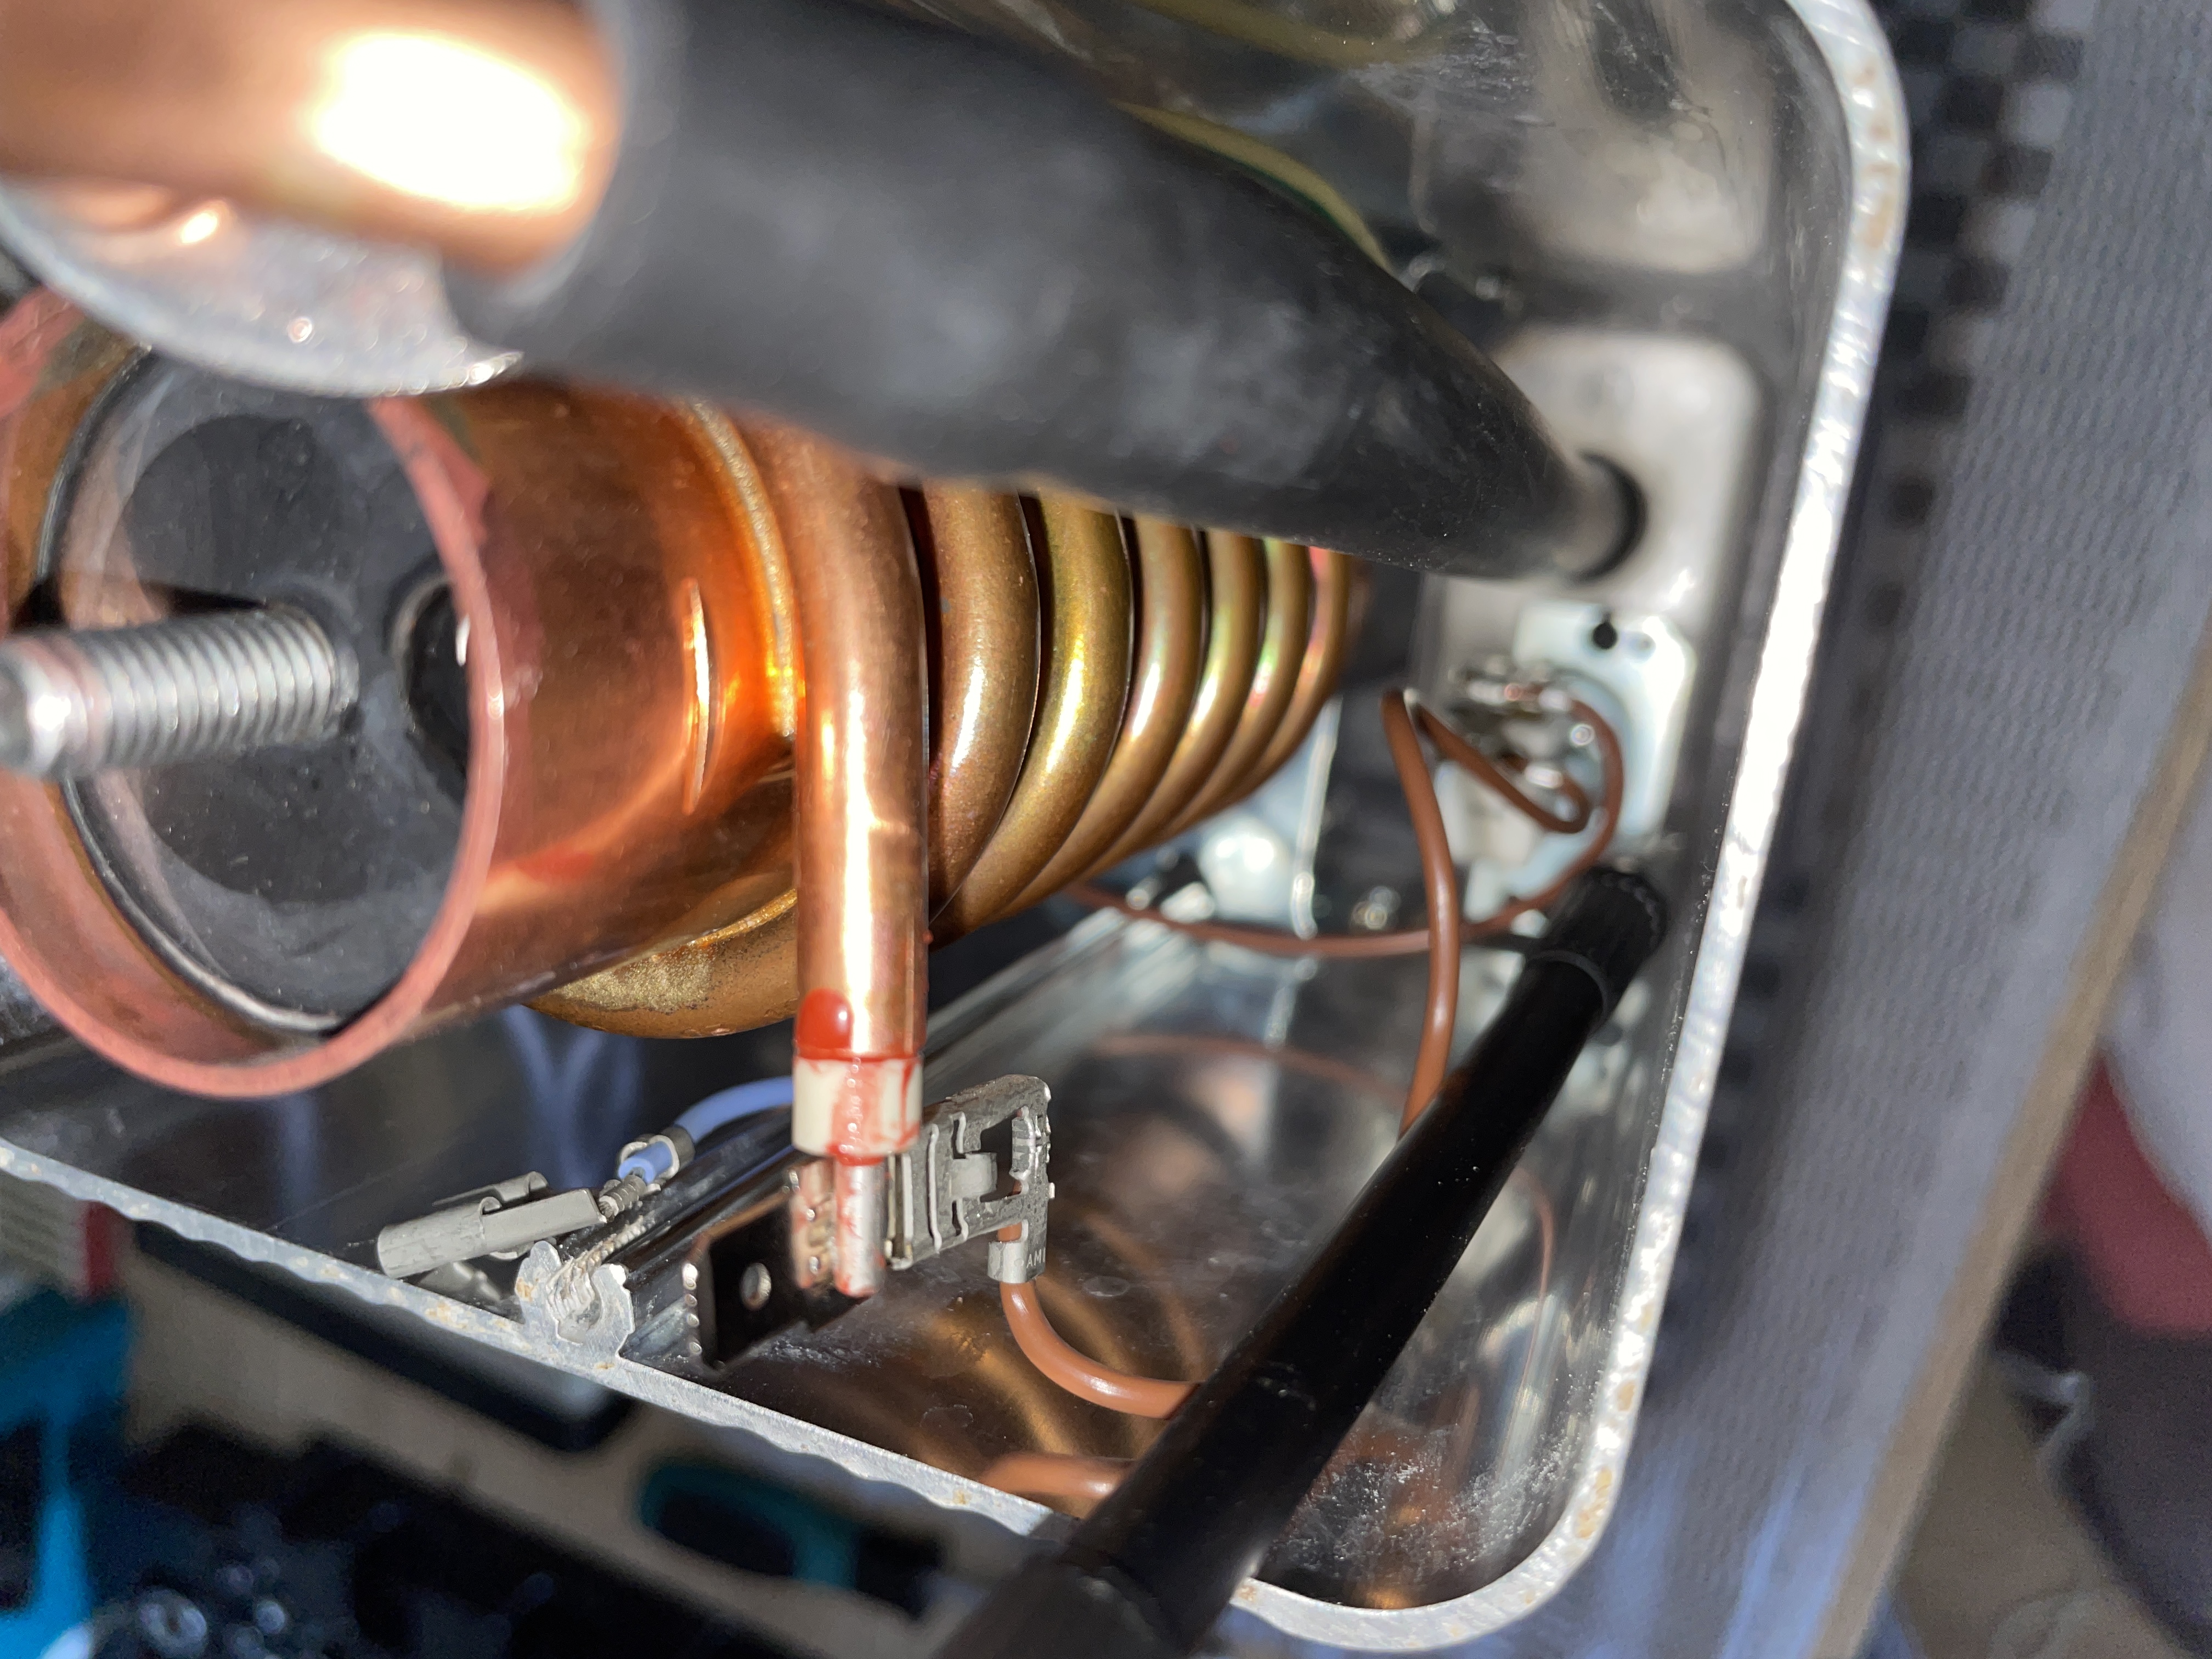
Ultimately, this is were the leak was coming from in my case. An elaboration on this is provided at the end.
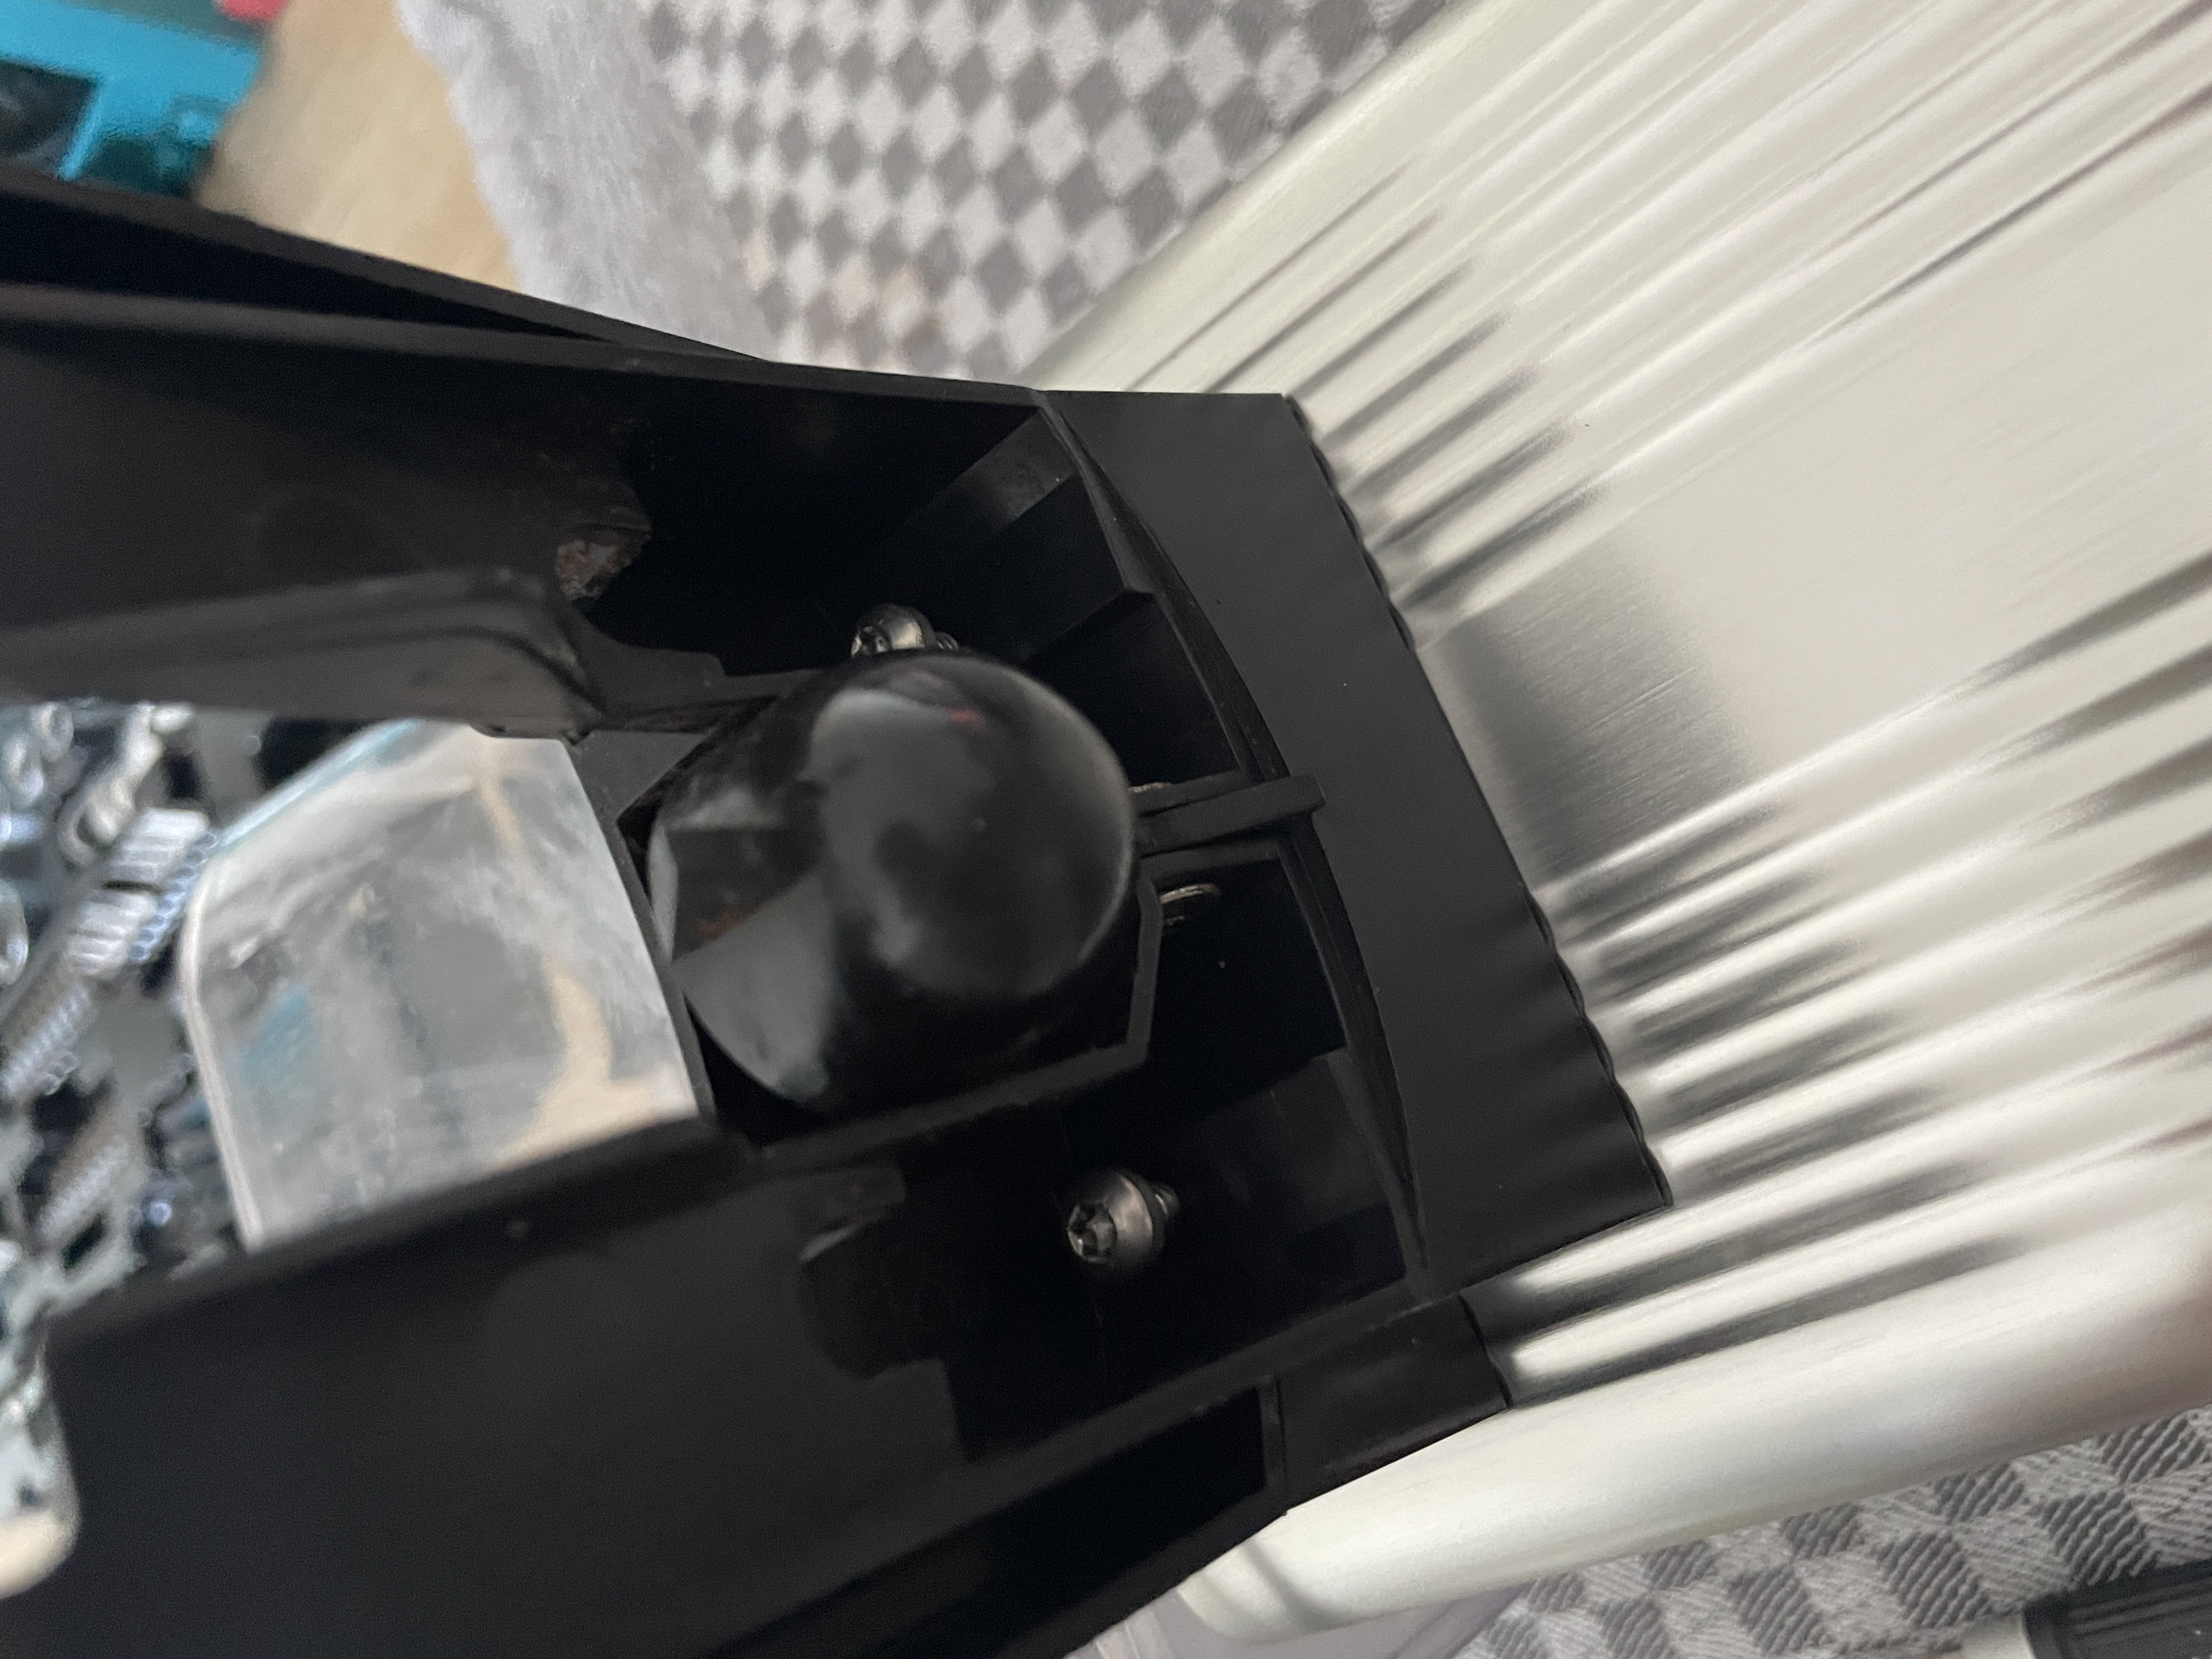
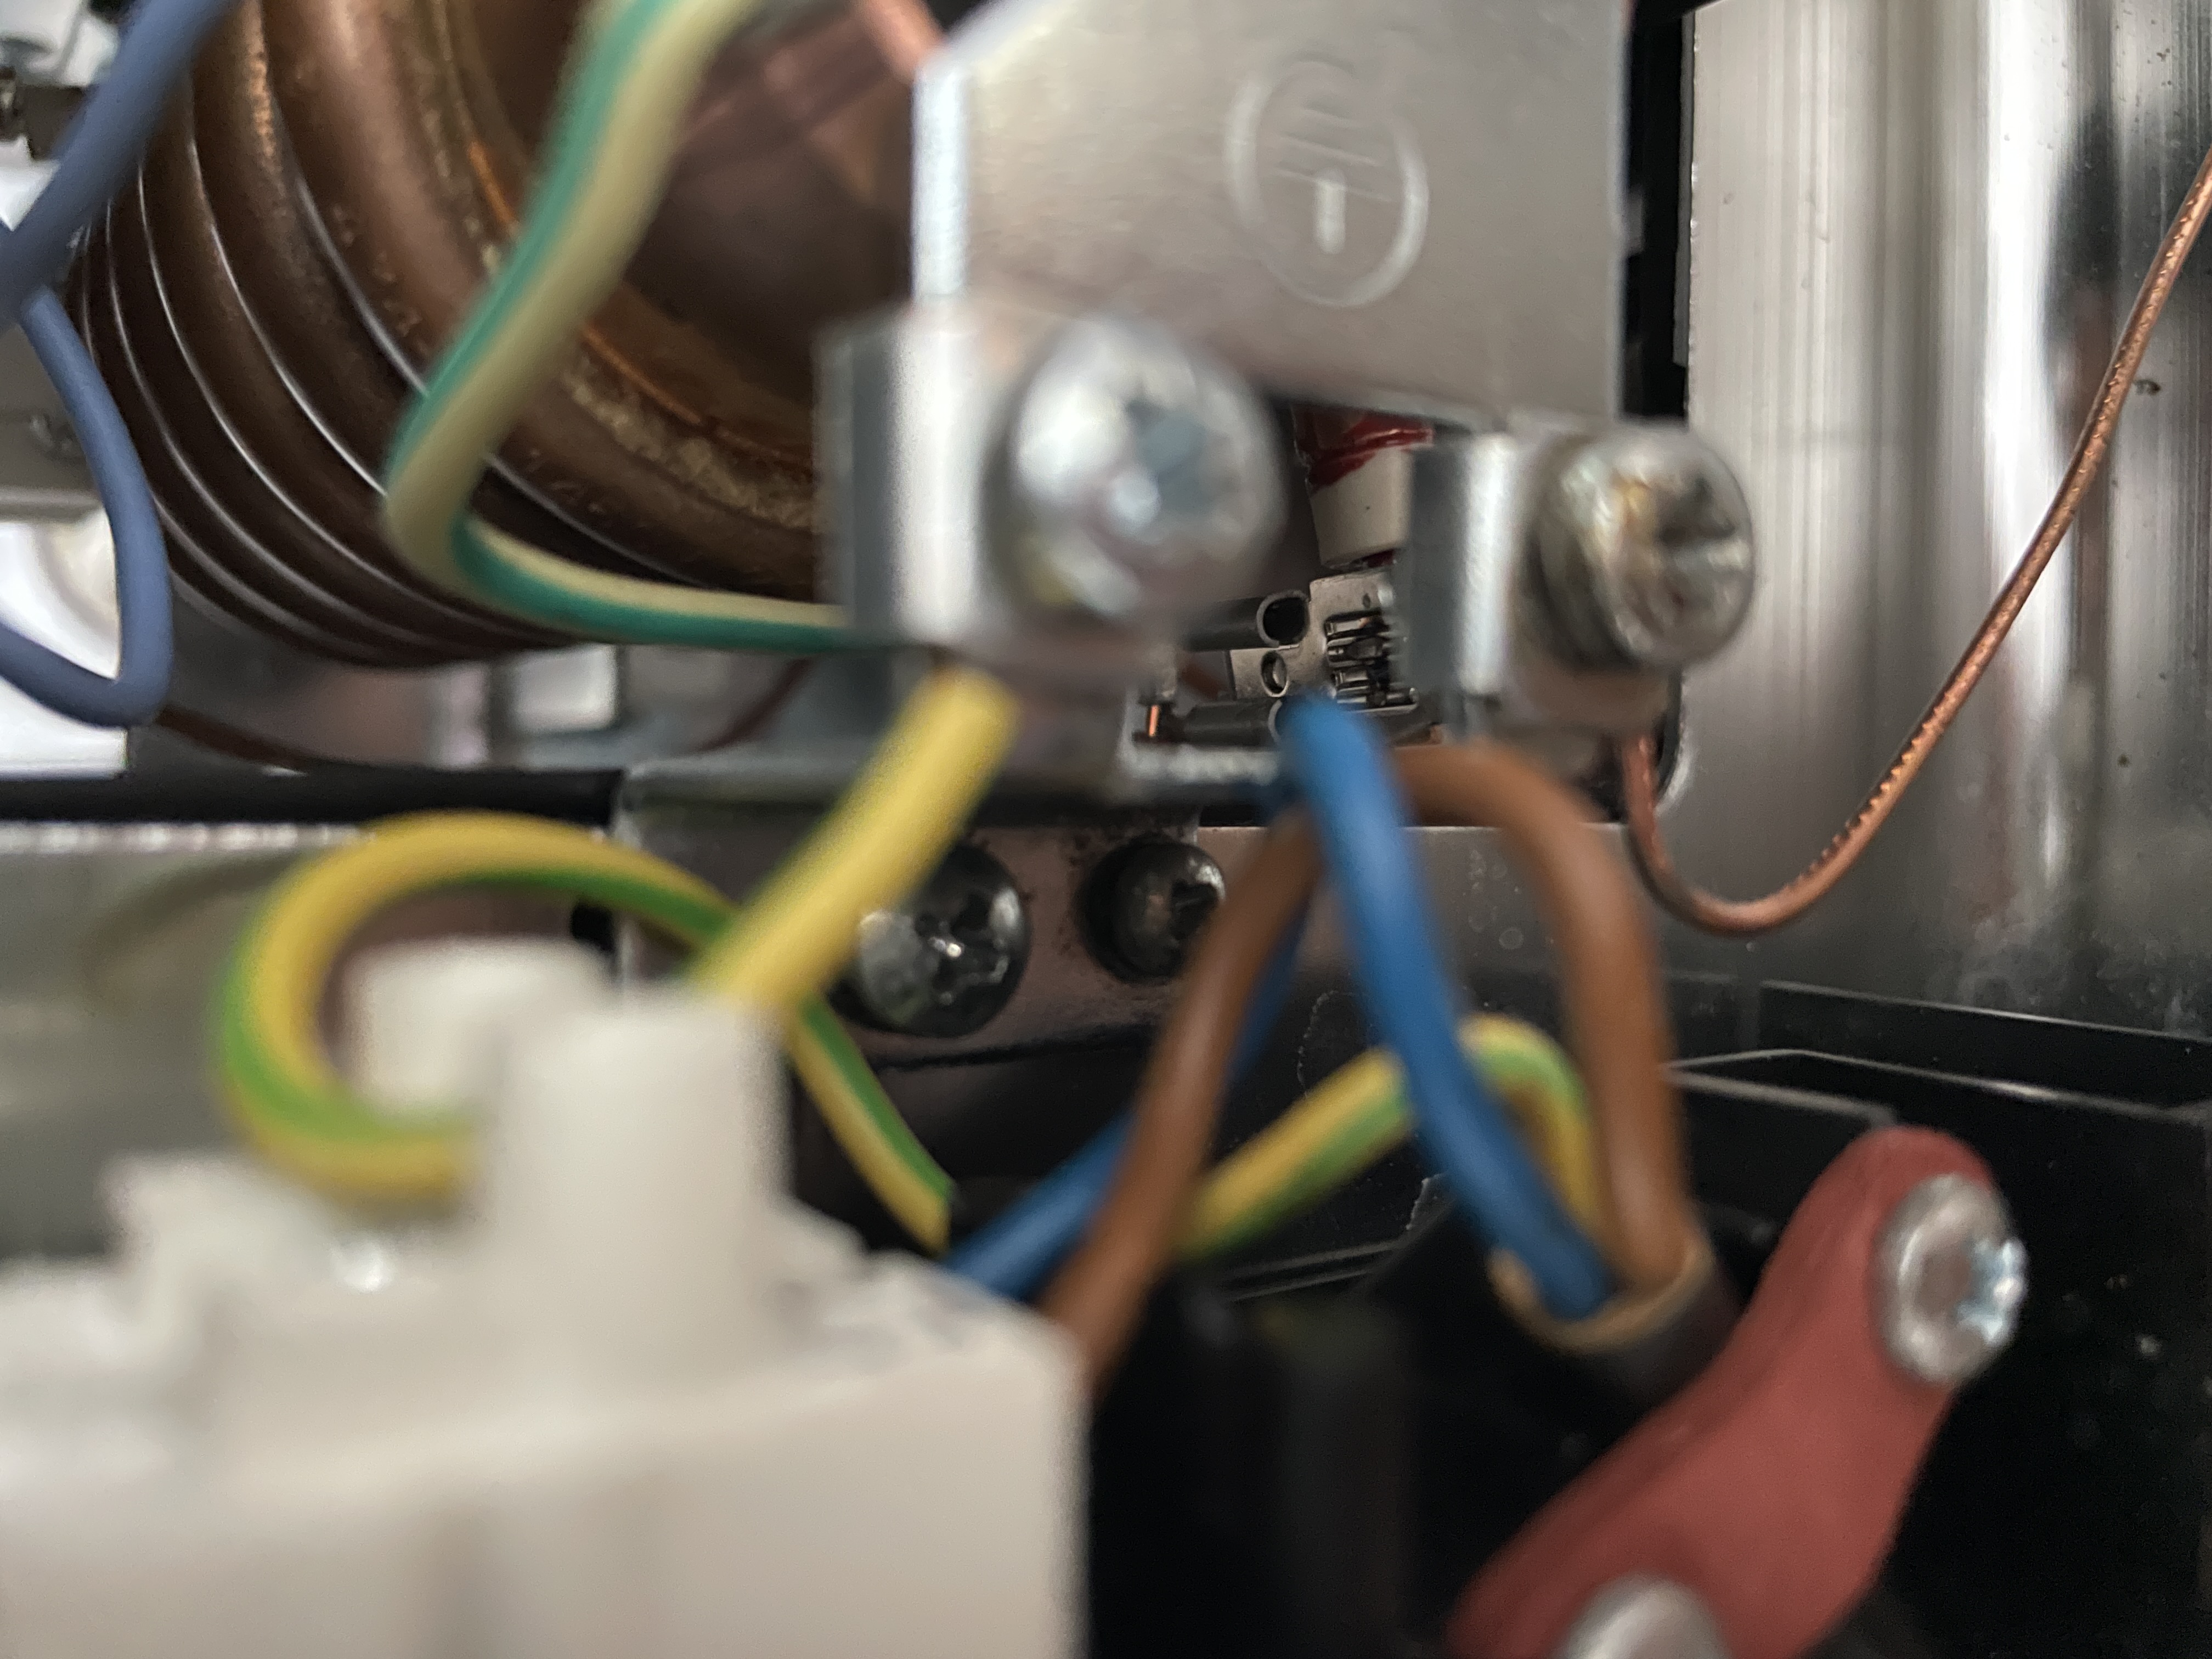
7. Disconnect The Controller For The Floating Element
This is one of the trickier steps, since the screw are inside and difficult to reach. Again, I used a magnetic bit holder extender to reach them.
8. Disconnecting The Tower From The Water Tank
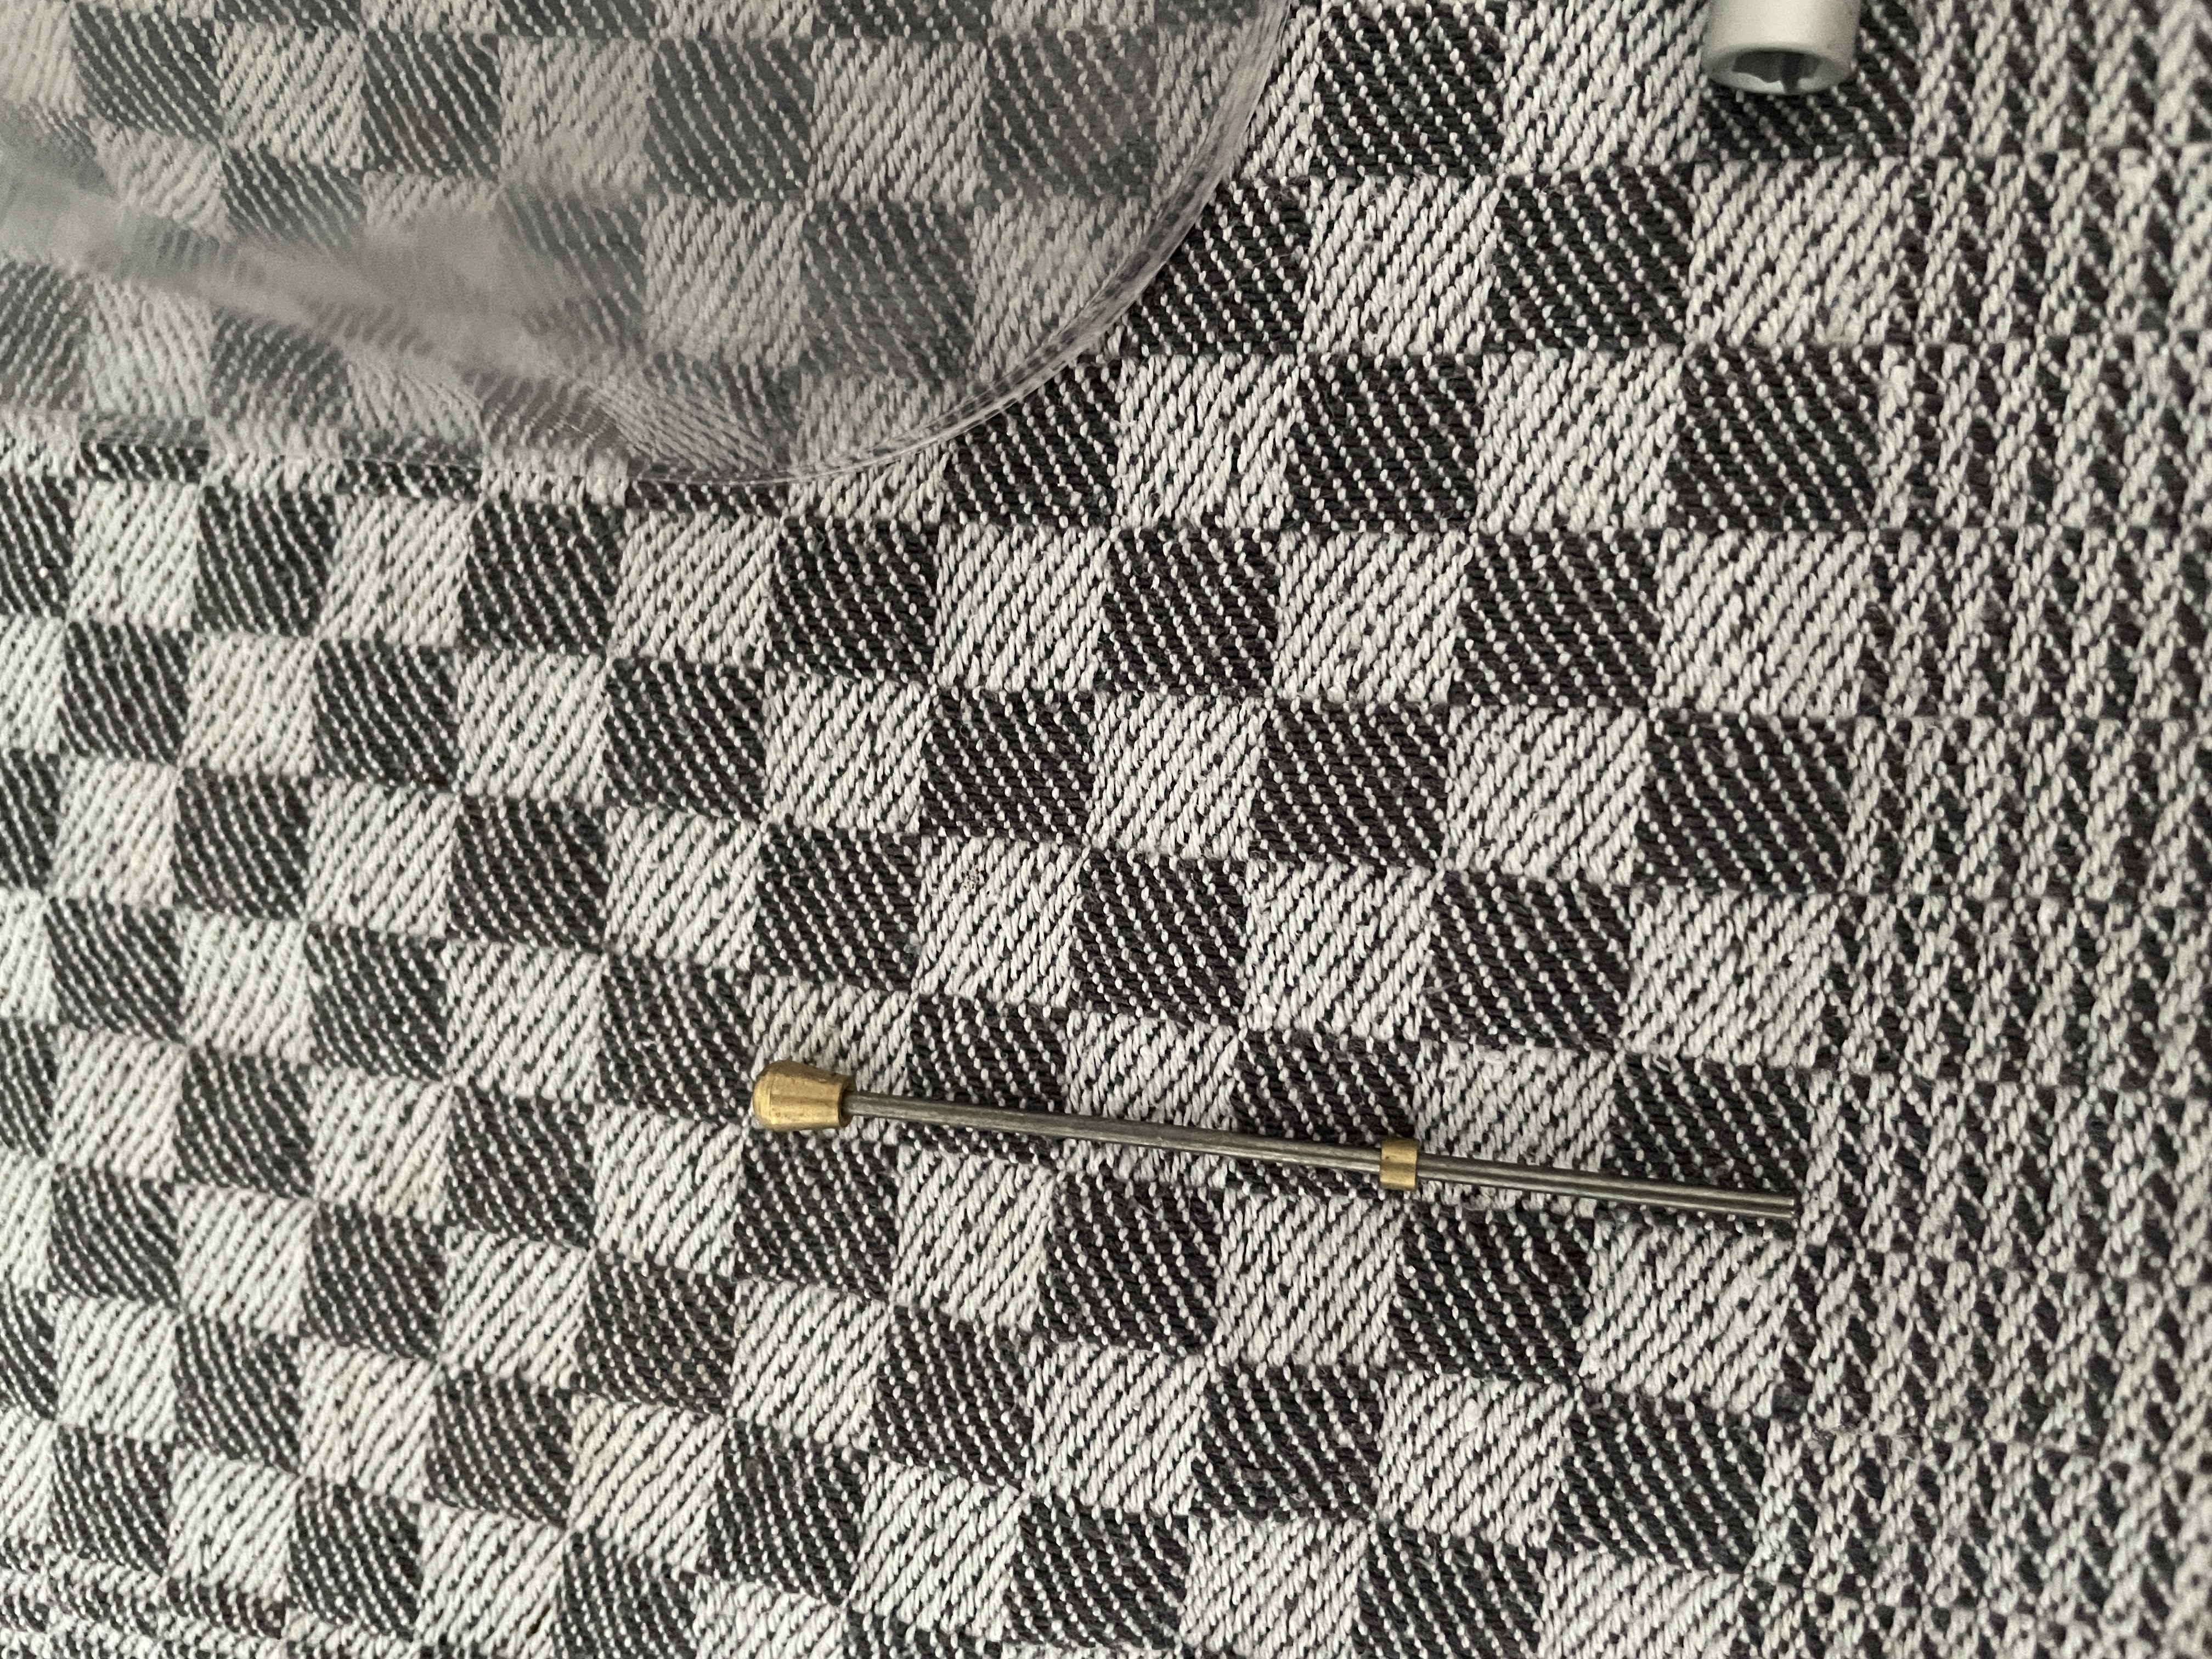
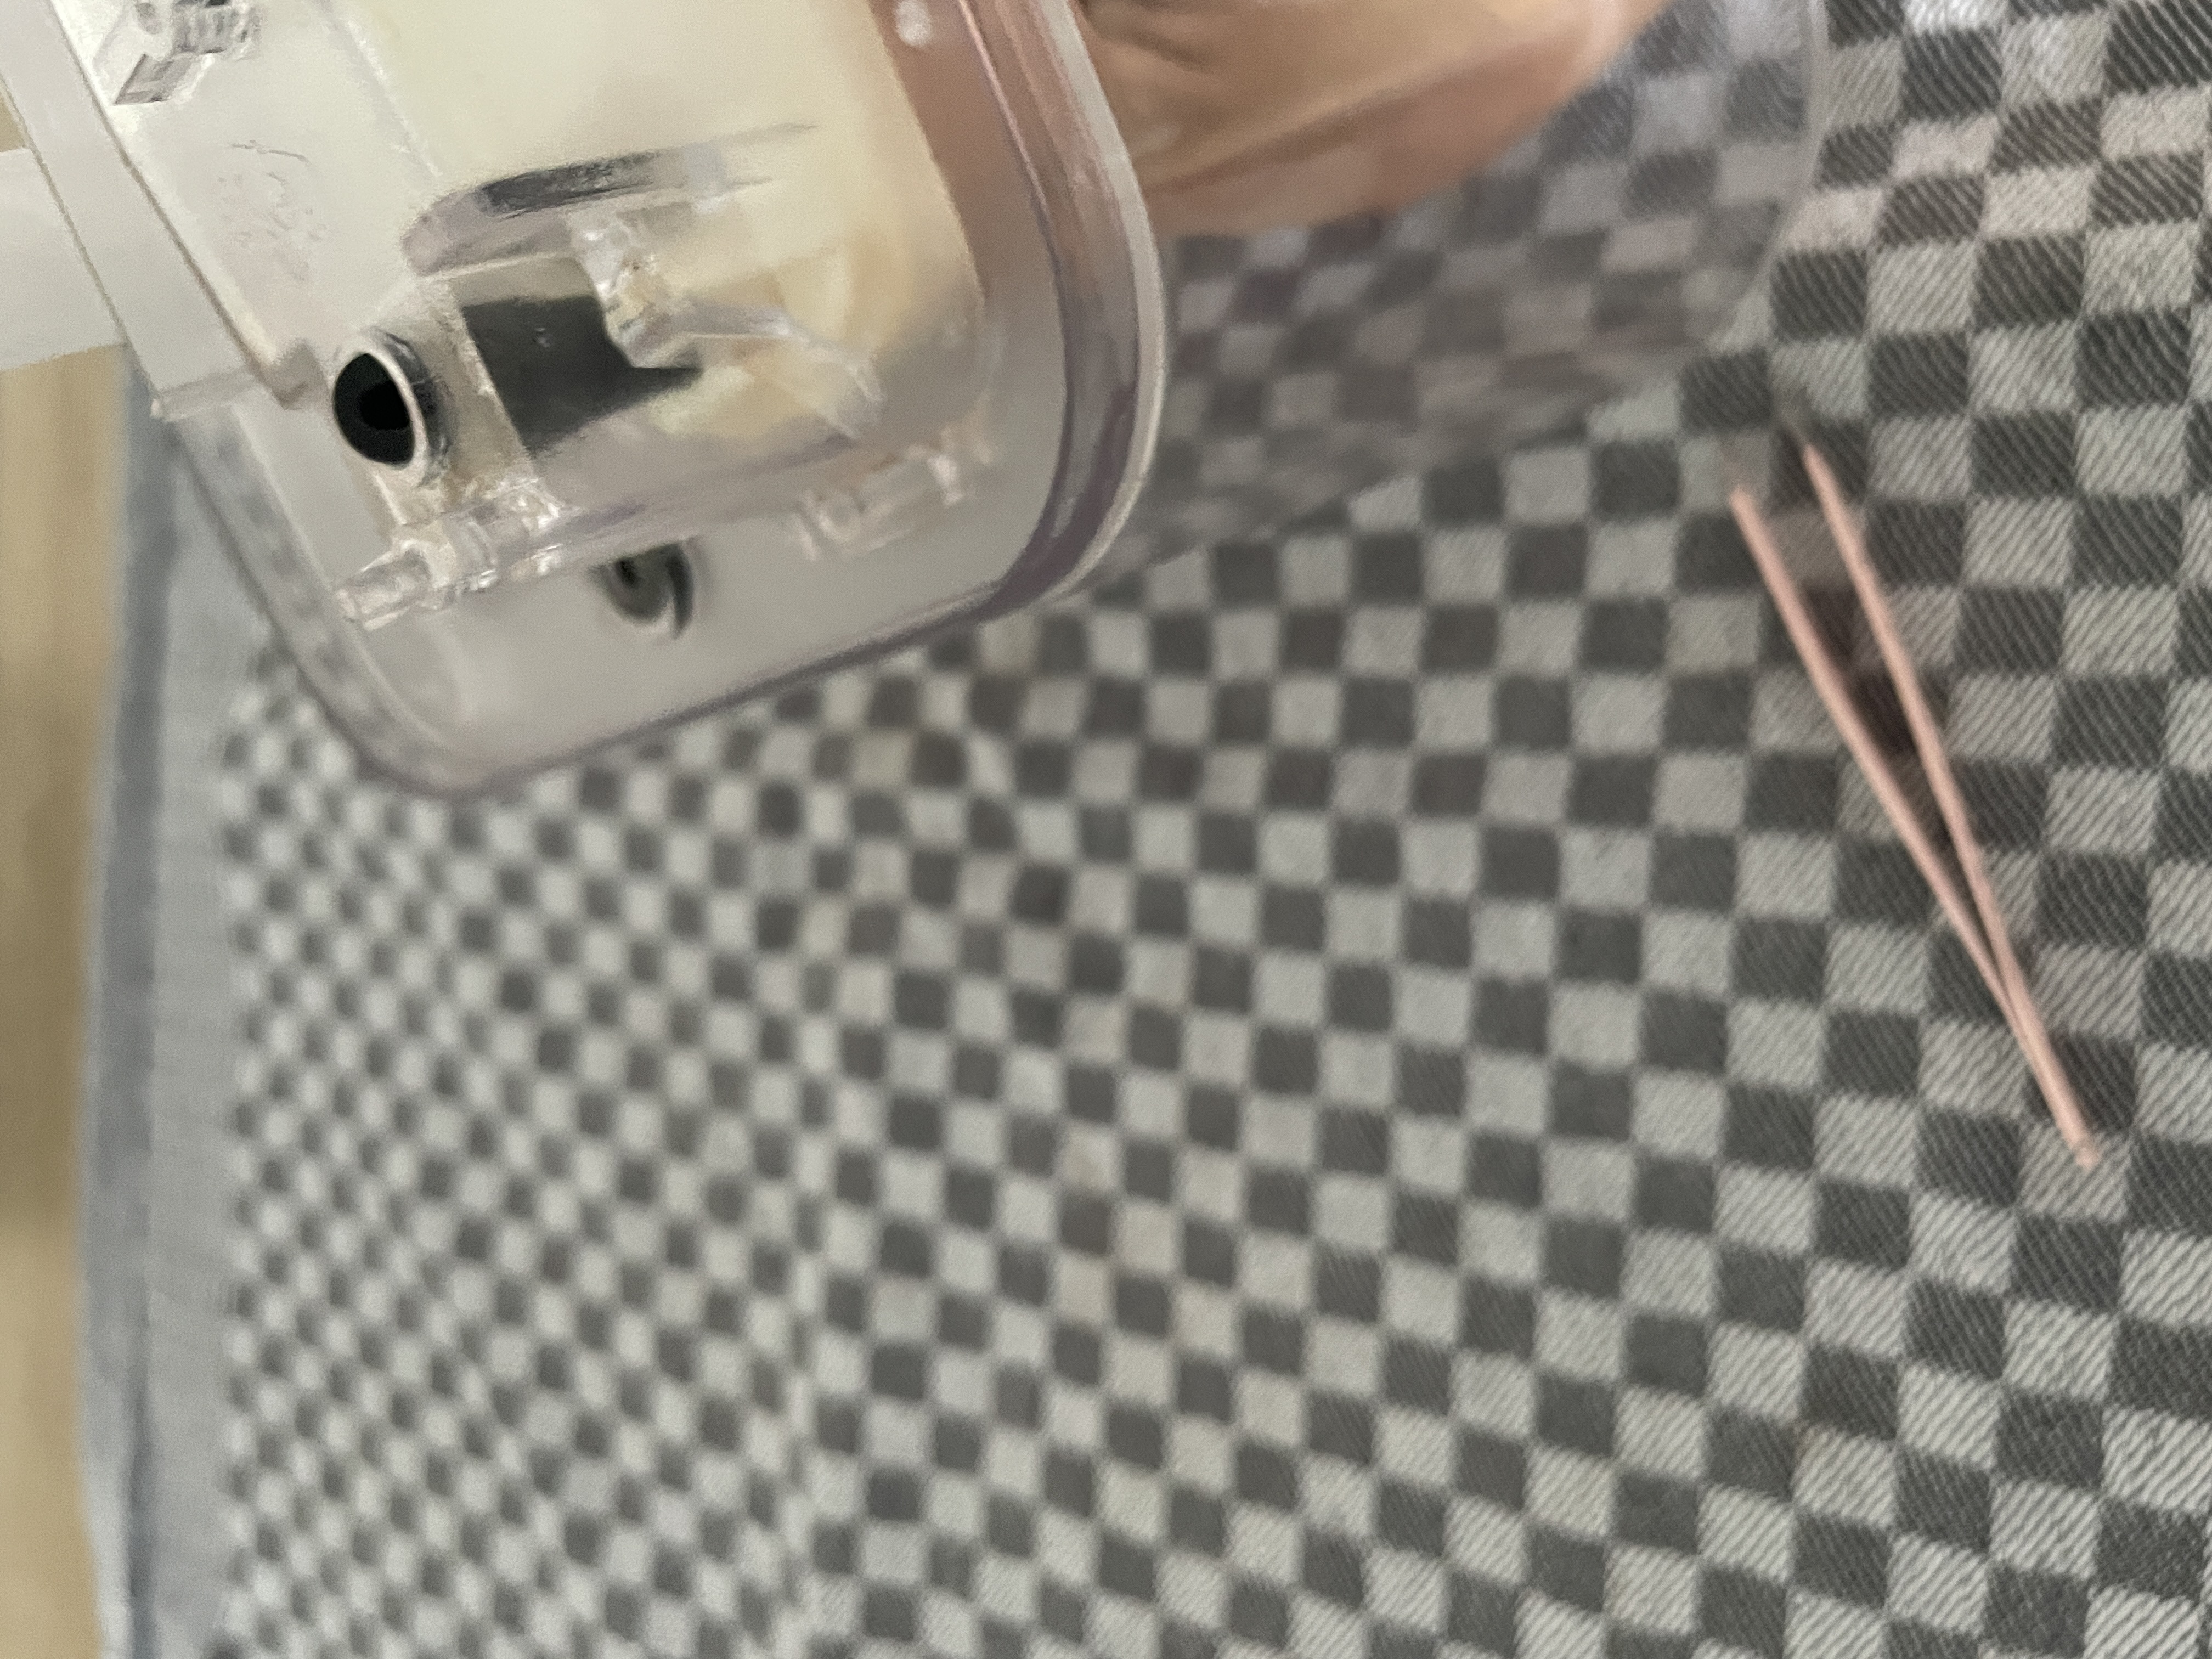
Once everything is unscrewed, the heating element can be pulled out. Be careful, since it connects to the glass tube which is attached to the water tank. This will also reveal this small “stick” (I don’t know what it’s called) which is attached to the floating element and will create the connectiong to tell the heating element when to turn on and off. Be careful not to lose it.
The tower in itself is connected with two Torx screws. Remove them to disconnect the tower from the water tank.
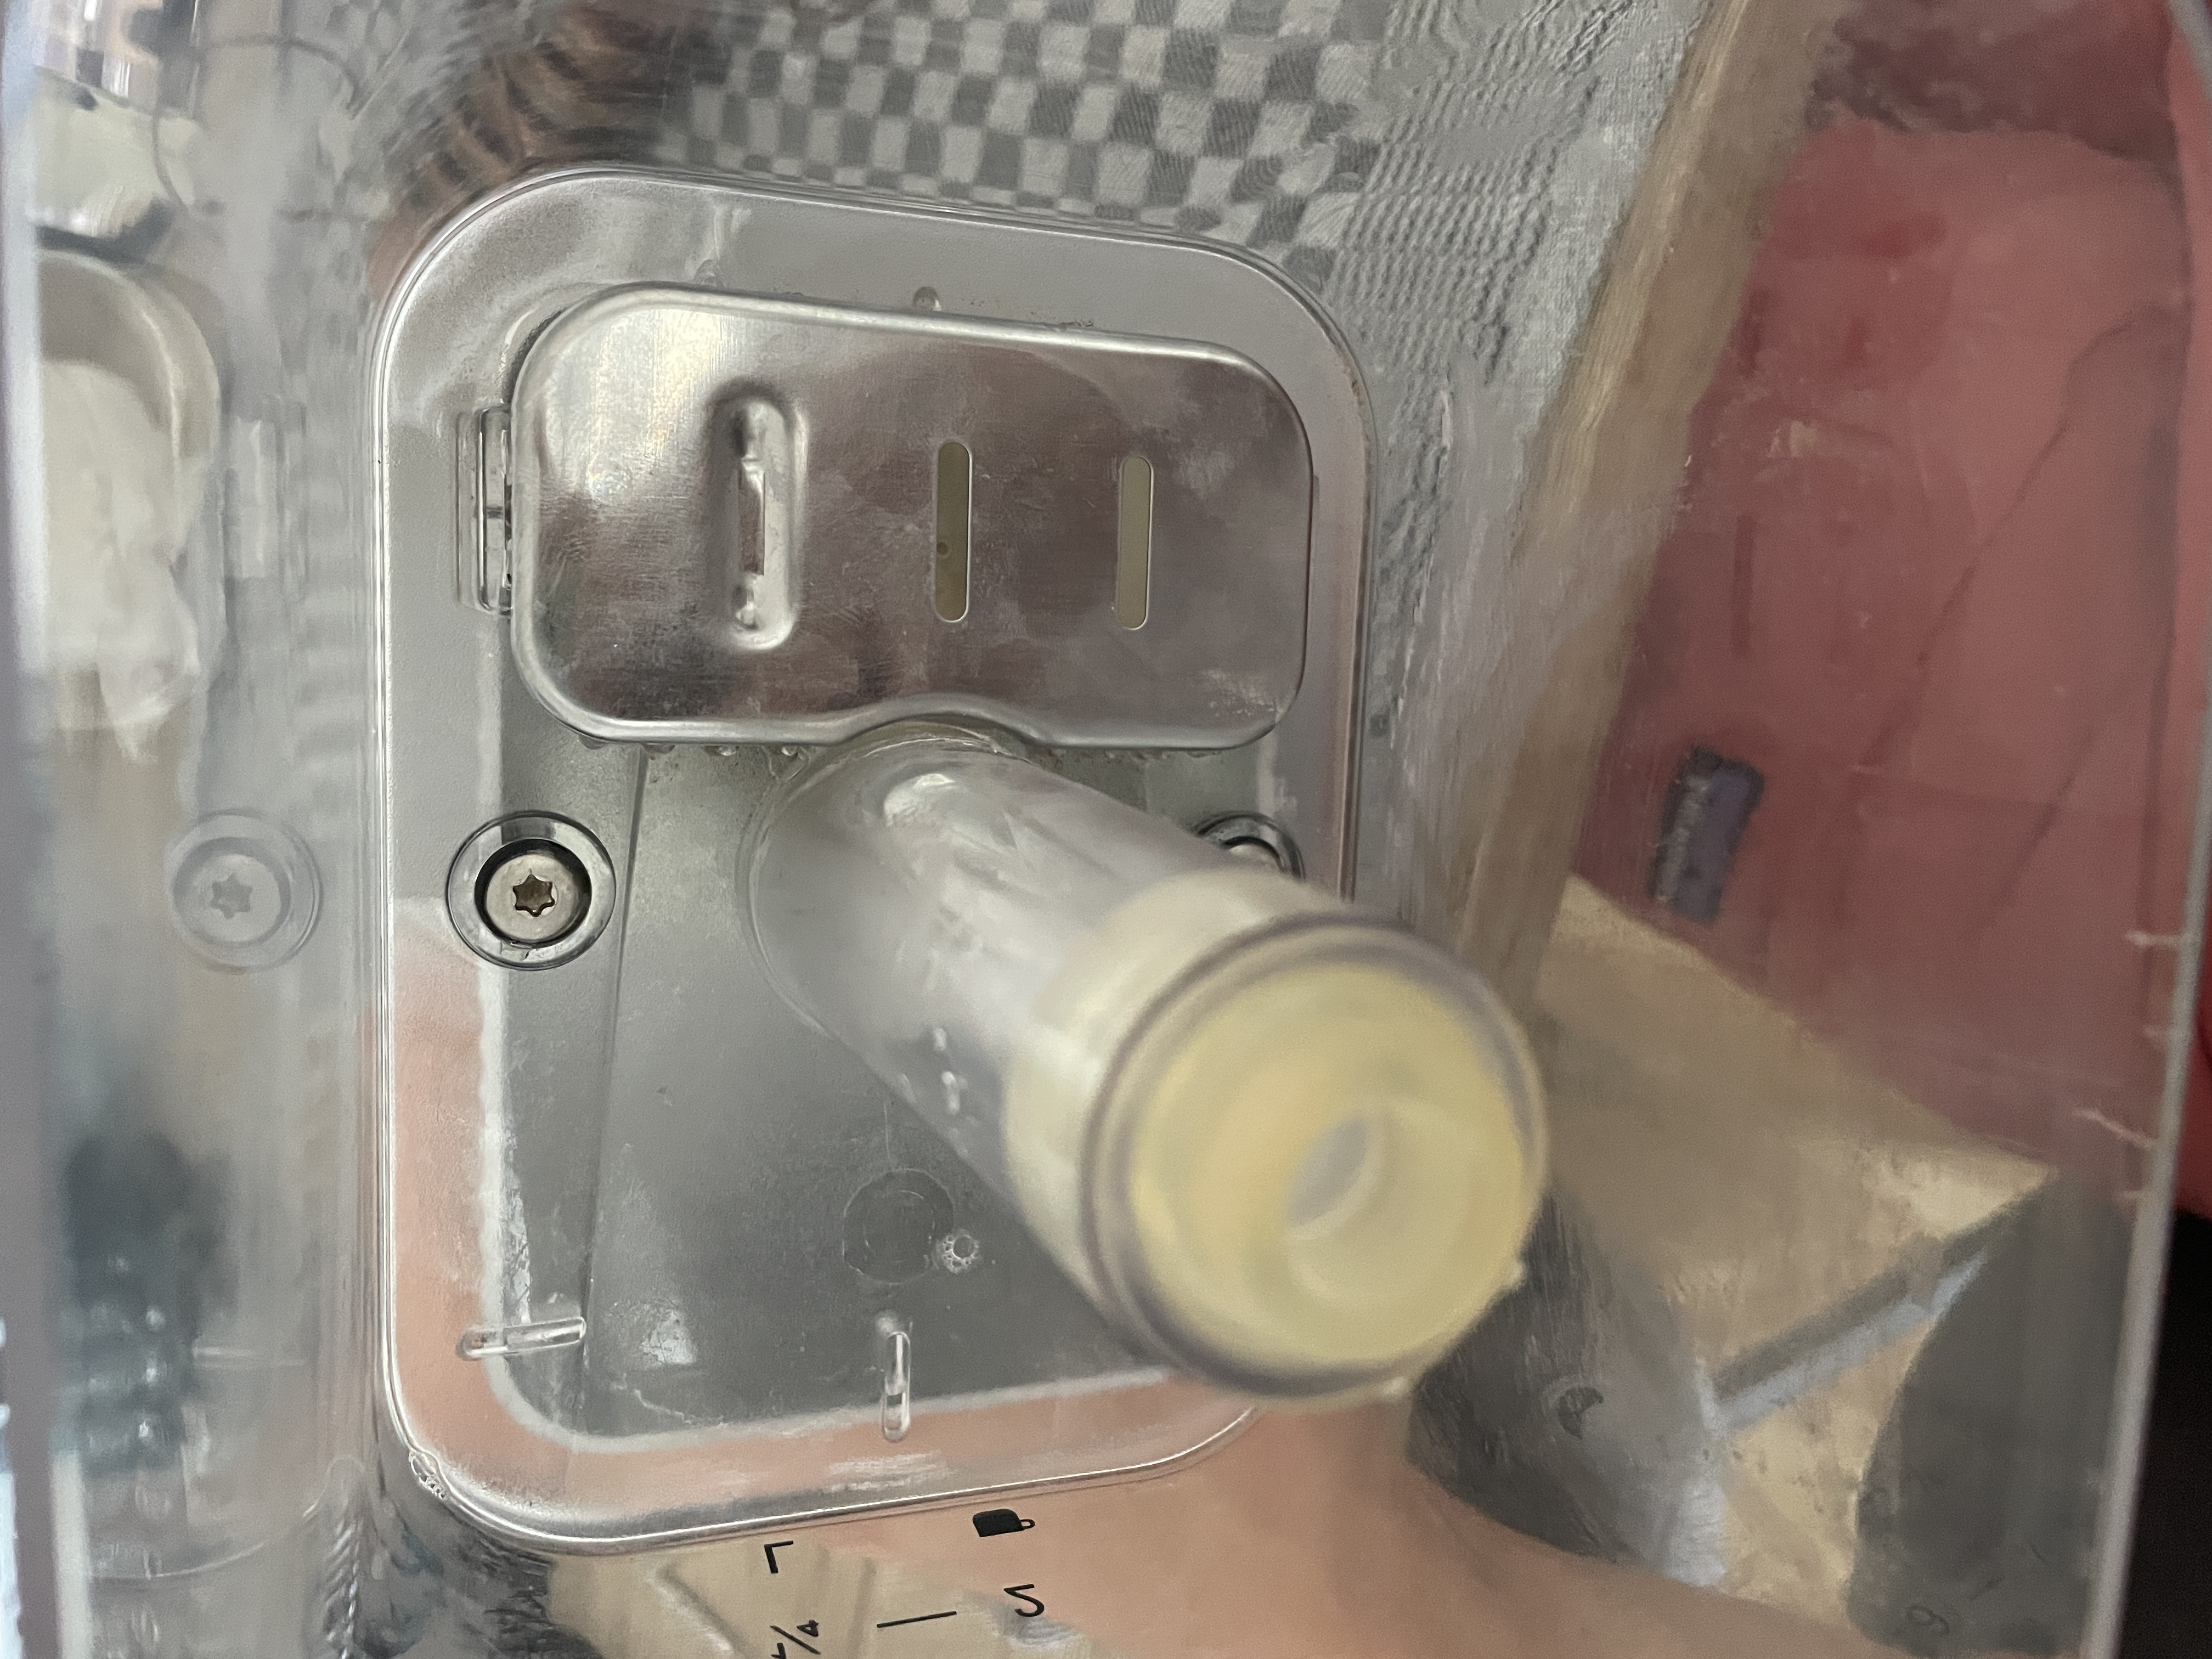
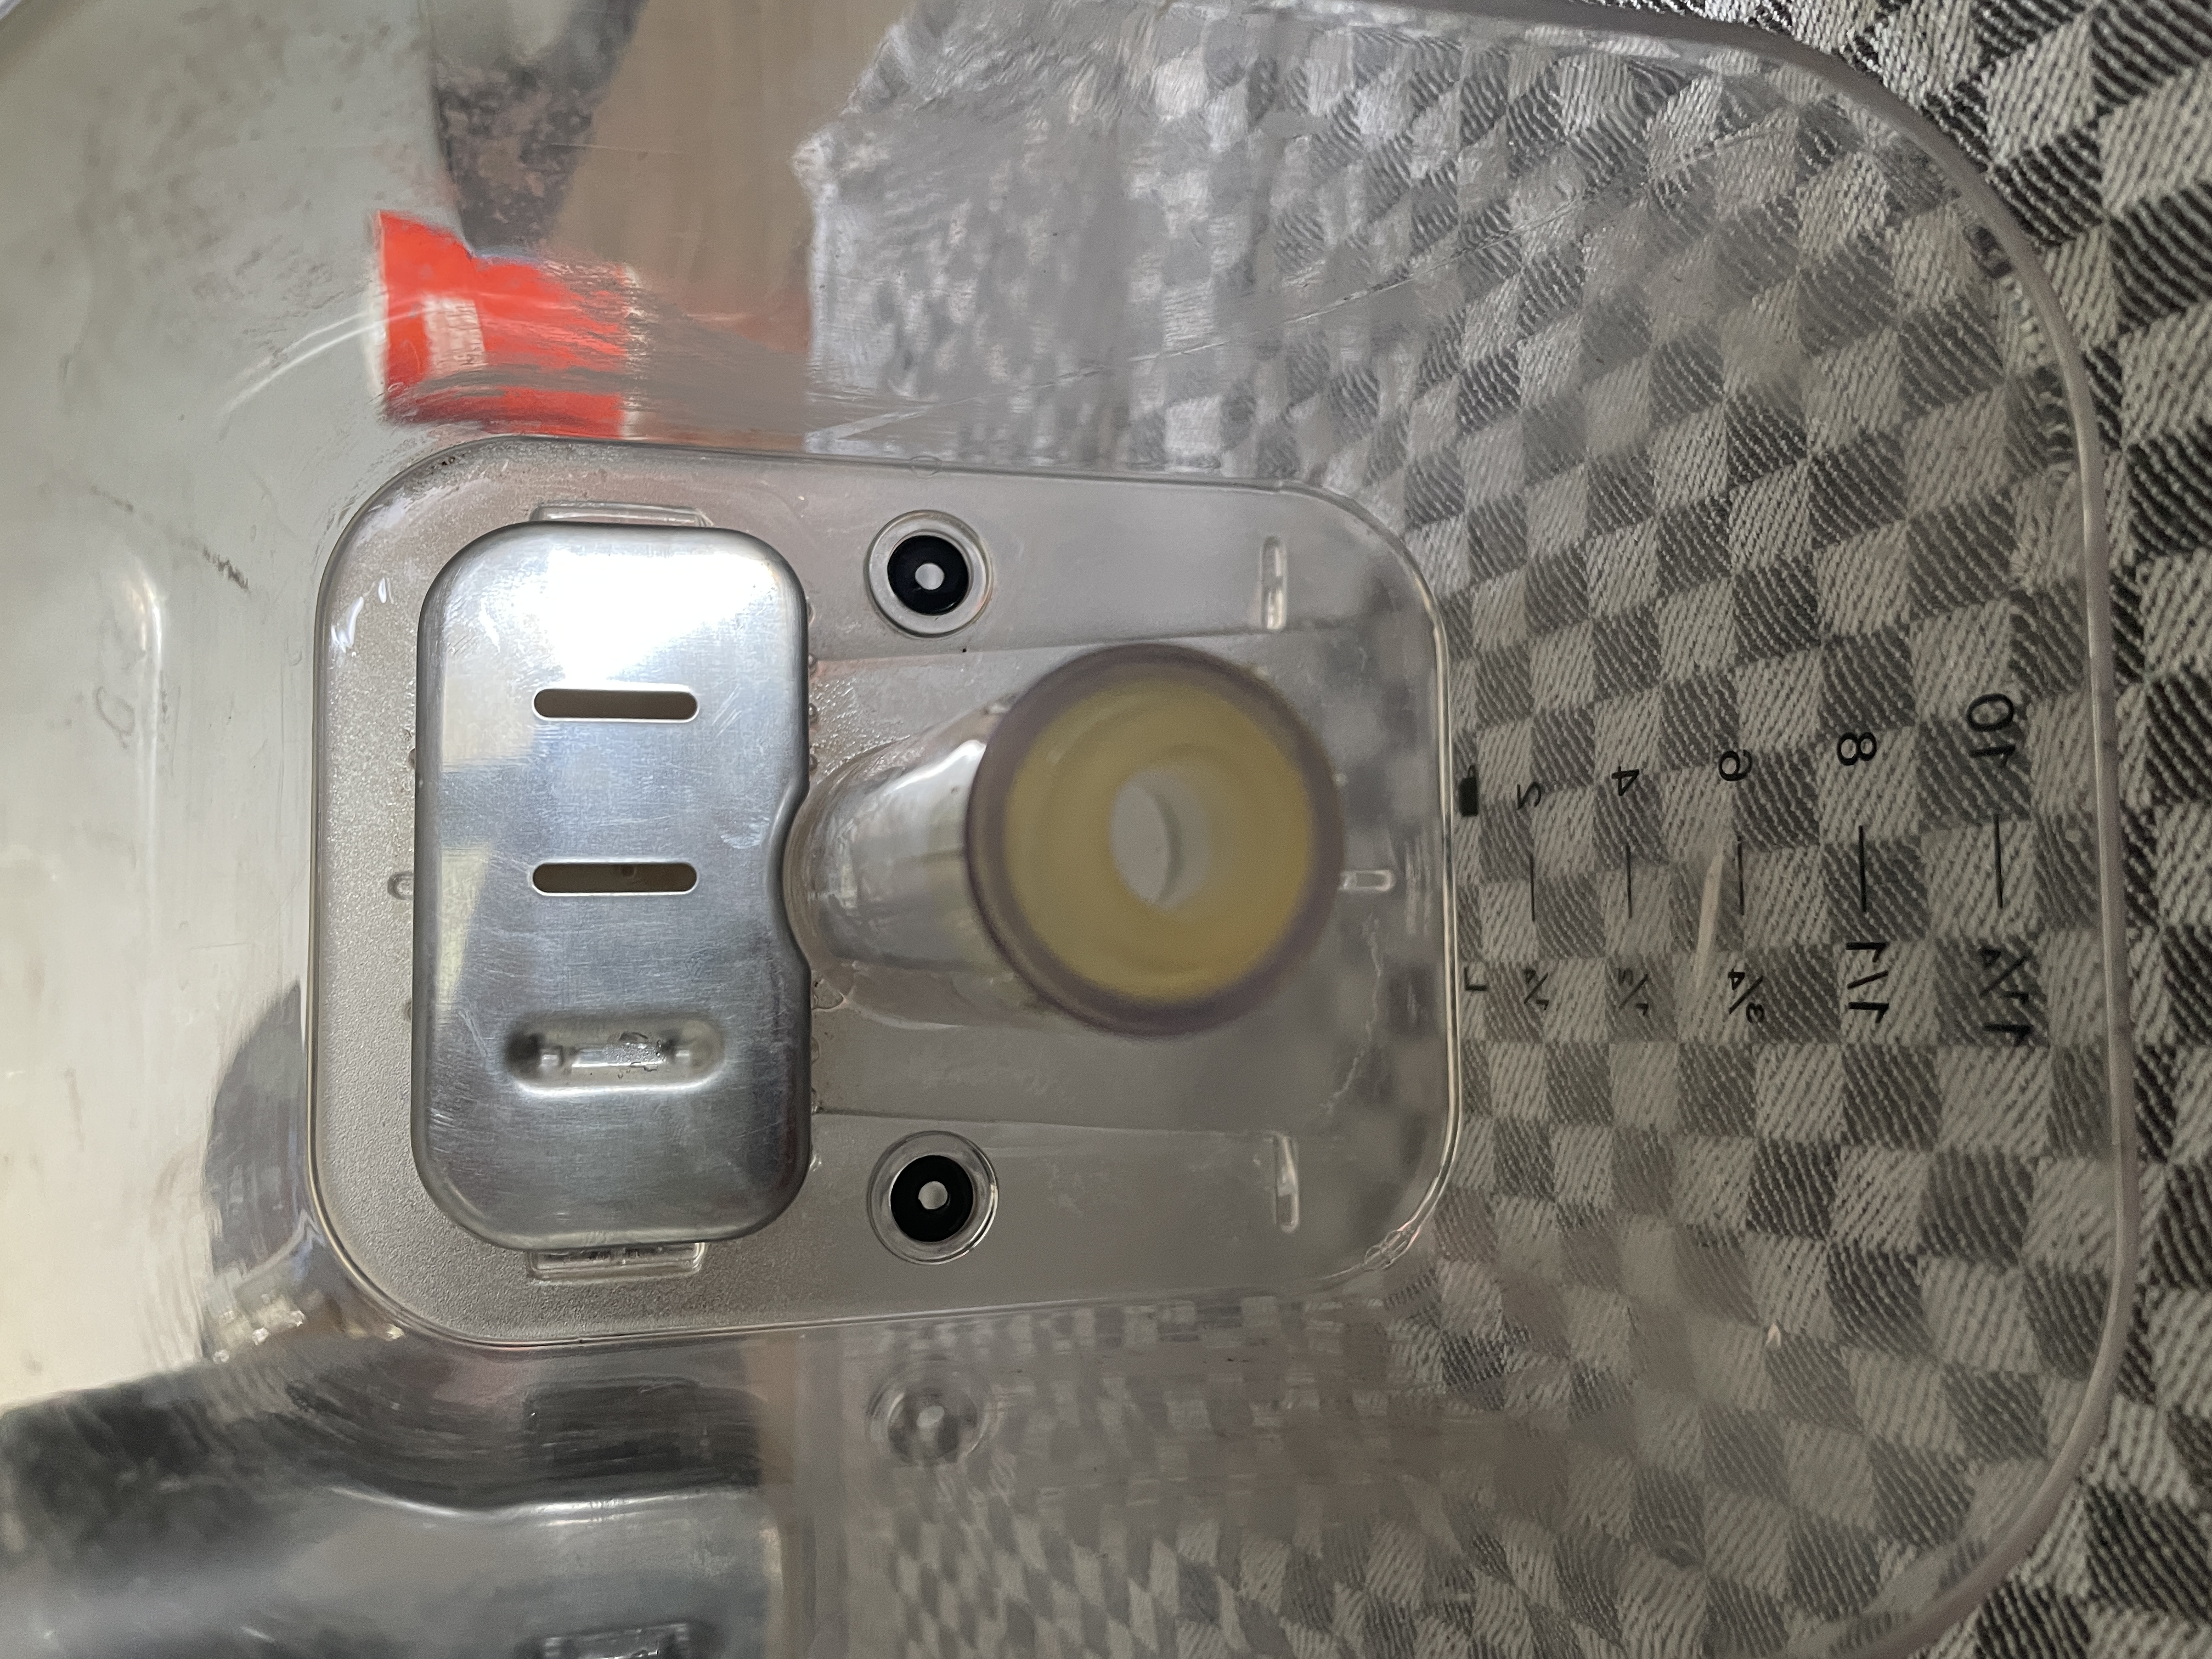
9. Removing The Floating Element
Necessary to clean! Can get very dirty This might seem unnecessary, but it is a good idea to clean the floating element. Even if you de-scale the coffee machine every 100 cycles, dirt, scale and possibly even mold can collect under there. Disassembly is easy, use the pair of tweezers to pull out the white plastic plug, then push the small rubber tube through the hole. Cleaning thoroughly with a bent toothbrush and a cleaning paste is recommended.
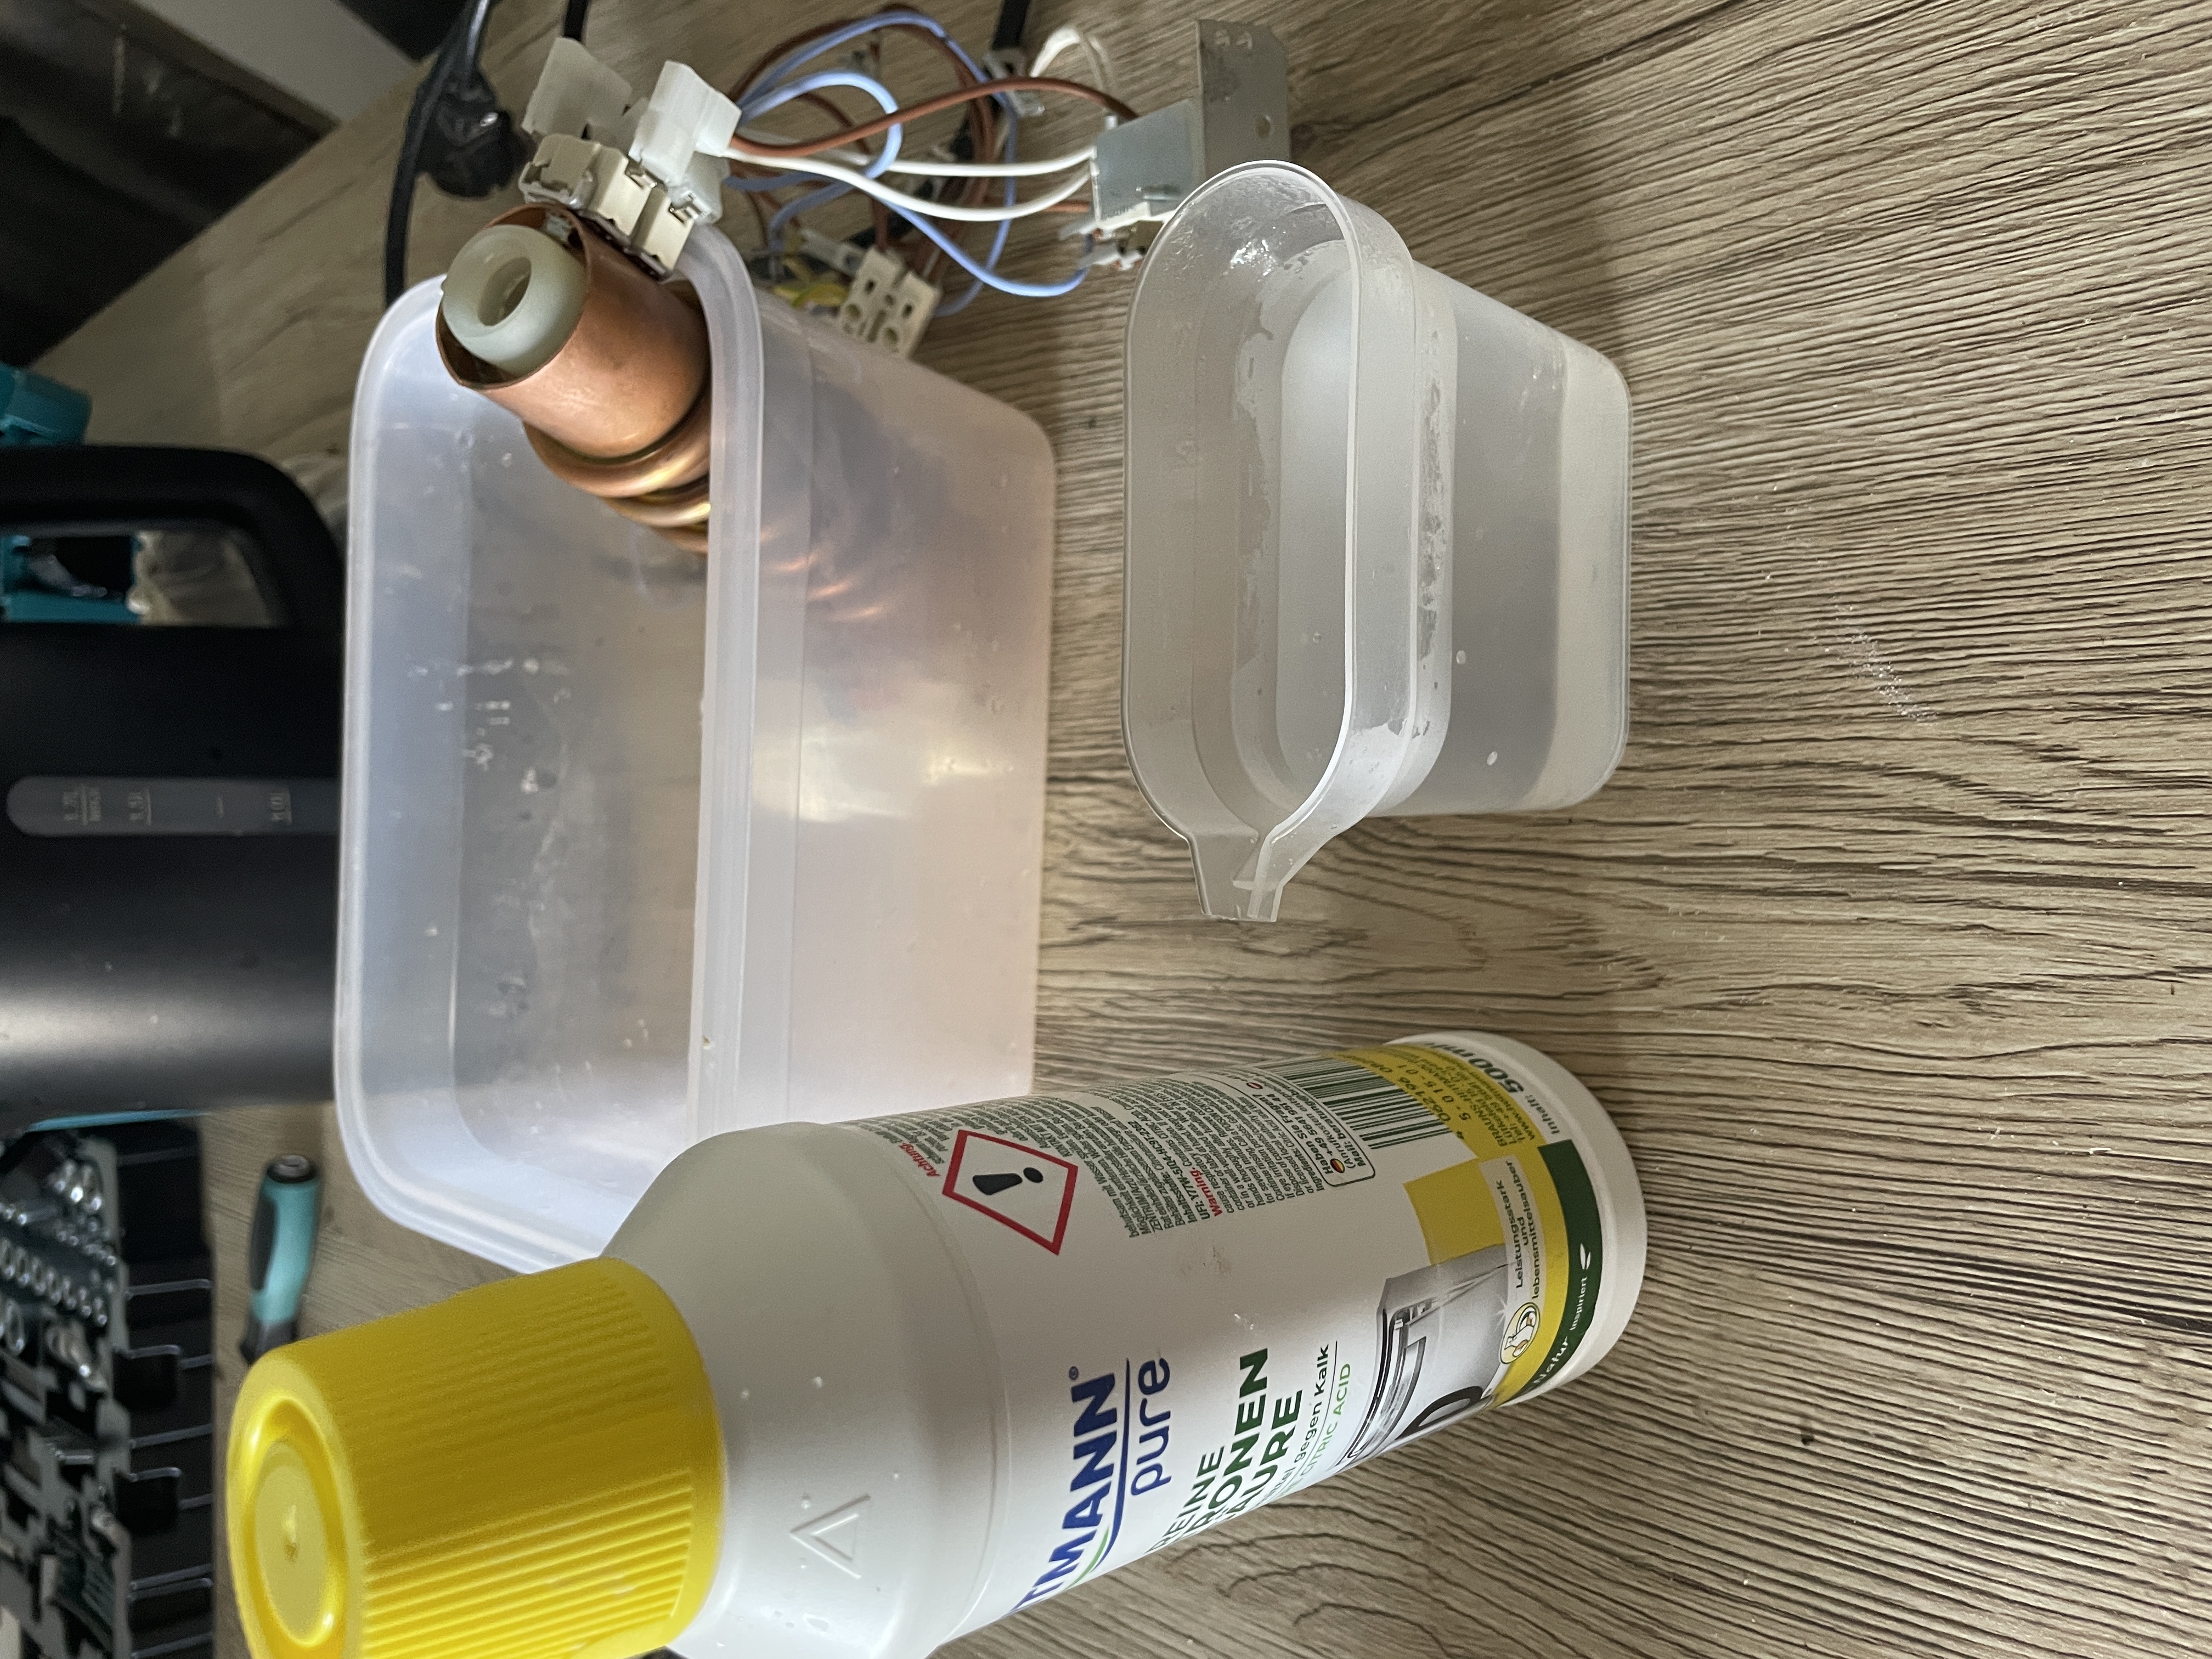
10. Cleaning and De-Scaling
I found this very helpful post on reddit by u/tjtonerplus, detailing how to descale the heating element specifically. Place it in a bowl and place the cables off to the side. Stuff the small tube at the end with some paper towels and pour a combination of descaling solution and hot water into the larger hole where the glass tube connects. Let is soak for 30 minutes and rinse it out after.
Removing the sides and plastic covers to clean underneath easy, just pull them out carefully.
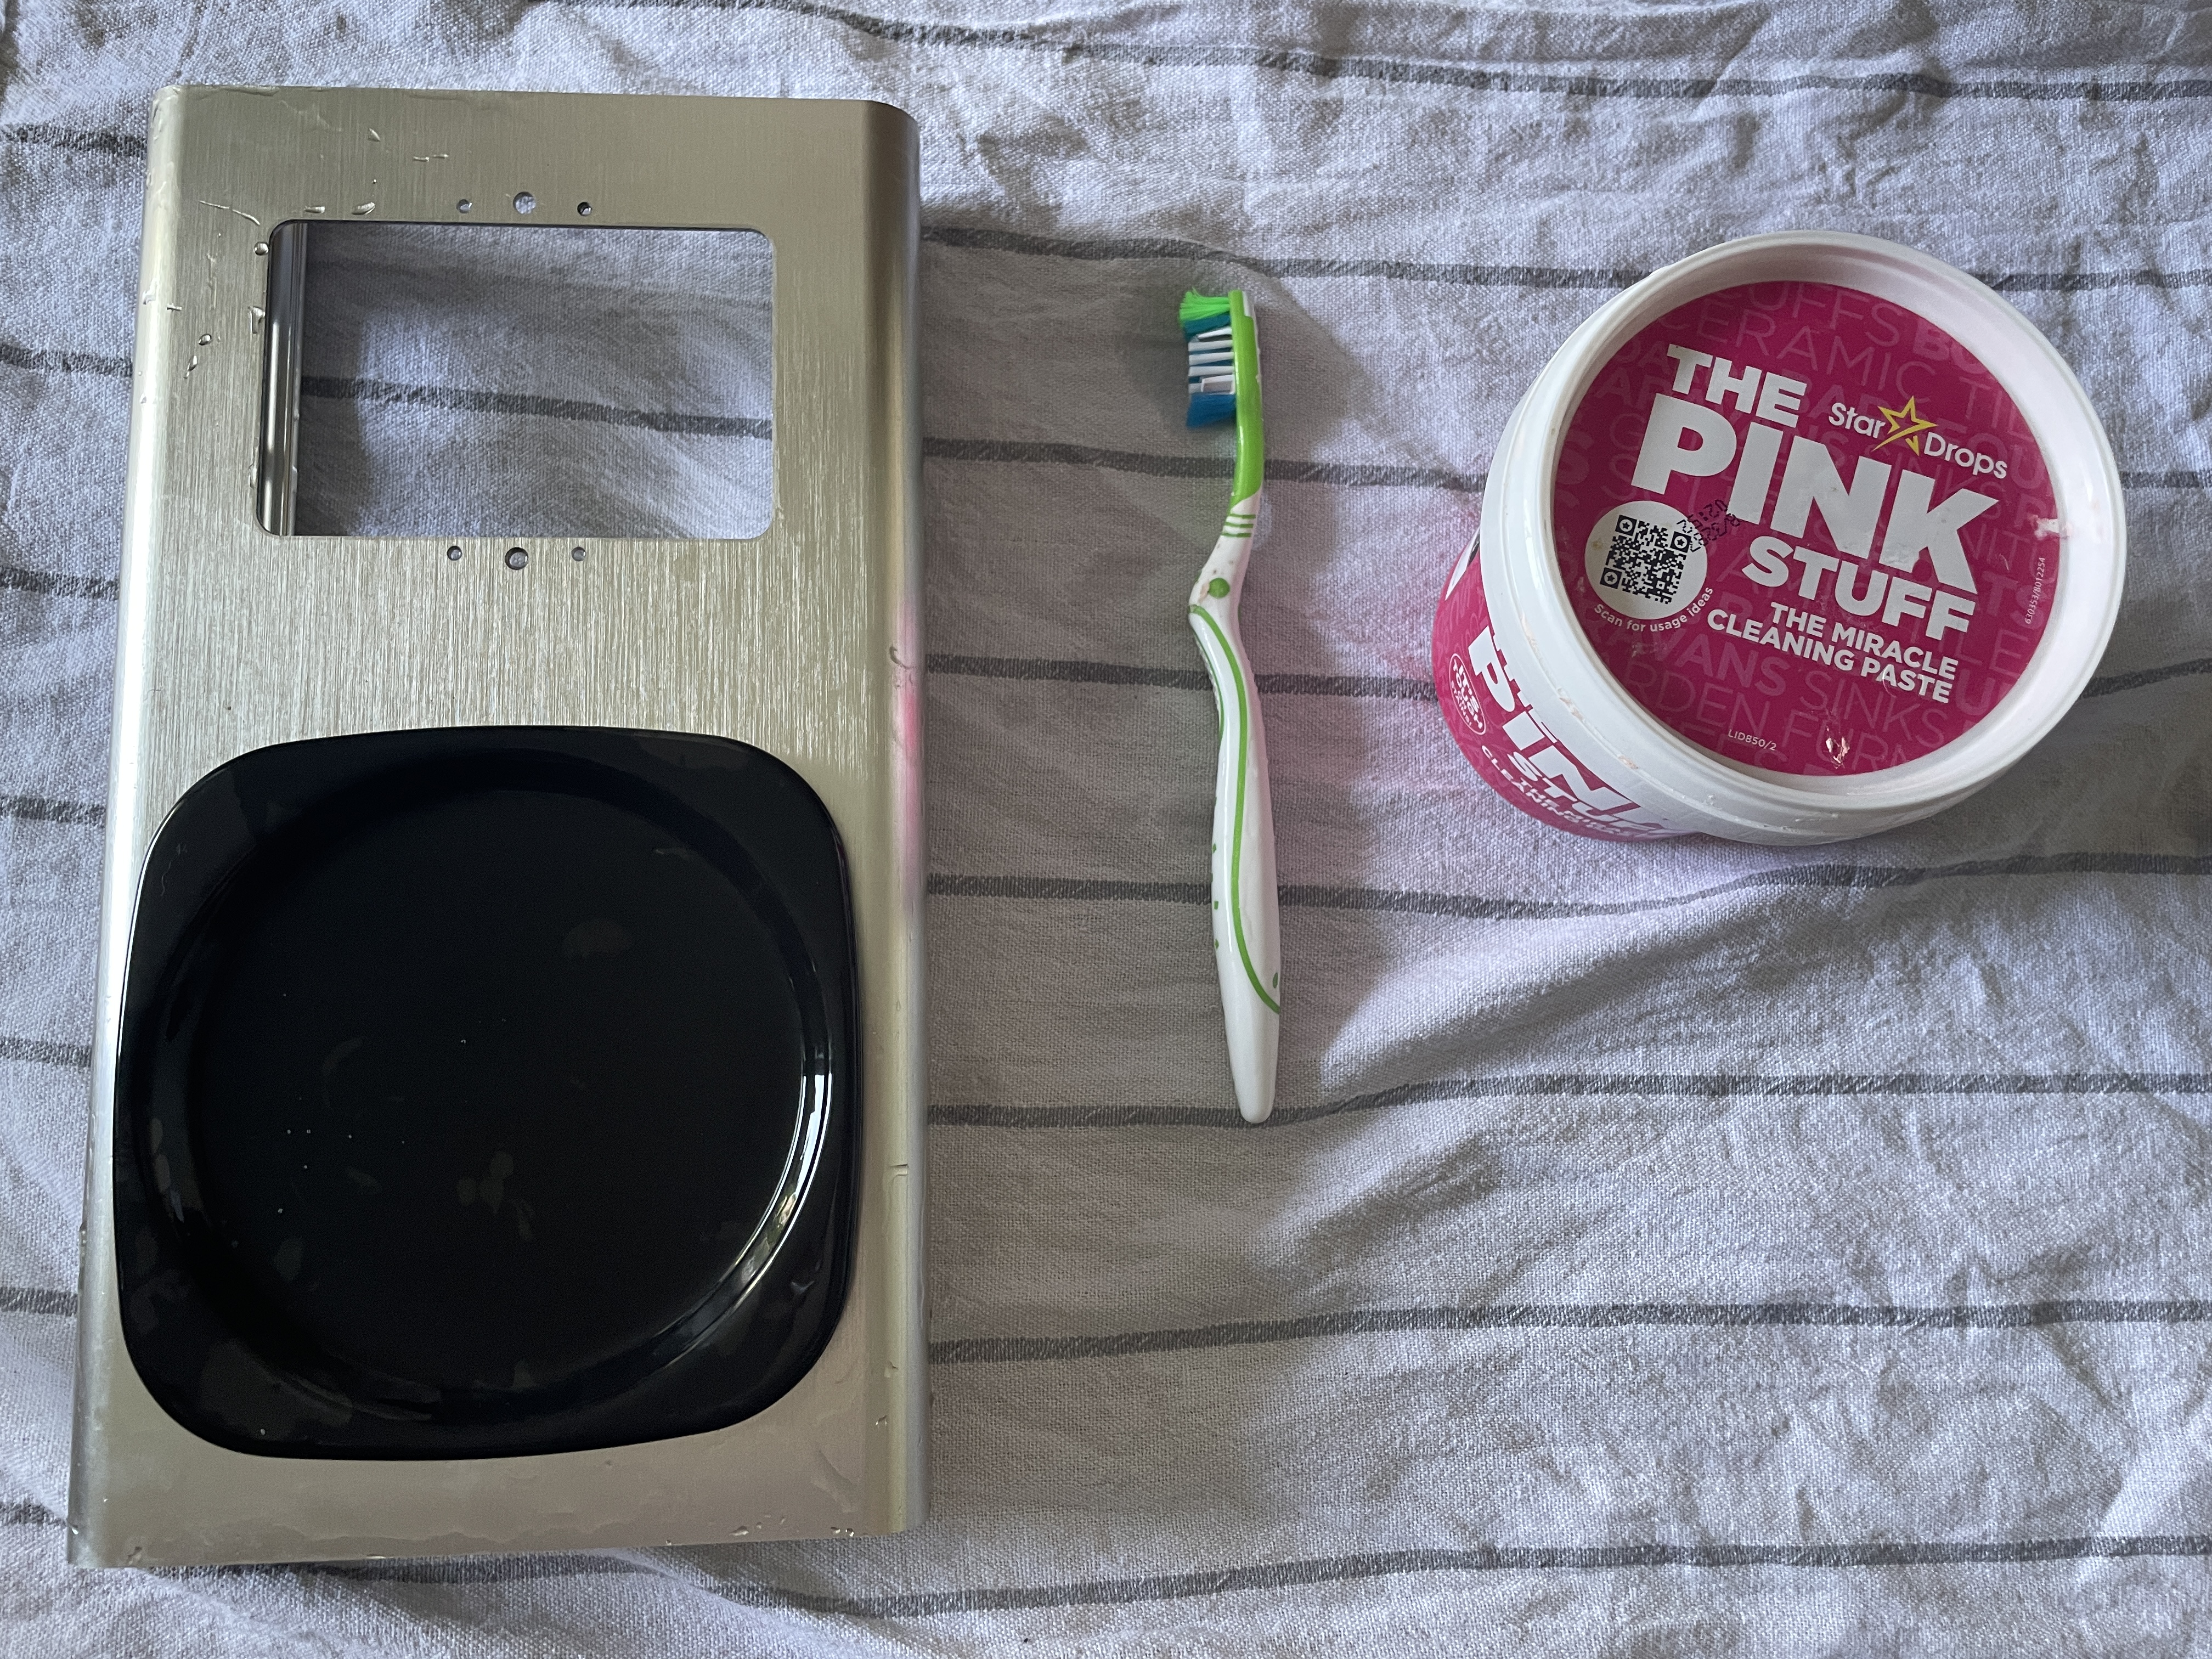
Cleaning worked very well with “Pink Stuff” paste, however I am sure other cleaning pastes would work as well. I tested it before and it did not scratch anything. I then washed it with Sonett All Purpose Cleaner and lukewarm water. Here is a before and after picture:

11. Reassembly
The reassembly is basically in reverse order of the disassembly. A second pair of hands can come in very helpful here, especially when re-connecting the floating element connector and the ground contacts for the heating element. Special cutouts for it are made, be careful to hold it in place when connecting. Also, place the small stick back into the floating element. The floating element can sometimes get stuck, which will cause the heating element to not turn on. Just reseat it properly and it will work.

After reassembling, run the machine with water for a few cycles to make sure it is working and to remove any remaining residue. I was then able to brew and enjoymy first coffee again!:-)
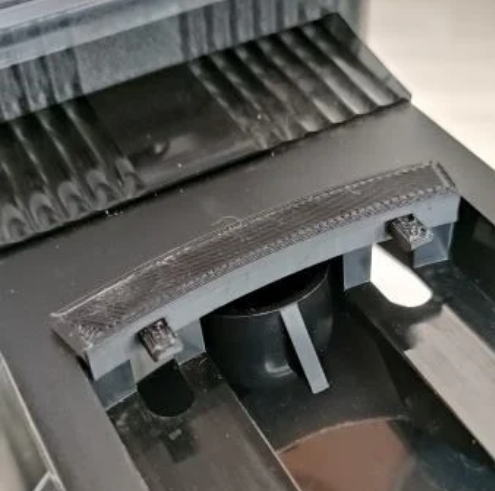
Additional Modification
While I love this machine, the one part I believe to be under-engineered is the connection of the funnel holder and the drip-stop mechanism. It does not sit flush and does not close properly in my case, which leads to coffee being spilled onto the hot plate every time the coffee pot is removed. I thought about modifying it to fix this, but found that I am not the only one with this issue. I then came across this great fix on Thingiverse: Moccamaster filter funnel holder fix. I printed it out and it fit perfectly! All credit to jakevaa for this design
Troubleshooting Common Issues
Coil not heating
The coil was not heating, but the hotplate was heating so after making sure the cabling was correct I could narrow it down to floating tank. During reassembly, I got it stuck a little which made it not come up when I poured water into the tank. Re-seating it properly quickly fixed this.
What caused the leak?
The first source I stumbled upon was this article: https://teukka.tech/posts/fixing-a-moccamaster/
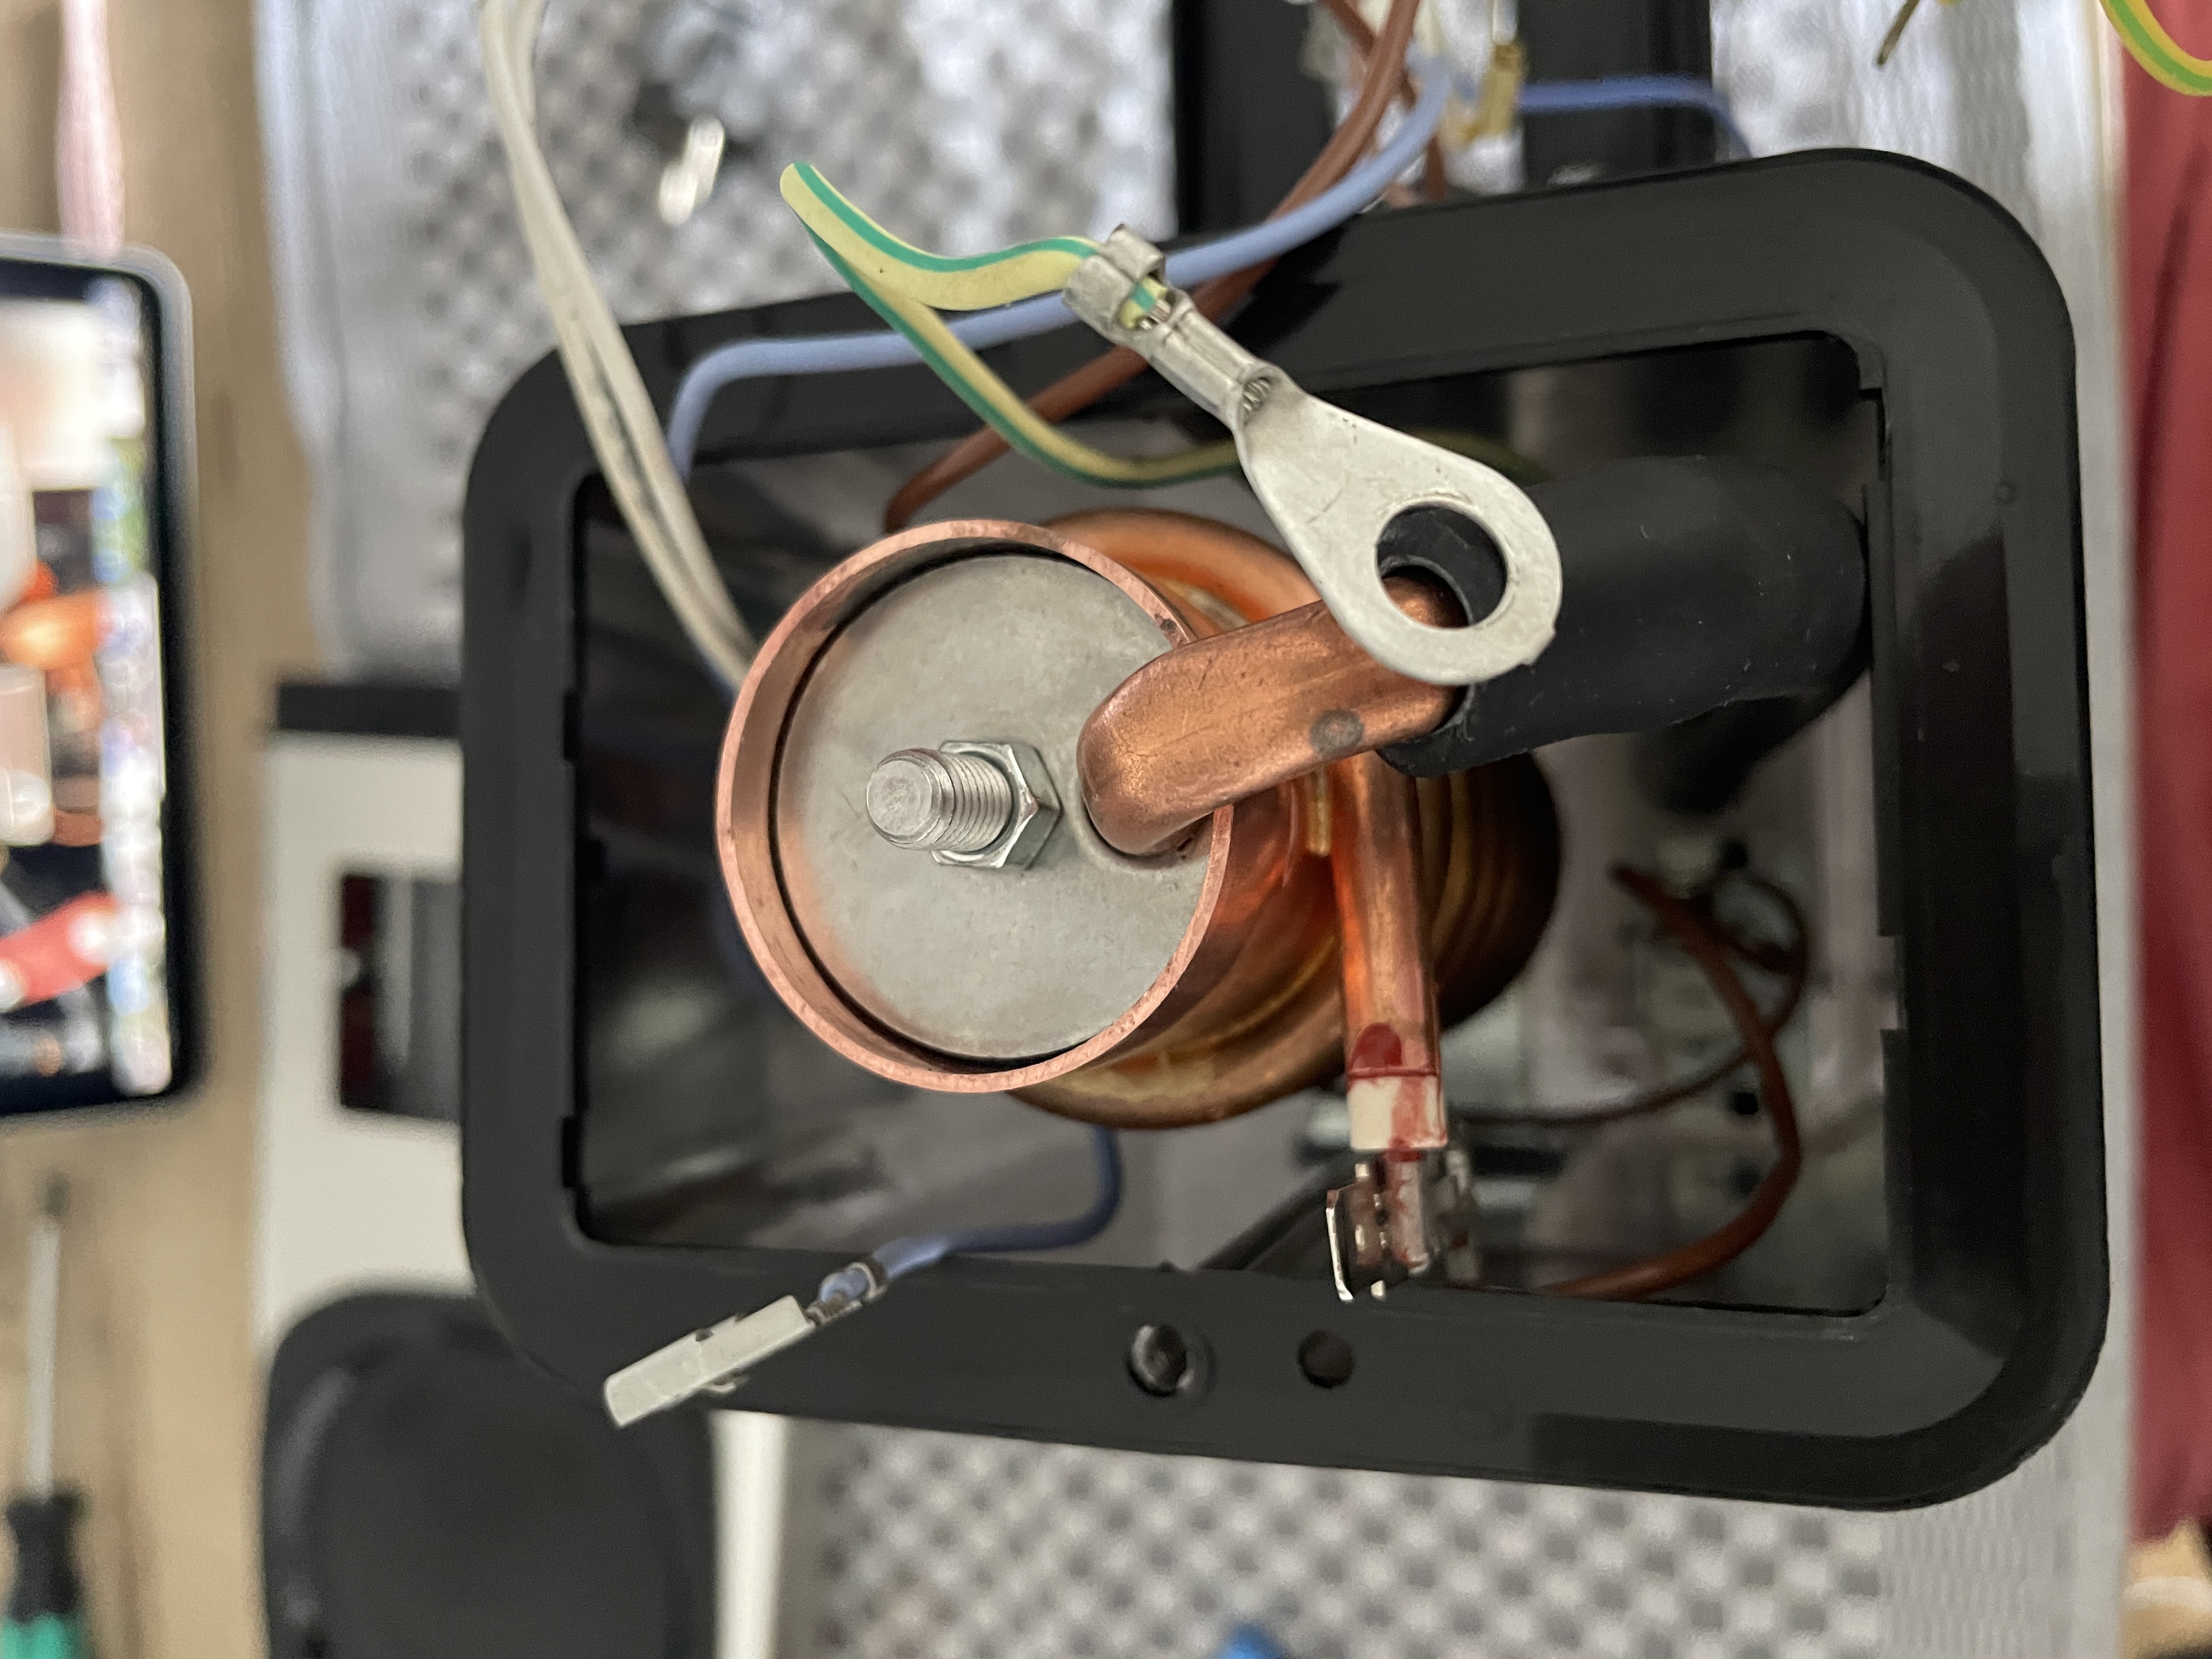
The misssaligned rubber gasket seemed to be the most likely cause of the leak and would be an easy fix, however in my case this was dissapointingly not the issue.
My next assumption was that the glass tube which goes through the heating element had a crack, which would have been a more serious issue. I was glad to discover that this was also not the case.
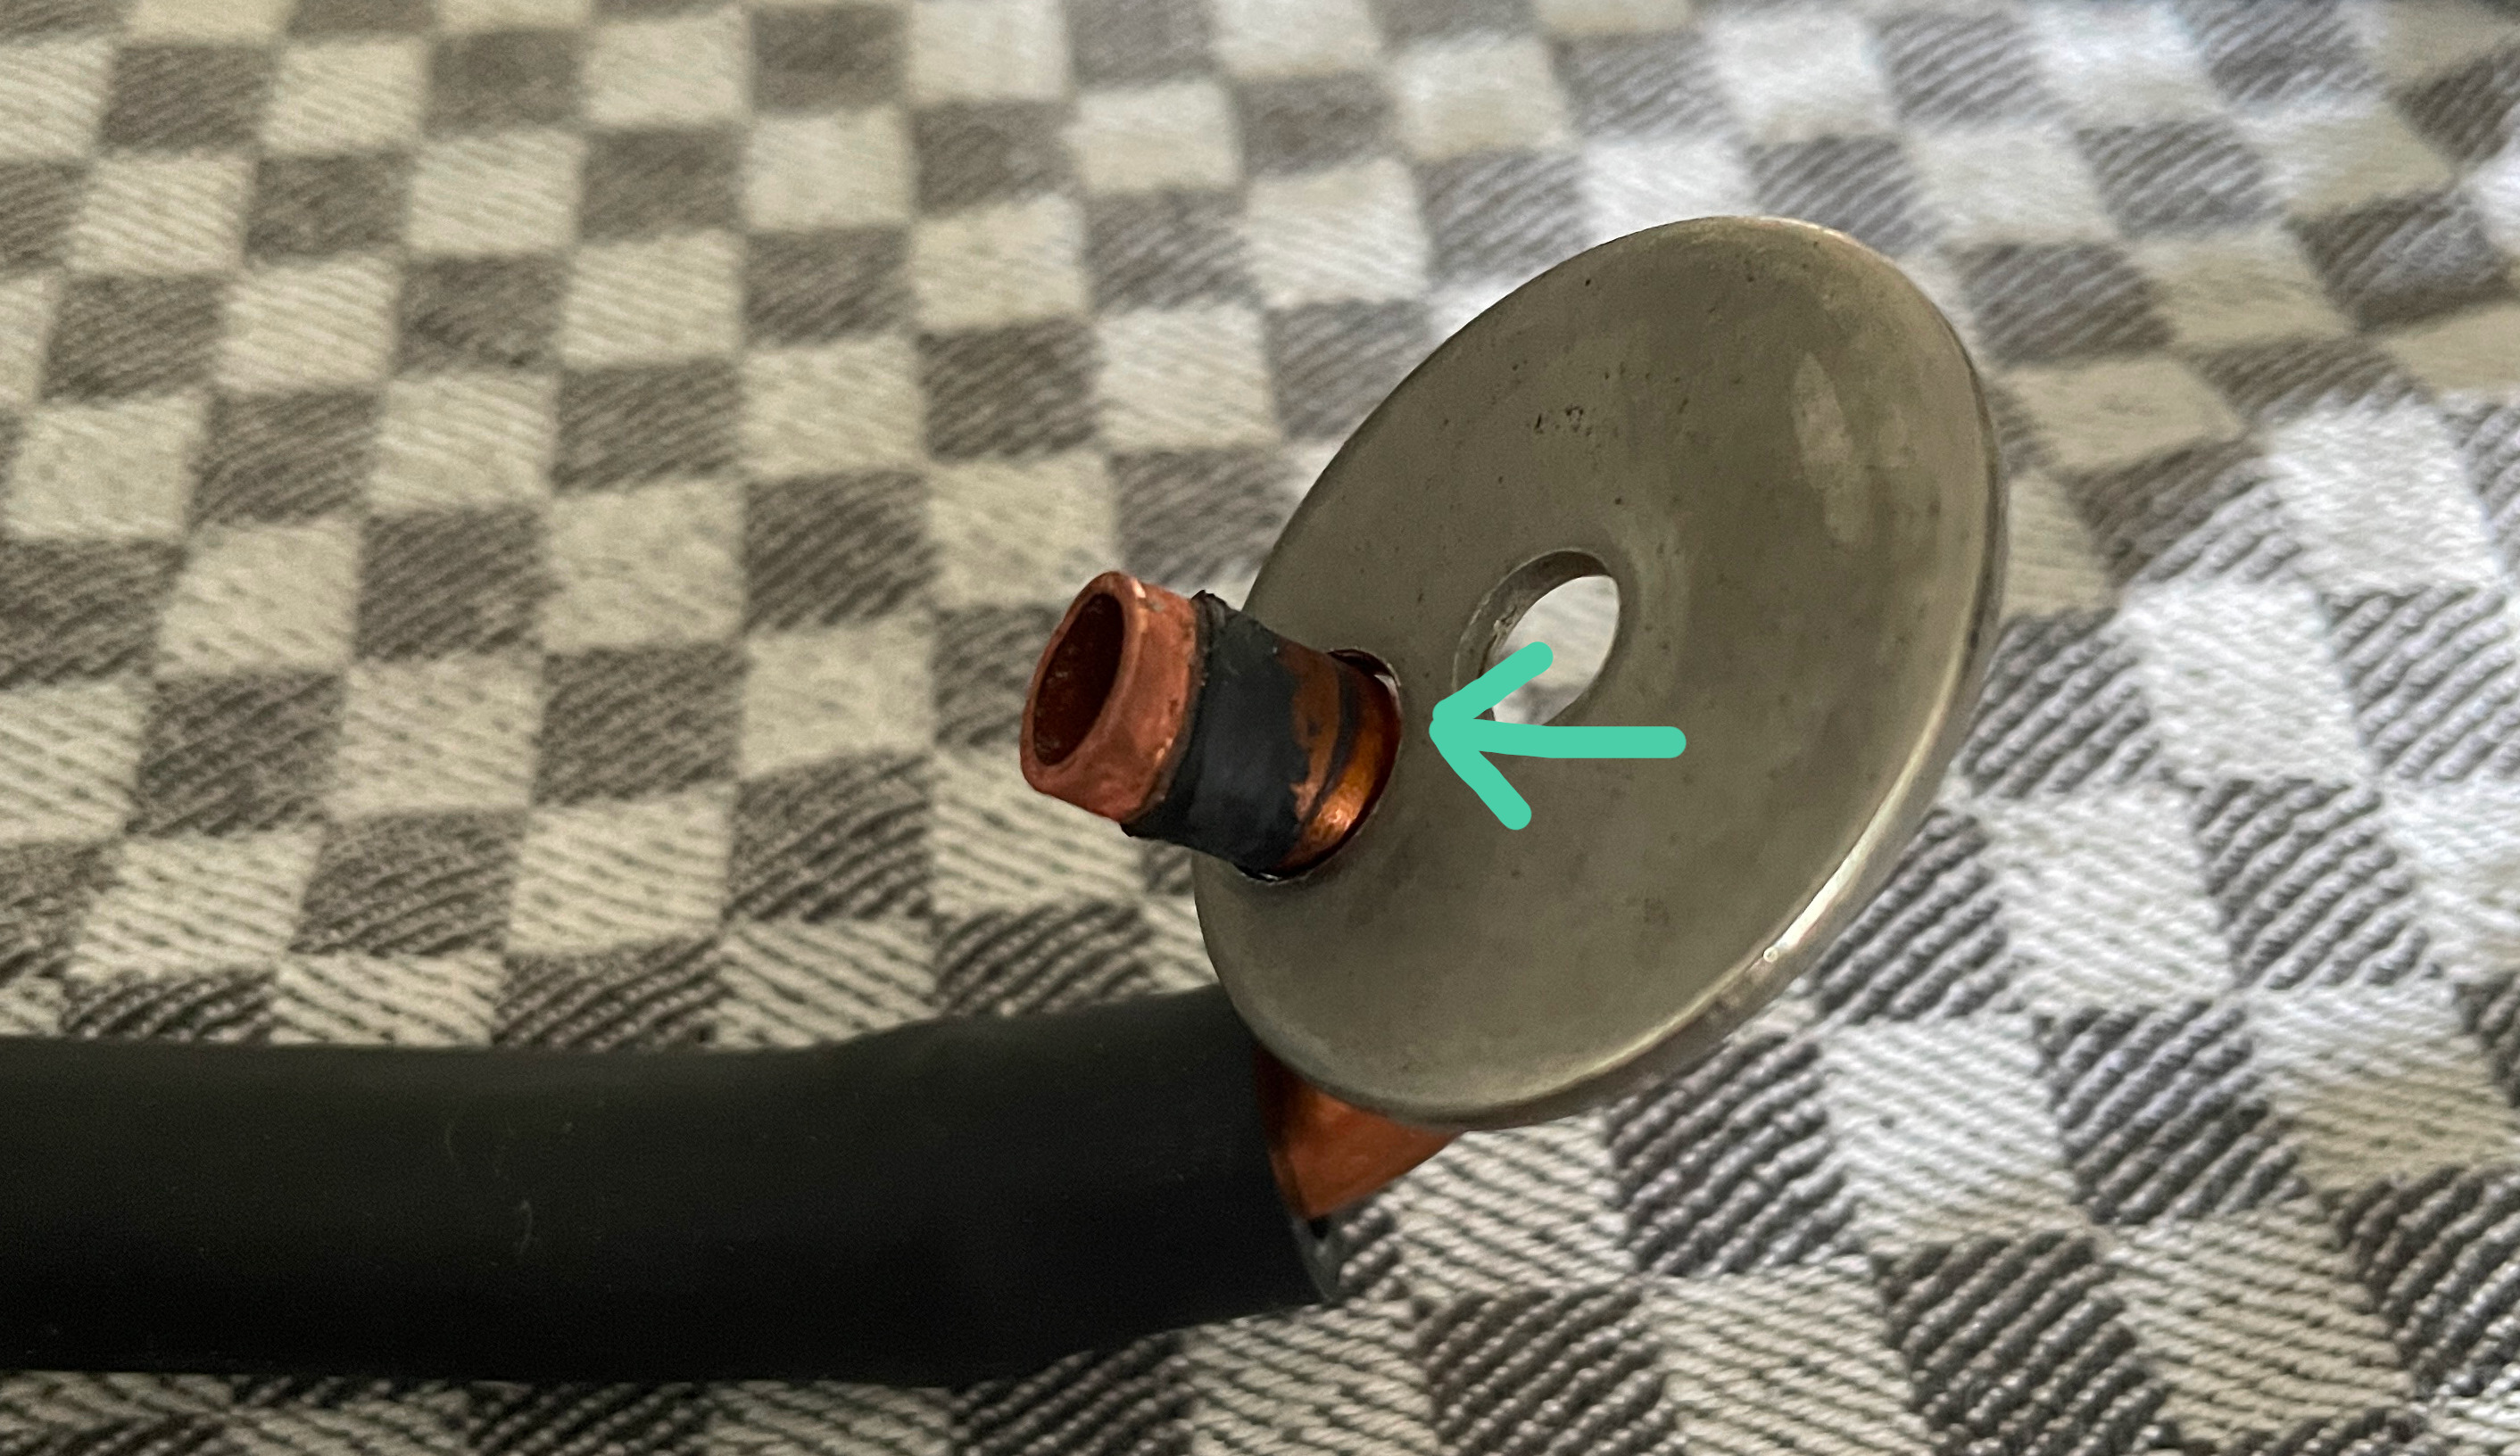
Finding the actual cause took me some time and a closer look again the the rubber gasket. Removing the copper tubing revealed that the small amount of rubber around the tubing had worn out over the years. At this point I had already disassembled the machine further. Giving it a closer look and noticing it earlier would have saved me a lot of time. Nethertheless the process was a lot of fun and I learned a lot about the machine and was able to deep-clean it as well!